


It might seem curious that whereas the average landing page conversion rate across industries is a mere 5.8%, landing pages boast a 160% higher conversion rate than other forms of online signups.
The lag between the two stats can be pinned down to this: The potential of a landing page, while not underestimated, is only rarely realized to the hilt.
You need sophisticated platforms (such as HubSpot) and a user-focused strategy to clock a healthy conversion rate through your landing page.
In this guide, you’ll learn how to create landing pages in HubSpot, along with best practices, examples, and more.
We are certified HubSpot experts, and we have over the years designed thousands of landing pages for brands across both sides of the Atlantic. Let’s get started!
- HubSpot Landing Page vs. Website Page
- Creating A Landing Page in HubSpot: 6 Steps
- HubSpot Landing Page Best Practices


HubSpot Landing Page vs. Website Page
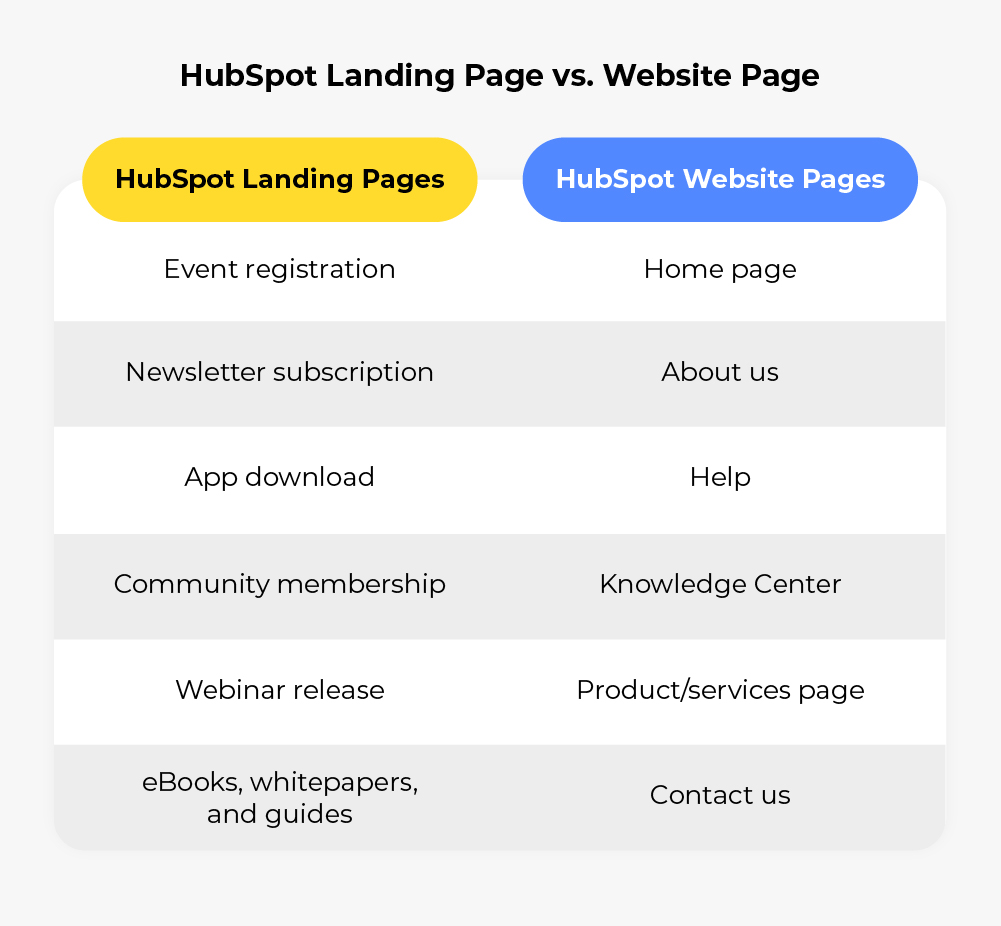
A HubSpot landing page is a dedicated page with a single call to action. It is customized for a specific campaign, offer, launch, etc. A HubSpot website page, on the other hand, can function as any standard, static page on your website.
In general, whereas the purpose of a website is to encourage exploration, that of a dedicated landing page is to convert a prospect. To that end, website pages and landing pages differ a lot in terms of content, structure, and longevity.
Below are some examples to distinguish HubSpot landing pages and website pages.

Creating A Landing Page in HubSpot: 6 Steps
Log in to Your HubSpot Account
- Log in to your HubSpot account, and hover the mouse over the hidden sidebar on the leftmost side of the page.
- From the slide-out menu, select Content, then select Landing Pages.


Enter A Name for Your Landing Page
- On selecting Landing Pages, you’ll be taken to the following page. Click the Start from scratch button.

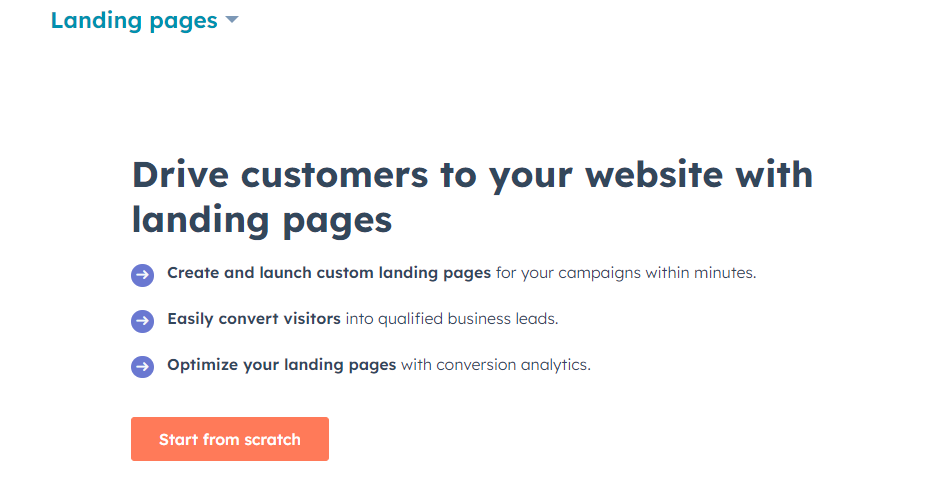
- Enter a name to your landing page on the Create a page popup. Make sure that the name is distinct and easy to find. You’ll be building many landing pages later.


Choose A Template
When selecting a template, it’s important to ensure that it not only has an appealing design, but effectively captures the attention of your visitors based on your specific industry, and has the ability to convert leads.
Hundreds of HubSpot landing page templates are available for use!


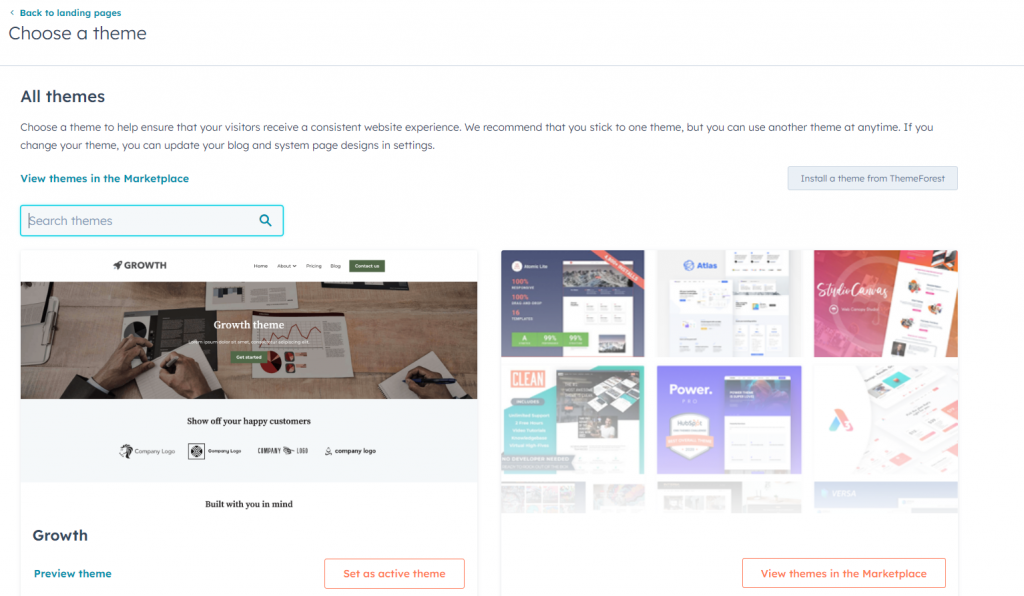
Now, depending on your HubSpot account level, you’ll have access to various kinds of pre-made templates. If you want to build from scratch, you can do that as well.
Having given a suitable page name, you should be able to view the Choose a template page as shown below.

Customize Your Template
Once you’ve selected a template, it’s time to customize it to fit your specific needs.
With HubSpot, you can easily edit various elements of your landing page using custom email templates. This includes modifying subtitles, body text, titles, and more. You also have the flexibility to incorporate elements such as images and videos to enhance the overall look and appeal of your landing page.
To customize your landing page, simply click on the element you want to modify and make the necessary changes.

Add The Signup Form
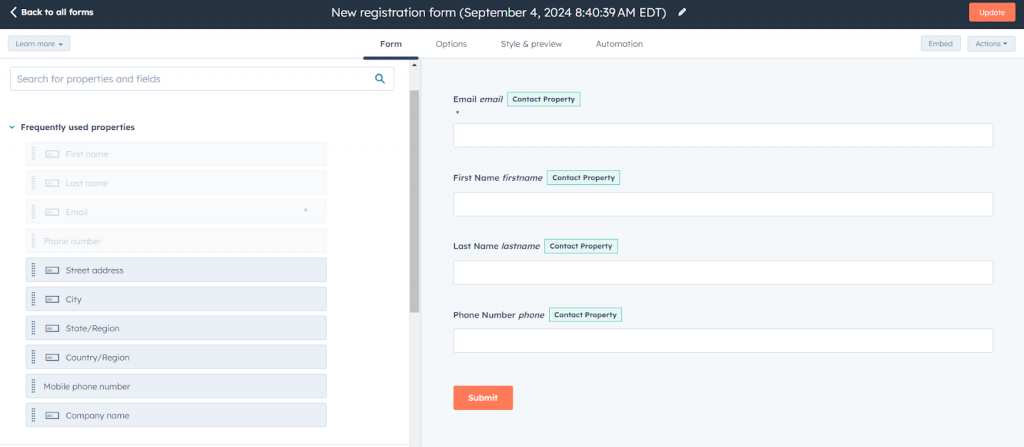
To add a form section to your HubSpot landing page, go to the landing page editor and click on the Form section. Then, select the Add New Form option.
You can customize the form by adjusting its layout, style, or adding additional fields. You can also connect the form to a capture tool like HubSpot’s CRM to automatically store the information submitted by your visitors.
To add a CTA, click on the Add Element option in the left-hand menu and choose CTA. You can either choose an existing CTA or create a new one by clicking on the Create new CTA button.

Edit Settings, Check Preview, Hit Publish
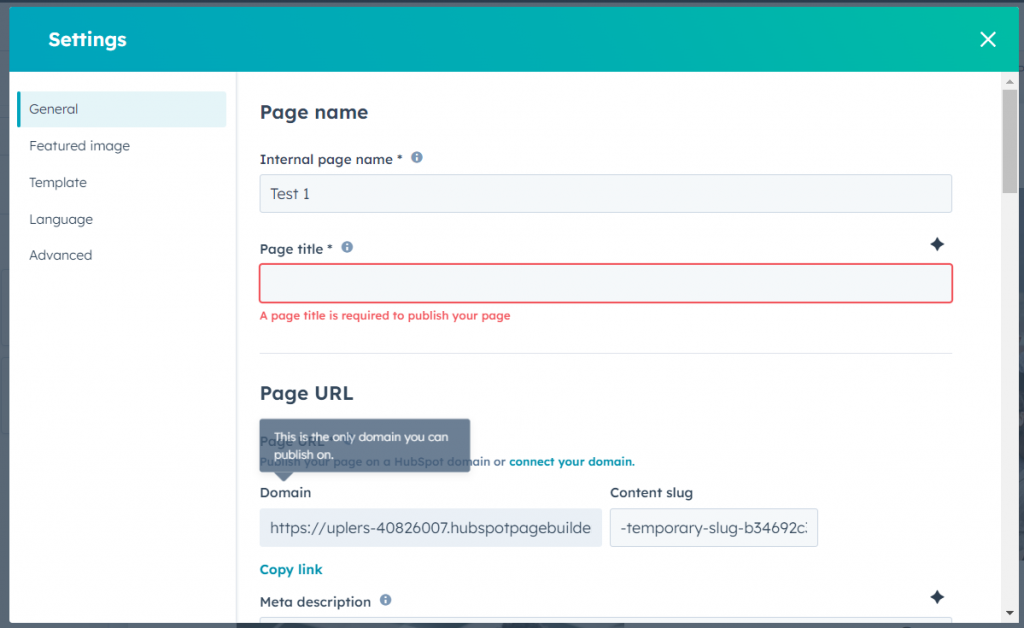
- Select the Settings option to open the Settings popup.
- Enter page name, page title, page URL, featured image, meta description, etc. There are multiple options, including advanced settings, to optimize the page.
- Preview the landing page. Then, click Publish.

While previewing the landing page in HubSpot, make sure that the landing page is easy to understand. Avoid overloading it with excessive text, images, or videos.
Keep the content simple and straightforward, avoiding complex language. Let’s explore more HubSpot landing page best practices in detail.
HubSpot Landing Page Best Practices
1. Highlight The Pain Point
The primary headline is the foundation of your landing page. It is not decorative; it is designed to persuade the visitor immediately by highlighting the pain point. Let the headline show that you understand where your prospects hurt.
The secondary headline expands on the pain point and offers a glance at the solution.
Remember that 80% of your visitors will read the headline of your landing page.
Here are some expert tips to ace both the primary and secondary headlines in HubSpot:
- Emphasize the pain point by coloring, underlining, italicizing, or bolding the focus keyword. Distinguish it from the rest of the copy.
- Offer a peek into the solution in the secondary headline. Utilize the three-word formulation to describe the process of your solution.
So, if you are a real-estate company, the secondary headline can be something like, “Compare agents, book a meeting, finalize deal!” - Utilize second-person narration. Use the word “you” in your headlines. Keep the focus on the visitor.
- Display the potential losses the visitor may face if they choose not to purchase your product or service, rather than simply displaying the price. Utilize the secondary headline, where the solution is presented, to implement this strategy.
- Reinforce the problem statement and solution by using a good image. Here is an example of how you can visually reinforce your message.

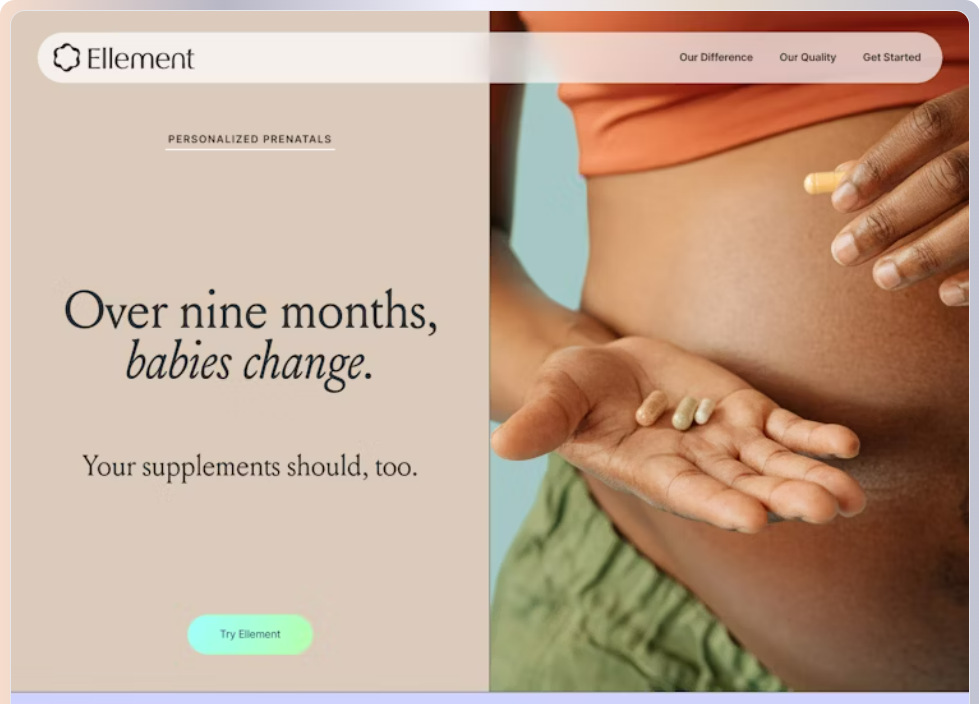
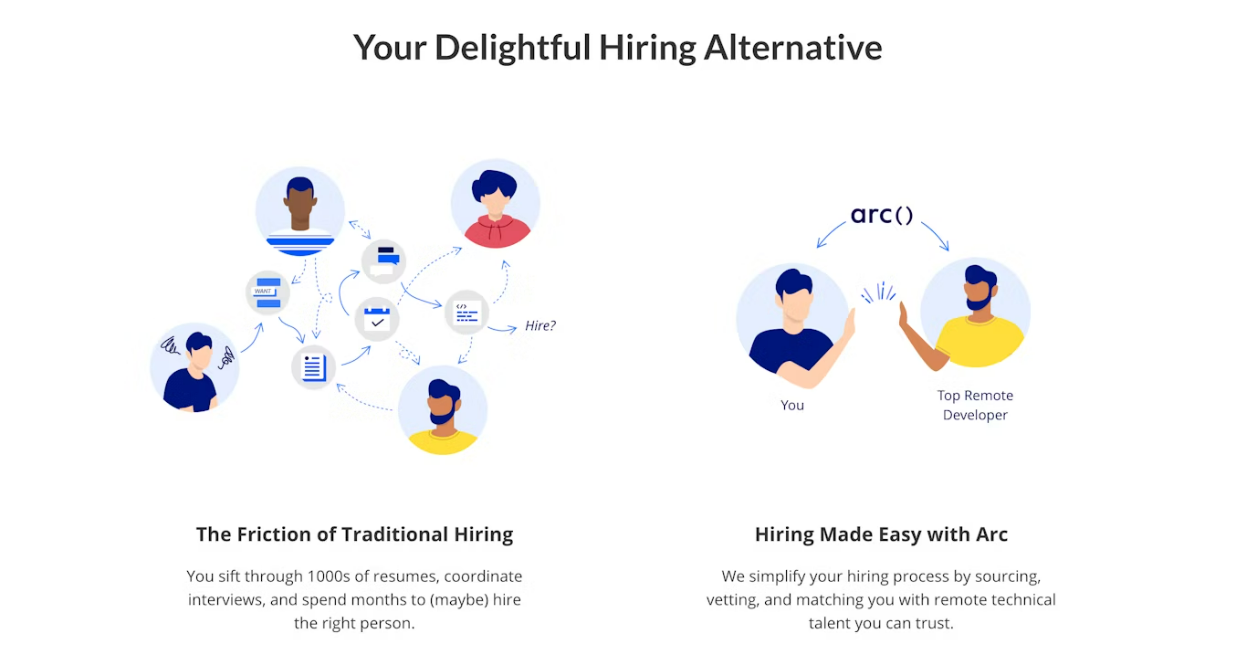
You can also use images to showcase a before and after scenario. Take inspiration from Arc (formerly, Codementor) when you create a landing page on HubSpot.

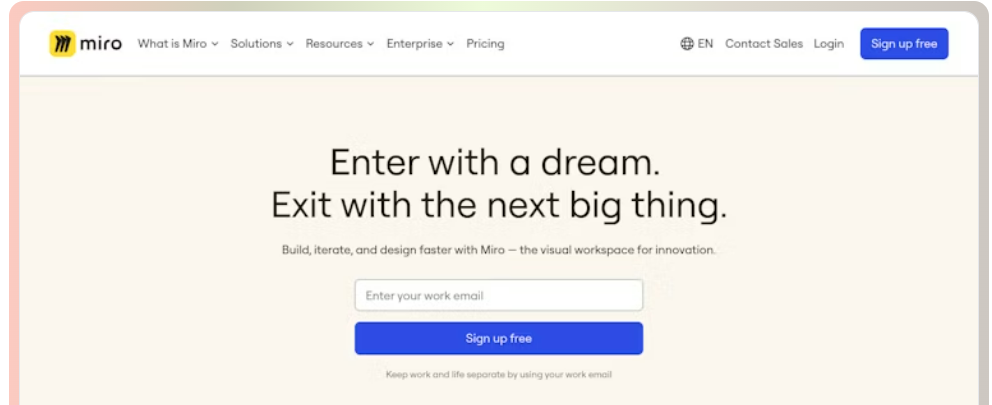
You can customize HubSpot landing page templates to implement the above tips. Below is an example of a perfect primary and secondary headline from Jive.

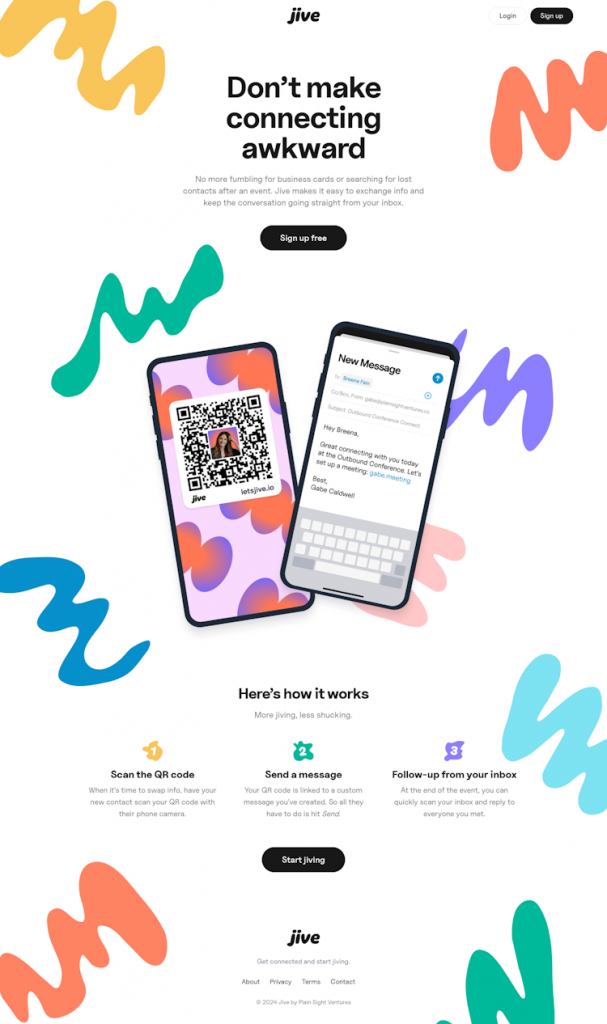
You can see the three-step formulation in Jive’s landing page, though not in the headlines. Check out Miro’s secondary headline for the formulation.

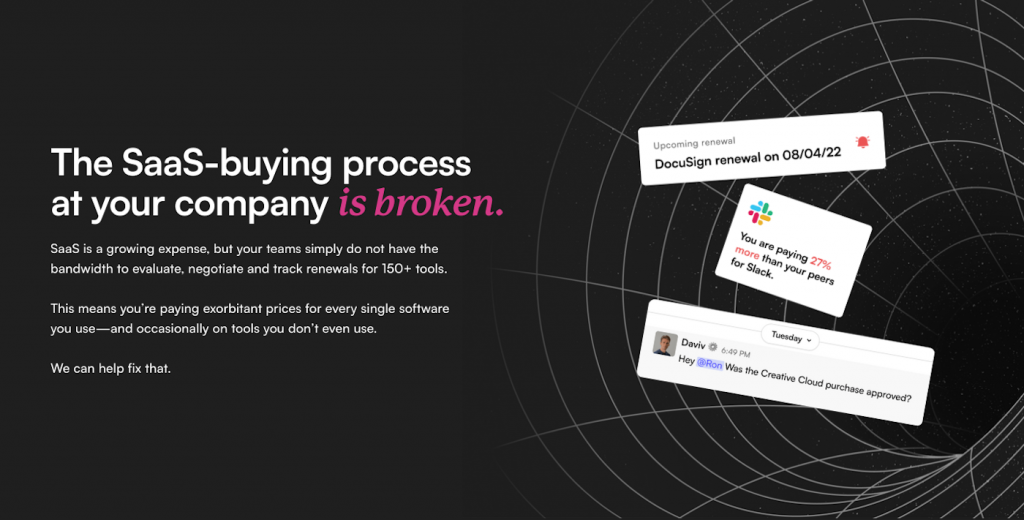
A very effective way is to tell the visitor their own problem straight up. This tactic anticipates and diffuses the viewer’s potential inhibition simultaneously.
Check out how Spendflo does it. This is so enviably spot-on!

2. Simplify Your Form
Here are some best practices to design a high-converting signup form on HubSpot:
- Only ask for information you need. As per WPForms, for secondary conversions, you should not add more than three fields in the signup form, since at this point, the visitor may be interested but not invested in your brand.
- Reassure the visitor by featuring a testimonial alongside the signup form.
- Avoid placeholder text inside the form fields. Don’t waste the visitor’s time by making them delete any text before they can input their details.
- Implement minimal aesthetics on your signup landing page. Leverage white space to draw attention to the signup area.
- Make your CTA button big and well-padded. Whether on desktop or mobile, make it easy for the visitor to click through.
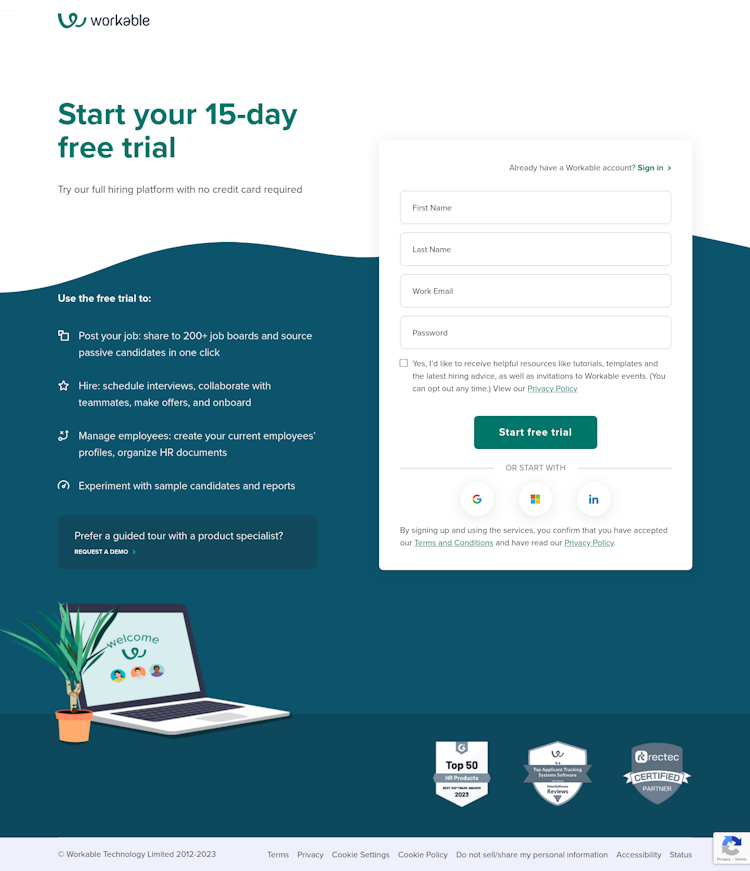
Consider the following signup page by Workable. Minimum form fields, benefit-oriented copy, and testimonials.

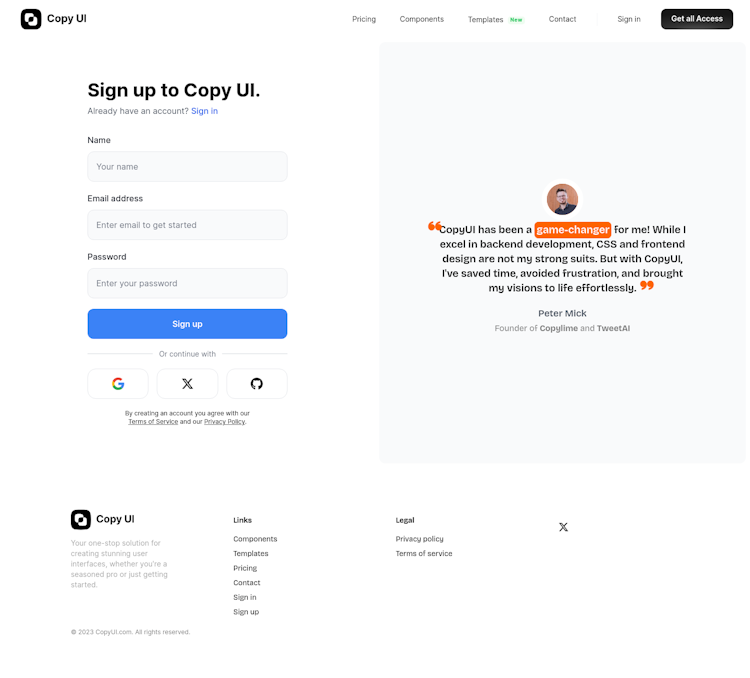
Or take a cue from CopyUI when you create a landing page template in HubSpot.

3. Take Time with The CTA
The CTA is the most critical part of your landing page. You don’t want to rush it. So, here are some best practices to design a high-converting landing page CTA on HubSpot:
- Avoid vague copy. If you’re specific in the headlines, be specific in the CTA as well. Tell the visitor where they’ll be taken upon clicking the button.
- Use action verbs such as ‘Register,’ ‘Download,’ ‘Start your free trial today,’ ‘Save now,’ ‘Start converting,’ ‘Log in,’ and so on. Not hard to do, but very easy to ignore.
- Contextualize the CTA copy. Let it match the core intent of your landing page. For instance, a live webinar and its recorded version both may need the visitor to register. But the copy on either case should be different. In the latter case, it can be ‘Get the recording’ though the visitor has to follow the same steps to register.
- Include, if possible, a number in your CTA copy. People look for specificity when online. For instance, when giving an offer, you can use the CTA to announce as well as display the amount. Or if you’re promoting an eBook, you might mention its length in the CTA copy. Again, if it’s a discovery call, mention how long it is.
- Frame your CTA in the form of a question and answer. But make it short. ‘Tired of hairfall? Stop it now.’ You can look at it as an encapsulation of the primary and secondary headlines. This creates urgency, prompting the visitor to click.
- The language of your CTA copy should be such that it makes the visitor feel in control. Instead of feeling manipulated into clicking, they should feel that they are making the choice to take the desired action.
- Place the CTA button within the headline zone so that it’s immediately visible. The framework of problem, solution, and action should not take more than a glance.
“Perform a blink test on your page, meaning a visitor should be able to gather the main message in less time than it takes them to blink, i.e., less than five seconds.” advises Christina Perricone, Content Marketing Leader at Watershed. - If you don’t want to keep the CTA within the headline zone, at least place it above the fold. Don’t make the visitor scroll to locate the button.
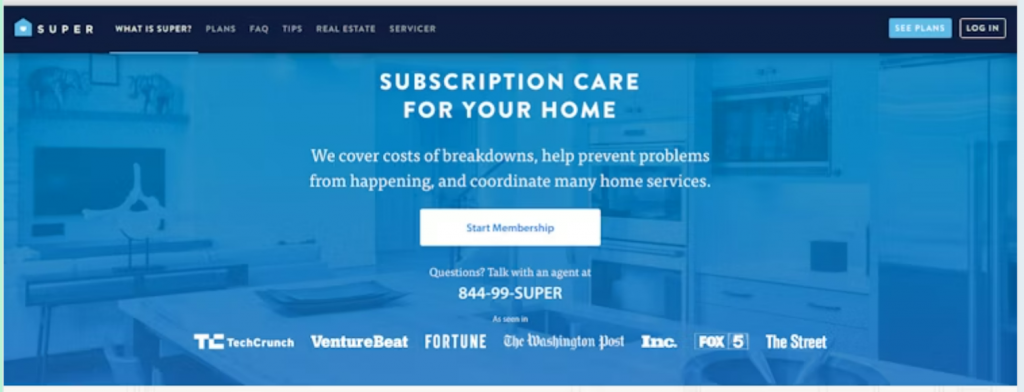
You can try HubSpot’s CTA generator to create the copy. Or, you can always customize your HubSpot landing page template to incorporate the best practices. Here’s a nice example of a specific, goal-focused call to action by Super, a real-estate company.

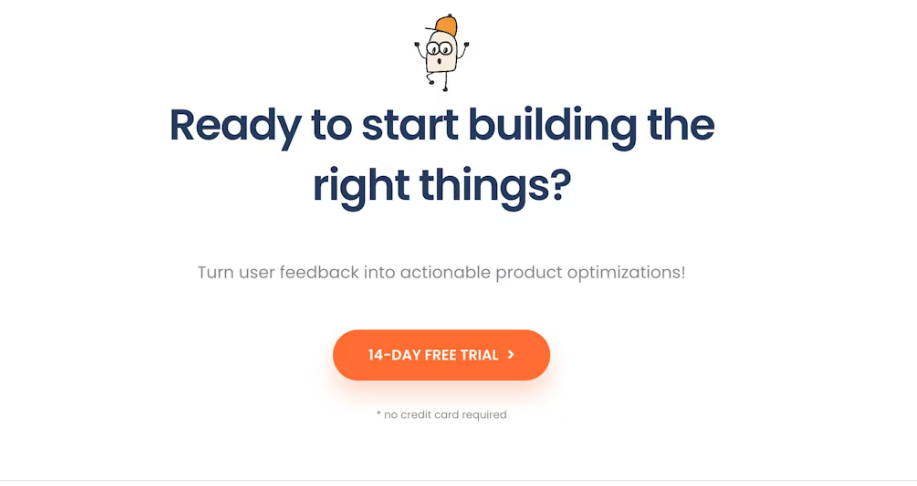
Or catch how Upvoty does it on their landing page. Notice the specificity of the call.

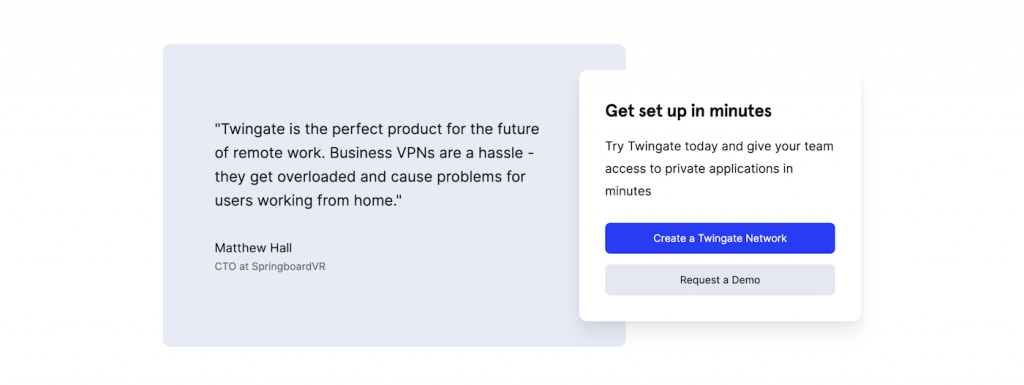
Twingate also slays it with their laser-focused CTA.

4. Design for Mobile Experience
Did you know that 86% of the top landing pages are mobile-friendly?
You can get everything right on your landing page, but unless it’s optimized for mobile, your work is not complete. Fortunately, you can create responsive landing pages on HubSpot, which takes care of most of the critical best practices, such as:
- Using bullet points to convey your message in digestible chunks
- Above-the-fold calls to action, sticky headers, and mobile-optimized popups
- Single-column layouts, minimalistic signup forms
- Limited images and videos, faster loading times
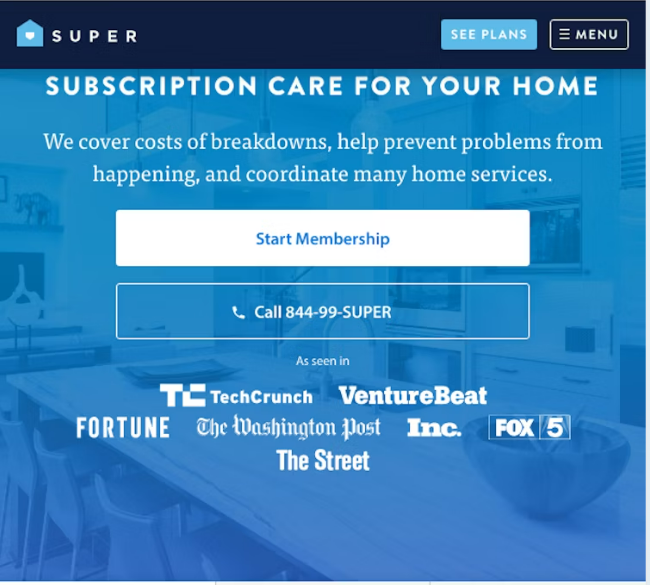
Once again, here’s Super’s mobile-optimized version of the landing page we just saw. As you can see, the copy for a discovery call in the desktop version is assimilated into a button in the mobile version, freeing up space. In addition, the layout is single-column.

5. A/B Test Your Landing Page
Your best guess is still a guess. Even after psychologically vetting your landing page tactics, things can go the other way than you thought. Hence the significance of A/B testing and why 60% of companies perform rigorous A/B testing on landing pages.
You can run A/B tests on HubSpot’s landing page builder. This is the last step, but the most important one. Follow these expert-recommended A/B testing best practices:
- Set clear goals and expectations. You’ll be dealing with a lot of data, and without a solid understanding of why you’re conducting a test, you might get lost.
- Test only one variable and metric at a time. For instance, if you want to test the CTR of the CTA button, don’t touch the copy, image, or any other aspect of your landing page. (This is not limited to landing pages only, just in case.)
- Propose a hypothesis you want to prove or disprove at the end of the test. This is formulating or giving a shape to your hunch: ‘If we replace the ghost button with a solid one against the light background, we’ll see a higher click-through rate.’
- Keep a dedicated log of your A/B test results. Go back to it whenever you’re planning new A/B tests. The point? To develop an intuitive understanding of performance dynamics, resulting in better decision making related to scheduling, monitoring, and analyzing future tests.
- A/B testing is not a one-time thing. You should be testing often. But at the same time, don’t be tempted to test everything.


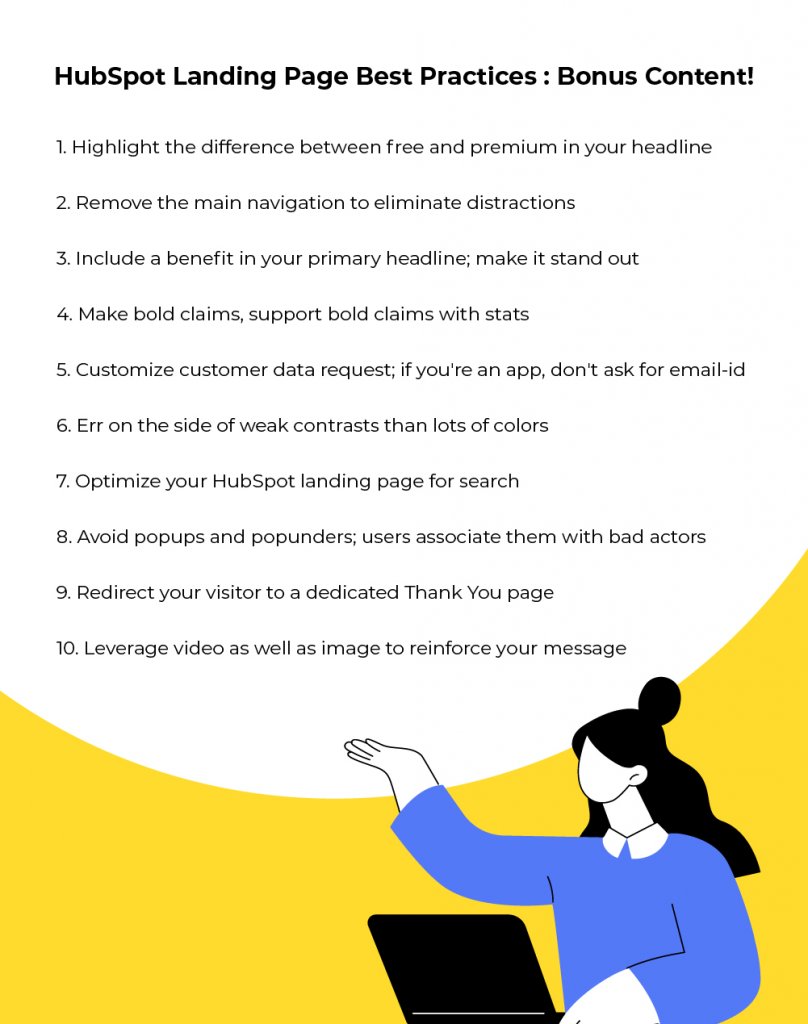
Additional HubSpot Landing Page Best Practices
Here are more HubSpot landing page tips and best practices for you.

Fast-track Creating Landing Pages in HubSpot with Us!
Looking to transform your design into a stunning custom landing page or build one from scratch? Look no further! Share your design files or brief with us, and get ready to see the best landing page design. Whether you need a sleek minimalist landing page or a personalized one, we’ve got you covered. Get in touch with our HubSpot pros!
In the meantime, feel free to learn how to leverage HubSpot workflows for your lead-nurturing campaigns.