


[This post was originally published on 18th June 2020. It has been updated on 8th June 2022.]
Automation is a boon for the world of email marketing.
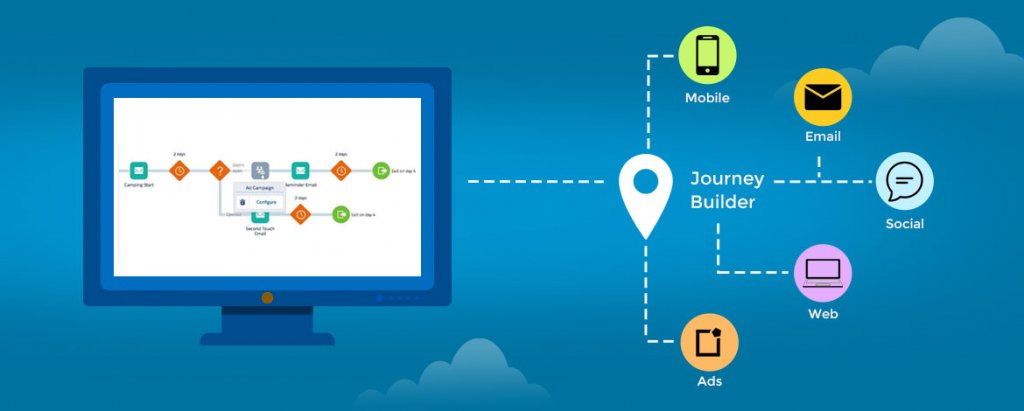
We all need tools to automate our processes, and the easy way to do so is by using drag and drop activities in the canvas which makes the process of automation easier. With Marketing Cloud we can track interactions using the powerful data capabilities of Salesforce Journey Builder, also known as a live activity tracker of all the flows included within the Journey. Salesforce Journey Builder can be used if we want to build further flow based on instant response to any of the past activities.
However, you need expertise and experience when it comes to building complex customer journeys. Apart from Journey Builder, there is the Automation Builder in Marketing cloud to serve almost the same purpose, which we can achieve using Salesforce Marketing Cloud Journey Builder. One of the key differences between the two is that in SFMC Journey Builder we can see the visual flow of our activities, whereas in Automation Studio we can’t.
There are multiple activities in SFMC Journey Builder to accomplish our requirements. And if our Journey is responsive and optimized, then it would be easy for us to manage the flow efficiently.
Let’s kick off our Salesforce Journey Builder tour.
What do you want to build?
1. Multi-Step Journey
You can build a journey that sends messages across any channel based on marketing logic and audience behavior.

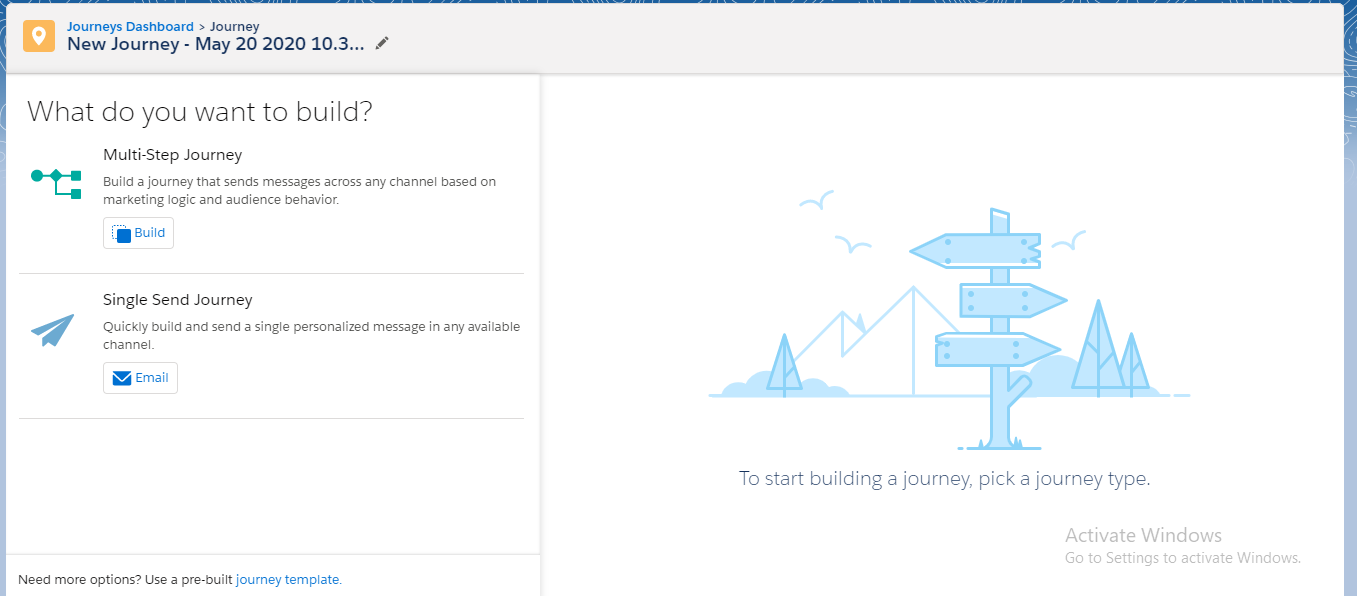
2. Single Send Journey
In this, you can quickly build and send a single personalized message in any available channel.
Now, let’s discuss the several options available in Salesforce Marketing Cloud Journey Builder. It is divided into 5 sections:
1) Entry Source
2) Activities
3) Flow Control
4) Customer Updates
5) Sales & Service Cloud

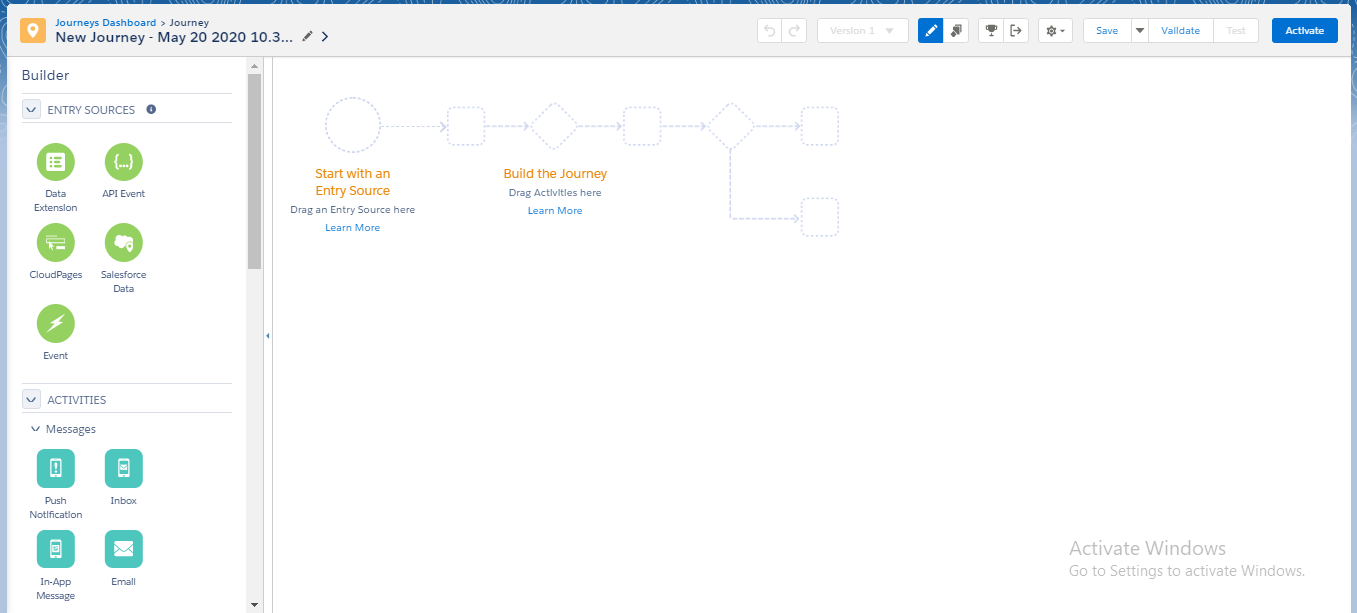
SFMC Entry Source

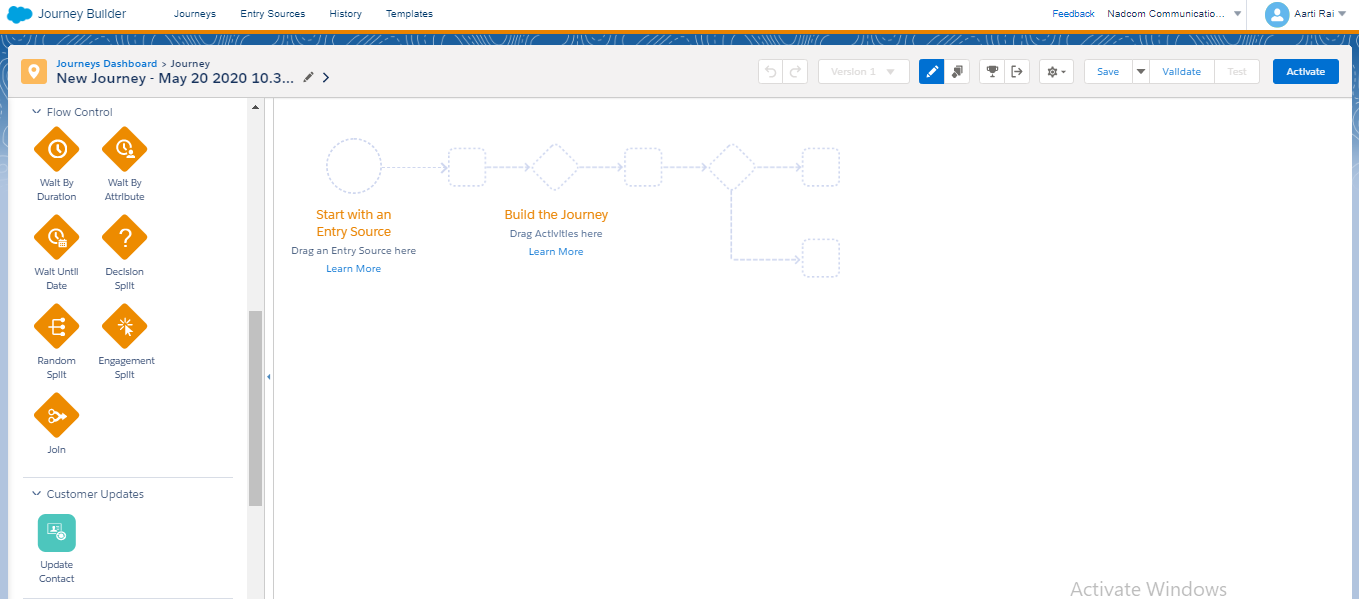
SFMC Activities Dashboard

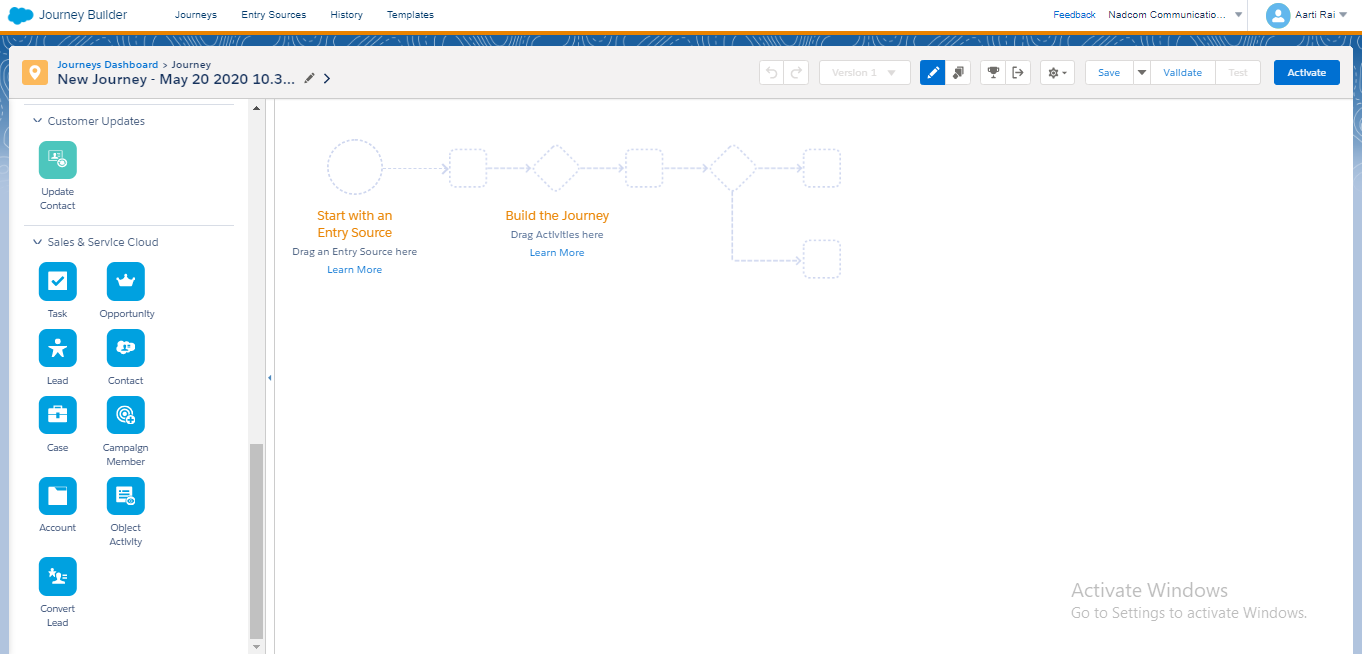
SFMC Customer Updates
For all these aFor all these activities mentioned above [in snapshots] we can drag and drop in our Canvas and can build complex journeys as a salesforce marketing cloud email specialist does. Although, the more the number of decision-based criteria the more our journey will be complex, So, here are a few tips that we can follow to make it easy to read and well organized.
Let’s start with Entry Data Source:
1. As a best practice, we should always create a proper segmentation before admitting contacts into Salesforce Journey Builder. We can use either Automation Studio or Data Designer from Contact Builder to accomplish that.
2. In SFMC Journey Builder we should avoid using one Data extension in multiple journeys as it can make the journey slow at the initial stage. It can also impact the data extension and other activities like import, reports creation, send logging, or extracts.
3. We should avoid Data relationships, Data Extensions as an entry source in journeys because a one-to-many or many-to-many relationship can cause issues while retrieving records. In contrast, the Journey is Activated and we won’t get updated records due to inappropriate activities used to refresh the existing Data Extension.
4. If you have selected API as your Entry source, then there shouldn’t be too many 3rd party targeting servers because it will delay the flow process of admitting subscribers in Journey Builder.
5. Salesforce Objects can be selected as an entry source instead of the Synchronized Data Extensions or Salesforce Data Extensions of Marketing Cloud. Also, we should avoid using filter Data Extensions of Synchronized Data Extensions.
6. Cloud Pages are considered as the best workaround if we are planning to use API calls to start our Journey; Cloud pages considered as Landing Pages can be created within Marketing Cloud, and we can use that Smart Capture Form to insert our Subscribers into the Data Extension and Journey in real-time.
7. Event options can be used if we want our Journey to get a trigger from Automation Builder. This option will be used if we want our Journey to start after few activities of Automation like refresh Filter Data Extension, update the tracking of subscribers.

Data Filters of Journey Entry Source:
There are chances of having raw data from Marketing Cloud Pages or 3rd Party API calls. So, there will be a likelihood of this data getting inserted in Journey audiences. To overcome this, we can use Data Filters wisely in Journey builder. One should consider these things while creating and filtering of contact for the Journey:
1. By default, journeys without any contact filter accept two Millions records, whereas if there is any contact filter used, it can go up to 25K/h.
2. Developers shouldn’t schedule all the journeys at the same time. It makes the account as well as the Journey to slow down as far as performance is concerned.
3. One should set a clear objective while creating Data Filter and Journey flows.
4. Decision split should be avoided as the first activity in the Journey. Instead, we can use filter contact while selecting the entry source.
Flow control decision with logical activities:
We have multiple activities in the Salesforce Marketing Cloud Journey Builder to use in our journey flow. But we need to be extra careful while selecting any of them with the combination of activities.
1. Wait Activity: This activity sets the wait time between any two activities. In the initial stage, when you start building Journeys, you should avoid more wait activities because large numbers of these make the journey slow in its flow. This activity further distinguishes between 3 subparts:
1. Wait for Activity by Duration
2. Wait for Activity by Date
3. Wait for Activity by Attribute
The most used activity among the top three is Wait by Duration, which helps us to manage the flow and to keep track of data and Email/SMS sent to the subscribers.
2. Split Activity: It will split the records in random count/ selected count, based on the business requirement.
1. Decision Split
2. Random Split
3. Engagement Split
DECISION SPLIT is used to divide the subscribers based on any field in Data Extension. We need to create a custom path or use the fields existing in the Data Extension. RANDOM SPLIT will be used if we want to divide our subscribers on the basis of some random count, and then target Email/SMS will be sent to them. ENGAGEMENT SPLIT is based on the previous activity of the subscriber, i.e. if an email is sent to them, whether they have clicked on that email or not. Also, while configuring Engagement Split, we need to make sure that the Tracking code is enabled in HTML Emails or else conversion tracking is enabled in the org, else Engagement Split won’t work.
To optimize the journey Decision Split is used with Join operation to make it more enhanced in functionality:
JOIN: This option is used to join more than one Split Activity used in the account. Also, we need to ensure that data is stored in the correct location so that the decision split will work properly.


Although we can configure GOAL within our Journey to check if that is giving us the target result or not, it’s always a good practice to add and define goals within our Journey because , at last, the end goal of our process is to do business. Journey Builder allows you to personalize each customer’s Journey. It makes the journey more relevant to their interests, behavior, and needs. This in turn enhances customer engagement with your brand and ultimately increases sales. Likewise, Journey Builder helps to automate marketing, sales, and support teams’ activities. Today, the need to provide on-brand, high-quality, engaging experiences at each touchpoint can be fulfilled by creating an optimized customer journey. Salesforce offers a perfect tool in Journey Builder to understand, visualize, and create customer journeys across channels.
Wrap Up
In this blog, we have tried to make the things easier for a developer who is trying to create a Multiple Paths Journey Flow. We have mentioned the best practices which one should keep in mind while creating flow of the journeys. We hope this helps you use Salesforce Journey Builder to its maximum potential.