


[This post was originally published on 20th Feb 2023. It has been updated on 8th Jan 2025.]
Just like your skin acts as the first line of defense for your body, signup forms are the first line of lead generation strategy for your business. Once you can get your signup forms right, you can pave the way for enhancing your business.
To make the task easy for you, we will be sharing how to create a Mailchimp email signup form and signup forms in Campaign Monitor. Let’s start with Mailchimp first.
How to Create A Mailchimp Custom Signup Form
Once you have created your mailing list in Mailchimp, you can customize the Mailchimp signup form according to your branding principles and add exclusive Offers to woo new customers. If it gets too technical for you, just hire Mailchimp email expert from Email Uplers and make your lives easier.


First of all, modify your Mailchimp email signup form and the response emails with the help of <Form Builder>, before generating the embedded form code.


You have 5 embedded signup form design options:
1. Classic: It is similar to hosted Mailchimp signup forms


It is useful if you wish to go for a traditional signup form. You can create a signup form in Mailchimp with additional fields or options you wish to add, that includes form title and width, visible and required fields, groups, and other formatting options.
For professionals who use JS on the webpage, it is recommended that they check the box <Disable JavaScript>.
2. Super Slim: Can be used as a sidebar on the website


The Super Slim Mailchimp custom signup form templates come in handy when you wish to have only an email address field in your Mailchimp email signup form. It is easy to customize the title and width of the form too.
3. Horizontal: Pan out as footers


The horizontal form is almost similar to the Super Slim form with minor changes. You can customize the title and figure out whether you need it or not.
4. Naked: No defined styles

The Naked form is just like the Classic form without any CSS or JS. The advantage of these forms is that it gives you more control and flexibility. It is possible to include a form title, change the form width, add or remove form fields and even link to your campaign archive.
5. Advanced: Host Your Own Signup Form – Using API.
Just check out your hosted ‘Mailchimp form’ for form action, user ID, list ID, and input name elements from the page source. Merge these details in the form hosted on the website and you’re all set!
The advantage of using this method over other Mailchimp signup form design options is that it allows you to select whether you want to have ‘single opt-in’ or ‘double opt-in’ for your subscribers who fill up this sign up form. With the conventional method, Mailchimp, by default, will apply double opt-in which might reduce the lead conversion up to certain extent. This method helps you decide whether you want a single or double opt-in.
Note: The embedded forms take up the style sheet of your website, so the form may look different in Mailchimp and the website. To make sure that your website design and form are visually in sync, you will have to modify the form code after adding it to your site.
How to Get Embedded Form Code?
Now let’s look at how to create a Mailchimp embed signup form.
Select “form option” after creating your signup form. Customize the settings and generate the form code that you wish to add to your website.
Steps to get the form code:
- Go to the Lists page.
- Click the drop-down menu adjacent to the list and <select Signup forms>.
- Go to Embedded forms.
- Select a form type- Classic, Super Slim, Horizontal, or Naked and customize the Form Options.
- Copy the code from the Copy/paste onto your site field and paste the entire code into the HTML of your website where you wish to see the Mailchimp embed form.


Done! That’s how you create a Mailchimp embed signup form.
Form Options
In addition to the types of forms, Mailchimp also gives you the option to include reCAPTCHA so that there are no spam signups. By enabling reCAPTCHA, subscribers will have to check a reCAPTCHA box in a pop-up window once they click the link in the confirmation email.
How to Create A Pop-up Form in Mailchimp?
You can’t neglect pop-up forms while learning how to create a form on Mailchimp. So, to create a pop-up form, follow these steps:
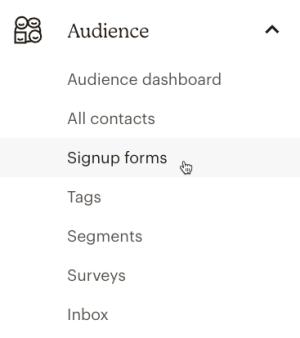
- You need to access the pop-up form builder. For that, click Audience, then select Signup forms.

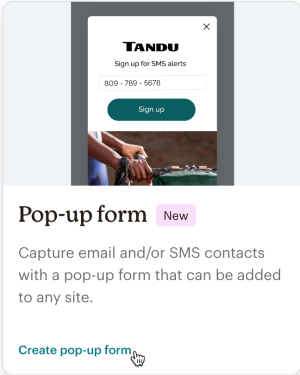
- Click Create new form, followed by Create pop-up form

- Name your form, then click Audience again, and choose your preferred theme.
- Click Begin.
Now you have successfully created a pop-up form. You can now customize it.
How To Add Tags to Mailchimp Signup Forms
In this section, we’ll learn how to use WP forms and Mailchimp to add tags to signup forms. To begin with, you need to add WPForms to your WP website.
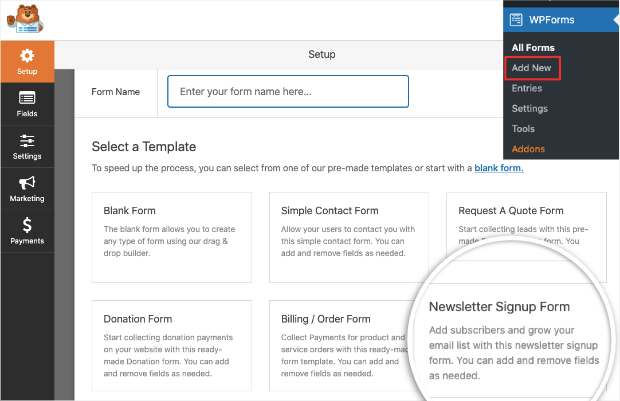
Next, go to the WPForms page and select Add New. Enter a name for your form and choose your preferred template as shown below.

Having chosen your preferred template, you can go on to customize your form. But the next important step is to connect the form to your Mailchimp instance.
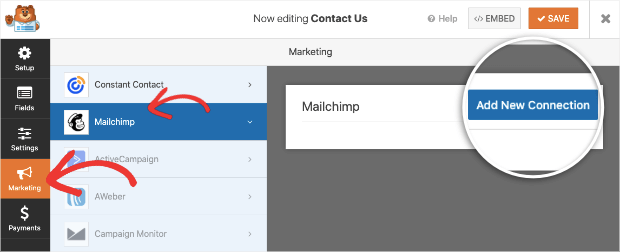
Go to Marketing, then select Mailchimp as shown in the screenshot below.

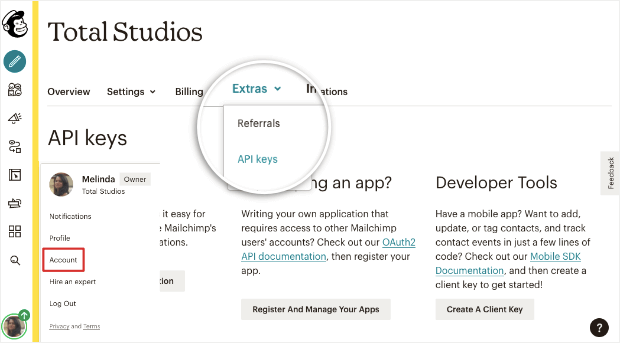
Next, go to your Mailchimp account to locate the API key. Click your profile photo on Mailchimp, and select Extras. Choose API keys from the Extras dropdown.

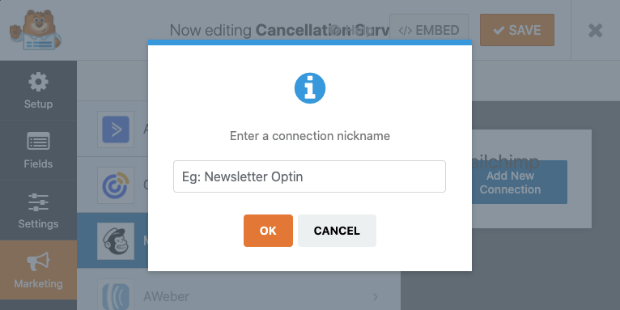
Generate a new API key, then copy and paste it into WPForms. Click on Add New Connection, and enter a name for your connection with Mailchimp. Click Ok.

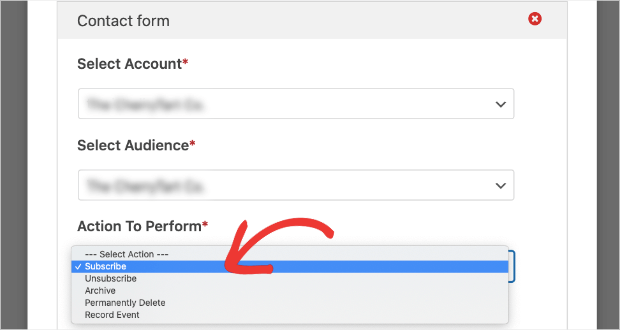
Now, you just need to add Mailchimp tags to your signup form. On the same page, click on the Actions to Perform dropdown, and select Subscribe.

Next, click on Select Tags, and select how you want to tag your subscribers.


Voila! You have successfully added tags to your Mailchimp signup form.
How to Add Form to A Third-Party Website?
You have to embed the code under a container/div to get its functionality right.


Check out the preview of the code below.


Mailchimp supports third-party platforms enlisted below:
- Blogger and Blogspot
- WordPress
- Jimdo
- Weebly
- Webs
- Yola
That’s all folks, for Mailchimp!
Moving on to Campaign Monitor now…


How to create signup forms in Campaign Monitor
So we’ve looked at how to create a signup form in Mailchimp. Now, have a look at the steps below to create a signup form in Campaign Monitor.
1. Go to Lists & Subscribers.


2. Select the list for which you are looking for signups.
3. Click <Signup> forms in the right sidebar, on the list page.

4. Select Copy or paste a form to your site on the Signup forms page


5. You can add and remove form fields by checking the box against it. If you wish to reorder the field, you can do so by clicking and dragging the handles.
6. Click on Get the code.


7. Copy and paste the HTML code into your website.


Bingo! You have just “created” a signup form on Campaign Monitor.
Some Additional Actions
1. Add, remove, and reorder form fields
Only the “Name” and “Email” fields will be included in default form. Besides, you can add or remove form fields and even change the order of display. To add custom fields, you only need to select the checkbox next to those fields. To reorder the fields, click and drag the handles.

2. Multiple lists to single signup form
You can even allow people to opt-in to multiple lists at the same time. Say for example, if you have newsletters as well as marketing emails, you can give the subscribers the provision to sign-up on multiple lists according to their preferences.
While using Mailchimp multiple signup forms, keep in mind that the selected lists should all be either confirmed opt-in or single opt-in. Subscribers will receive a single confirmation email even if all the lists are confirmed opt-in.
3. Make signup form fields required
A simple code can set a field as “required” which means that the subscribers will have to compulsorily fill that field.
Here’s the code:
<input id=”fieldiddtyu” name=”cm-f-iddtyu” type=”text” required />
Safari versions older than 10.1 on MacOS and Safari on iOS don’t support this feature. A workaround is to use Hyperform or html5 Forms..
4. Use HTTPS to make the signup form secure
Use the below mentioned code to use HTTPS instead of HTTP.
<form action=”https://accountname.createsend.com/t/i/s/tikpjy/” method=”post” id=”subForm”>
5. Add CAPTCHA to the Mailchimp email signup form
Add CAPTCHA as a verification step to ensure that there are no spambots corrupting your list. All the non-human responses will be eliminated by doing so.
To add CAPTCHA, search for input id=“fieldEmail” in the generated code.
Change the name=“cm-[unique identifier]” to name=“email”.
This successfully adds CAPTCHA to the signup form.
Campaign Monitor also allows you to host your own signup form through an API just like Mailchimp.
Wrapping It Up
Many enterprise ESPs like SFMC, HubSpot, Marketo too support similar logic to get lead form created on your assets and use them to bring all your leads to one platform and trigger emails helping your subscriber get the information they need.
Wanna try out creating signup forms for your website? Get in touch with us and Email Uplers would be happy to help.