


[This post was originally published on 9th July 2020. It has been updated on 6th April 2022.]
A ‘seat-of-the-pants’ approach is not advisable with Email Marketing. This is because the success of an email campaign – whether through Salesforce Marketing Cloud (SFMC) or some other platform – requires customer understanding, goal-oriented thinking, thorough planning and of course flawless execution. To this end, an email marketer must rely on the tools in his armory. One such tool is undoubtedly A/B Testing (also known as AB Testing).

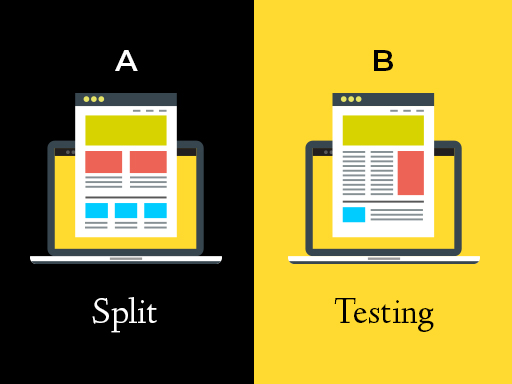
SFMC A/B testing (or SFMC AB testing) is a great way to run experiments with email campaigns set up on the platform. Email A/B testing – also known as split testing – enables you to set up multiple versions of an email campaign and determine which version is likely to drive more engagement with a subset of your audience before you send the campaign to everyone. Thus, it can guide your Email Marketing strategy and help you raise your campaign’s chances of success.
With automated AB testing, you can test for the following elements/variables in Salesforce email template:
· Subject line
· Email send
· From name
· Content areas
· Send time
· Pre-header
But what is AB testing in Marketing? For the answer to this question, and to know more about the what and the why, check out this article.
In this article however, we will focus on the how – how you can set up SFMC AB testing within Email Studio. We will also provide the answer to a very common question: is it possible to do AB testing in Journey Builder?

SFMC AB testing: Laying the groundwork
Before you start with A/B testing in SFMC, you should do some groundwork. Here are some strategies to get you going.
Step 1. Understand your audience
Who are you marketing to? Who will receive your email marketing campaign?
If you don’t know your audience, you won’t be able to set goals for your salesforce marketing cloud testing or make the most of it.
One of the best ways to understand your audience is by creating buyer personas. You can have different personas based on your current or prospective customers’ ages, locations, genders, pain points, or any number of other criteria.
Step 2. Segment your email list
Once you create your buyer personas, you will find that your audience (i.e. email subscribers) is not one homogenous group. By segmenting your email list into smaller groups, you can increase your conversions and get an edge over your competitors.
Some common ways to segment your email list include:
· New subscribers
· Location
· Gender
· Preferences/interests
· Level of activity/inactivity
· Opt-in frequency
· Abandoned shopping cart
· Purchase history
· Purchase type/amount/frequency
· Buying stage
· Birthday
Step 3. Create your campaign
Create a well-formatted, mobile-friendly email template for A/B testing. Pay attention to the fonts, colors, design, call-to-action text, subject lines, etc.
Step 4. Identify your key metrics
How will you measure the success of your SFMC AB testing campaign? Identify the criteria that matter with metrics. Commonly-used email A/B testing metrics include:
· Open rate
· Click rate (also known as click-through rate)
· Conversions
· Email deliverability
Read more about email deliverability here: https://email.uplers.com/blog/the-definitive-guide-to-bounce-mail-management-in-sfmc-email-studio/
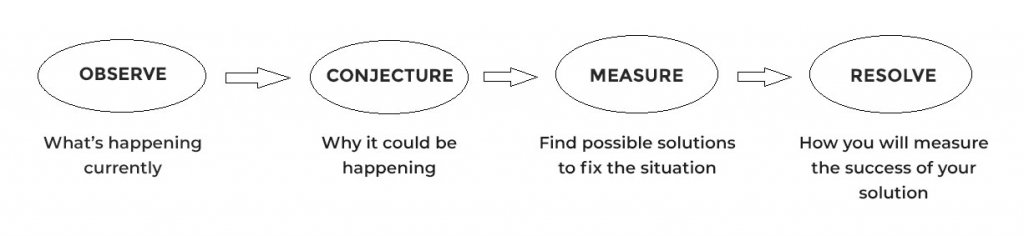
Step 5. Define a hypothesis
Once you have identified your target audience, know what your email campaign will look like and have a handle on how you will measure your campaign’s success, create a ‘hypothesis’ about why a particular email variation might perform better than the other.

Once you have laid the groundwork, you’re ready to set up SFMC AB testing in Email Studio. But before that, keep in mind that you’re sending different versions of your email to real subscribers. That’s why it’s important to send only a polished, final product. Also, A/B testing should always be done before executing the final send but after reviewing and performing test sends. Finally, because A/B Test sends take more time due to the ‘splitting’ process, you should use a ‘standard’ send when speed is important and for sends exceeding one million recipients.
And now, on to configuring A/B Testing in SFMC Email Studio.
How to Configure SFMC AB testing in Email Studio
Step 1: Configure test content
i. Click A/B Testing
ii. Click Create A/B Test
iii. Enter a name and description
iv. Select a Test Type to send classic emails, Content Builder emails or shared Content Builder emails
v. Complete all required fields
Step 2: Choose test recipients
i. Next to the ‘Recipients’ field, click Choose
ii. Select subscriber lists, groups, sendable data extensions or data filters to use
iii. Click Select
iv. Slide the marker left or right to determine your test distribution. You can also manually enter the percentage or number of test subscribers
v. Click Next
Step 3: Set the winner criteria
i. Choose a version with either:
a. Highest unique open rate
b. Highest unique click-through rate (CTR)
ii. Specify the duration in hours or days after which the system declares a winner among the test versions
iii. Click Next
Step 4: Schedule a test deployment
i. Select a start time: immediately, scheduled or schedule later
ii. Select how to send the winning email to remaining subscribers: automatically or manually
Step 5: Configure send options
i. Click Use the following from name and address OR Select a send classification
ii. Accordingly, make a selection from the dropdown menu
iii. Click Finish
iv. Click Confirm
Before the final A/B Test send, you can edit the A/B Test within SFMC Email Studio. If your A/B Test results in a tie, the system declares Condition A the winner. But you can edit the winner criteria: Determine Winner by, Declare Winner, Recipients or Next Send.

Follow these steps to edit your A/B Test:
Step 1: Click A/B Test
Step 2: Click the name of the test you wish to edit
Step 3: Click Edit next to the area you wish to edit and make your edits
Step 4: Click Save
Once the system saves your changes, verify your changes on the test results page.
Then to view high-level near real-time A/B Test results:
· Click A/B Test
· Click the name of the A/B test
You can also cancel an A/B test before completion.
· Click A/B Testing
· Click the name of the A/B test to cancel
· Click Cancel Test
· Click Confirm
If you cancel an A/B test, the current stage of the process will still complete.
How to Create a Duplicate A/B Test In Salesforce Marketing Cloud Email Studio
SFMC Email Studio provides a functionality to copy the conditions from an existing A/B test to create a duplicate without reconfiguring those settings.
Follow these steps to create a duplicate A/B test:
Step 1: Click the A/B test name to copy
Step 2: Click Copy A/B Test
Step 3: Click Edit next to the area you wish to edit
Step 4: Click Edit next to Next Send to send or schedule the A/B Test
Can We Set Up AB Testing in Journey Builder?
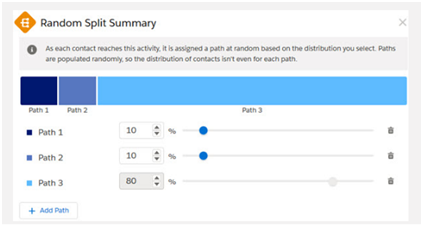
AB testing is more of an Email Studio functionality so the idea is not really applicable using Journey Builder. However, a workaround for this is available, using Random Split. This activity divides SFMC contacts into random groups in a configurable number of paths (up to 10) in Journey Builder. The marketer can specify a distribution percentage of contacts for each path. Journey Builder will ensure that the sum of path percentages always equals 100.

After randomly splitting the contacts, you can define the Email Activity and use the same email with different subject lines or add a Wait activity to send it at different times. The downsides of email AB Testing in Journey Builder are that it doesn’t have a ’winner’ functionality like A/B testing in Email Studio and reporting is not easily displayed. However, it does allow Salesforce marketing cloud email specialists to split the population and send different versions of the email, say, with different subject lines.

Best Practices for SFMC AB Testing
These strategies can help you make the most of your SFMC AB Testing campaign:
· Always have a valid hypothesis
· Change only one element at a time
· Ensure that the numbers you’re testing with are big enough to enable reliable (further) analysis. A test with fewer than 500 subscribers may not be statistically significant
· If there are more than 50,000 subscribers, send to 5% per condition and 10% if the number is less than 50,000
· Let your test run for long enough to get verifiable results. Wait at least 24 hours before declaring a ‘winner’
· Don’t update the data source; keep the data static to prevent any problems with the test
Wrapping It Up
We hope this guide enables you to optimize your future email campaigns with email A/B Testing and achieve exponential results with your Email Marketing campaigns. Remember, we’re always rooting for you!