
Automation Studio is an application in Salesforce Marketing Cloud. It is used to implement complex, multi-step marketing campaigns and data management tasks on a scheduled or triggered basis.
So much for the definition. But what about implementation? How can you use Automation Studio to launch a high-converting campaign? You might be at the very beginning of the process, or stuck somewhere in the middle, or quite close to making your campaign live, but still with a fishbone in your throat.
All good! In this guide, we will try to cover all the three stages related to Automation Studio in Marketing Cloud:
- How to access Automation Studio in Marketing Cloud
- How to create a new automation in Automation Studio, and
- How to build an automation workflow in Automation Studio
Having served over 800 SFMC customers, and performed iterative fine-tuning for over a decade now, we are deeply acquainted with the ins and outs of Automation Studio. We’ll take it one step at a time, beginning with how to access Automation Studio. So, let’s get started!
How Do You Access Automation Studio in Marketing Cloud?
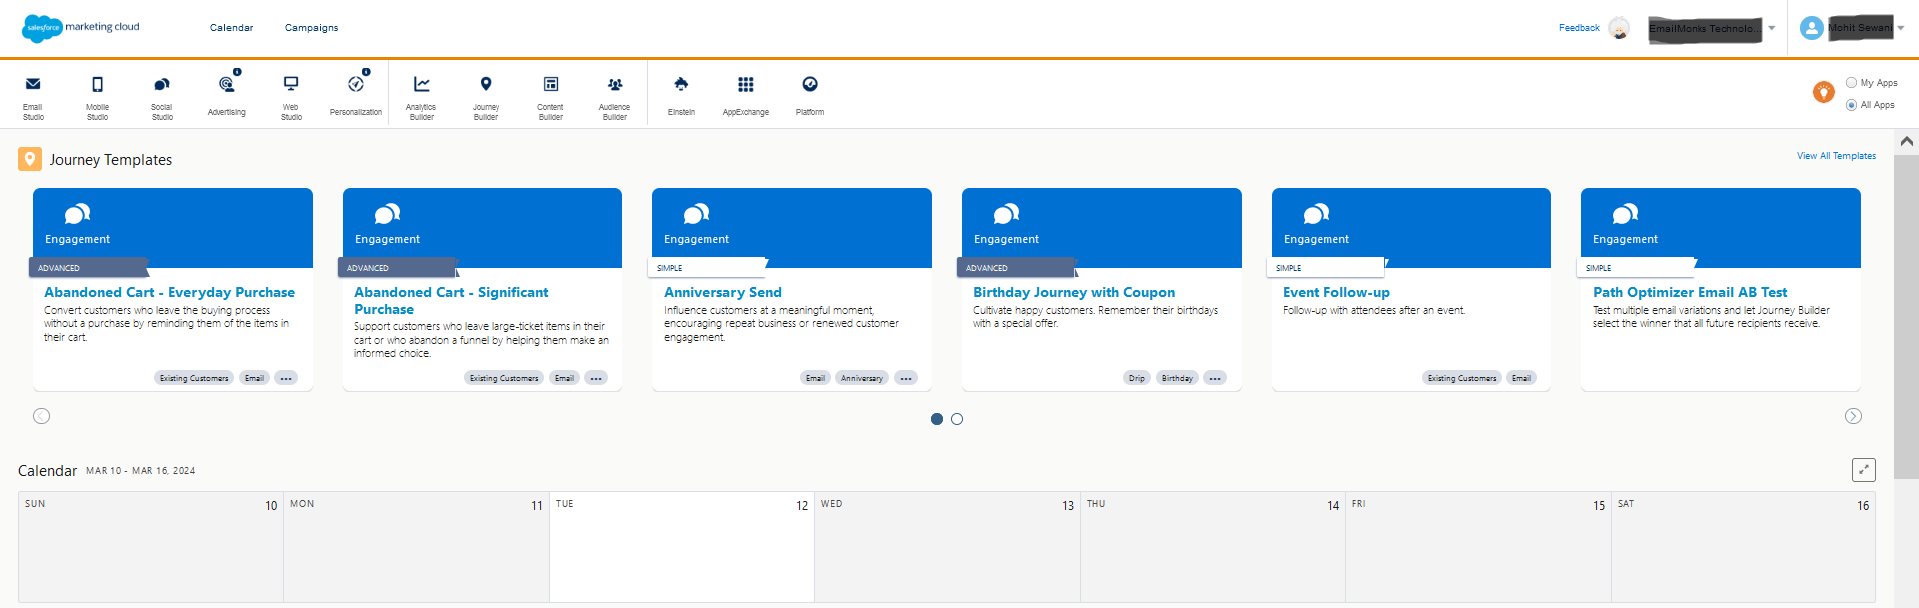
- Log in to your Marketing Cloud account. If you are not familiar with how the Marketing Cloud dashboard looks, here’s a screenshot of the same.
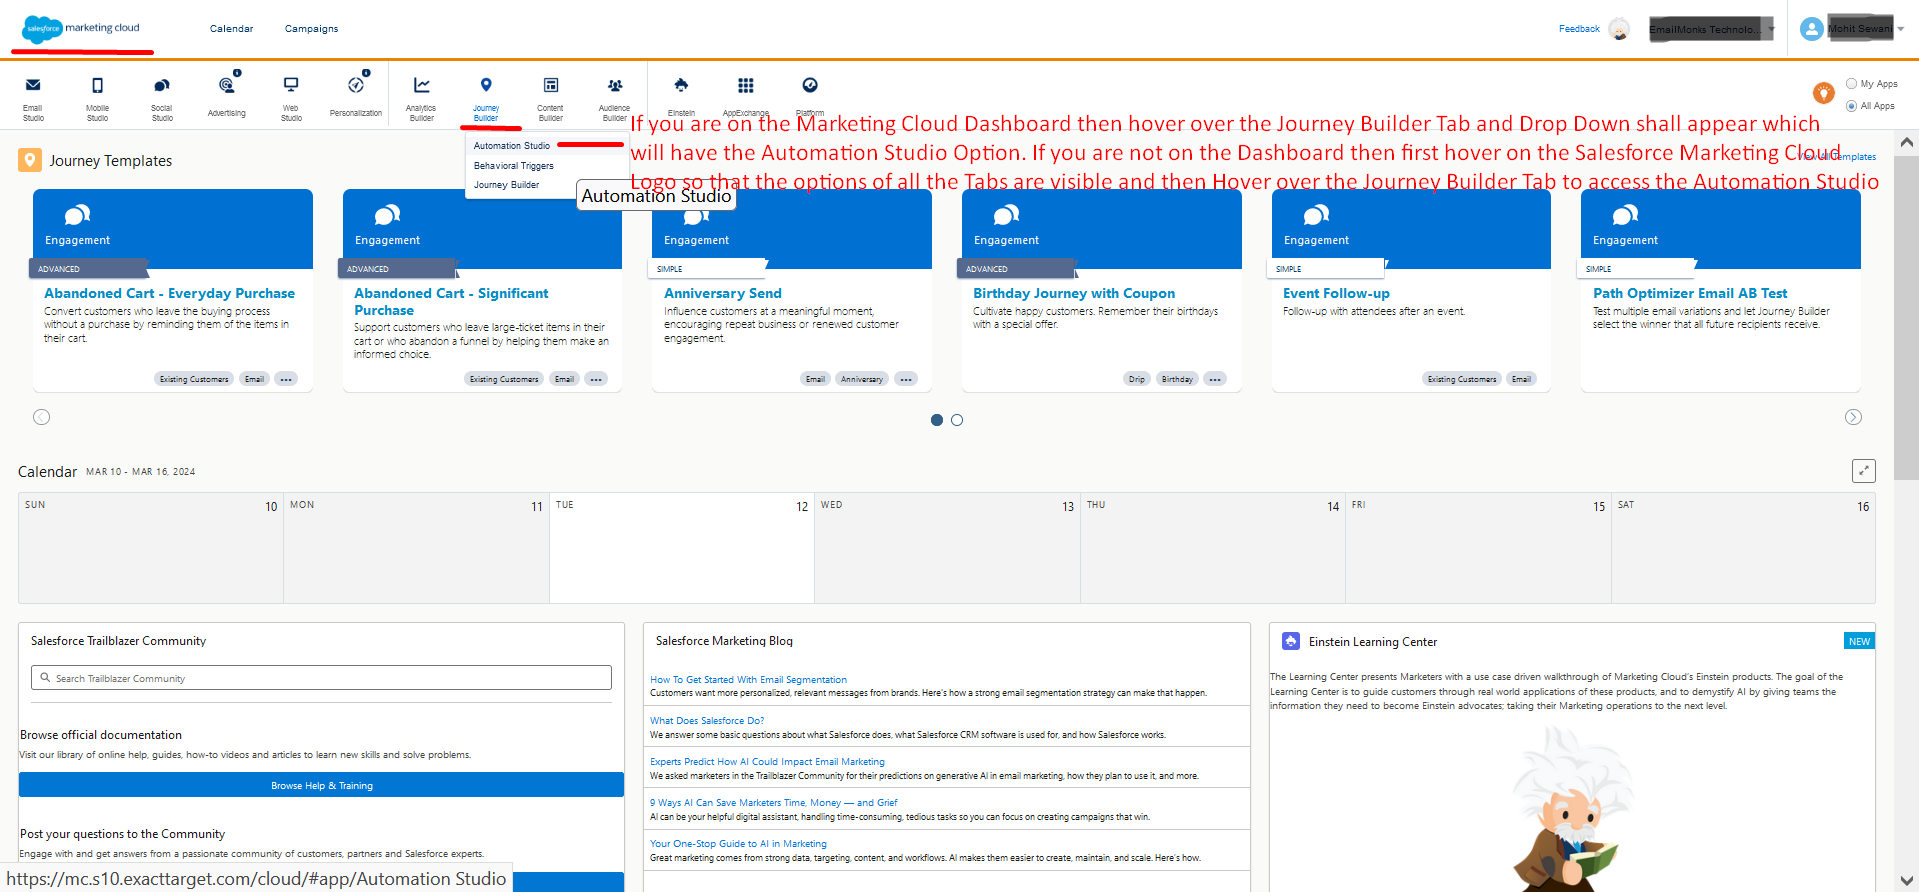
- In the Marketing Cloud dashboard, go to the Journey Builder tab.
- Click Automation Studio under Journey Builder. That’s all!
What Is The Difference between Automation Studio And Journey Builder?
Both Automation Studio and Journey Builder are applications within Marketing Cloud. But they serve different purposes:
- Automation Studio focuses on data management, whereas Journey Builder is associated with multichannel customer journeys.
- Automation Studio automates repetitive tasks and processes customer data by the gross. Journey Builder personalizes customer interactions and adapts to ever-evolving behavioral trends in real-time.
In Salesforce Marketing Cloud, Automation Studio and Journey Builder are distinct tools working together to streamline a campaign. For instance, Automation Studio cleanses and organizes customer data for creating segments. Based on these segments, Journey Builder will create targeted campaigns.
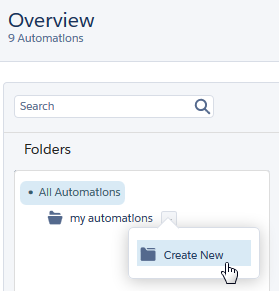
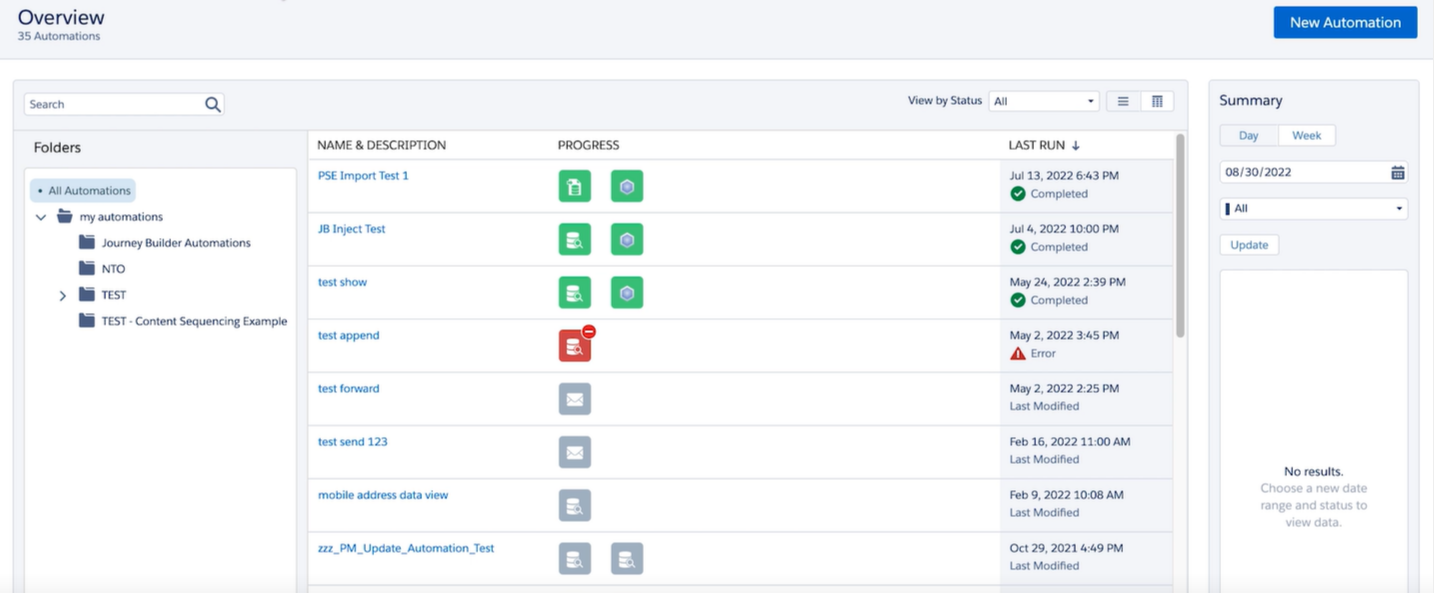
We’re ready for the next steps. Before we move on, you need to know about folders in Automation Studio. Folders are basically used to store your automations. They’re primarily for organization and improved visibility. You can create one very easily from the Overview dashboard as shown below.
How Do You Create a New Automation in Marketing Cloud?
- On the top-right corner of the Overview dashboard, click the New Automation button. Enter a name for the automation.
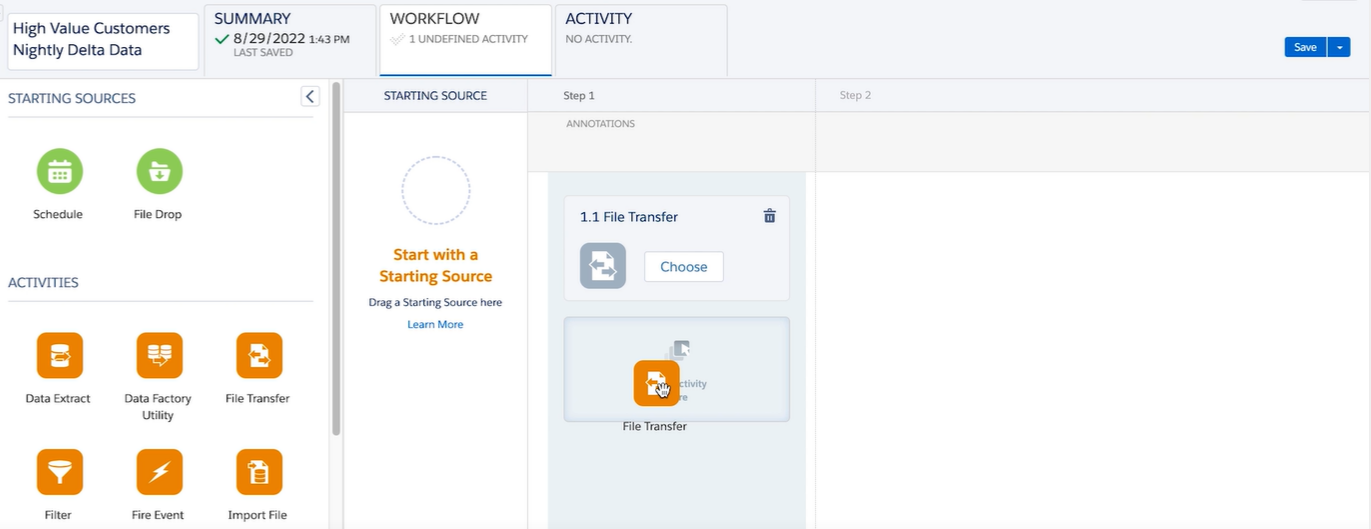
- You should see the following dashboard now. To get started with automation, you need to choose one of the starting sources, Schedule or File Drop. (More on this in just a while)
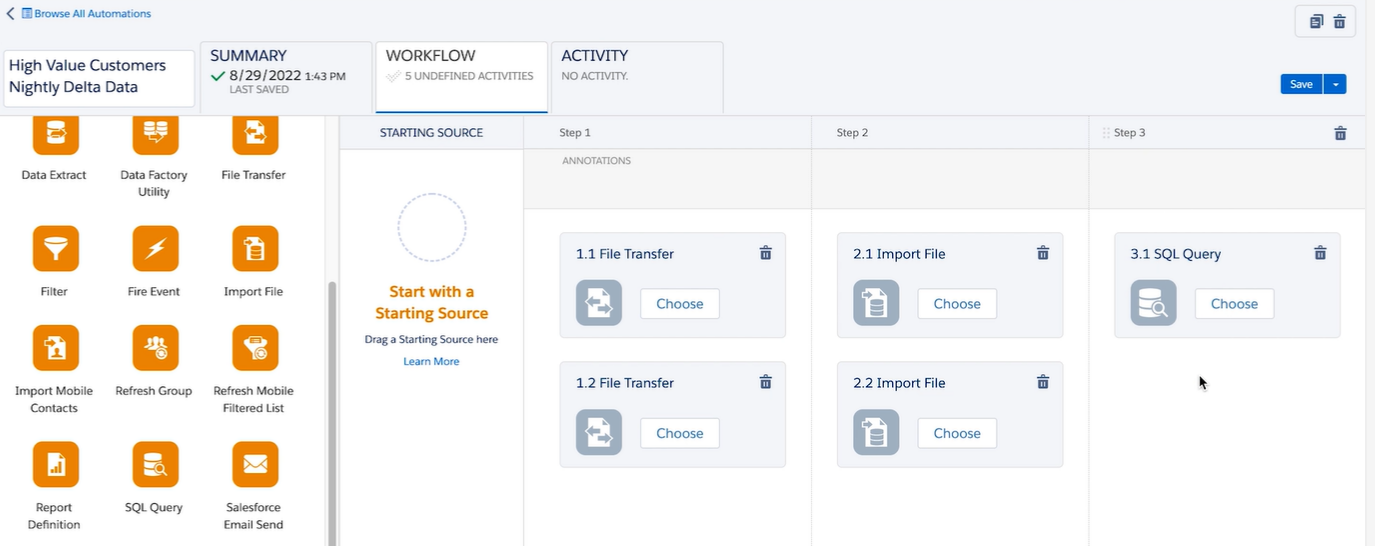
- That done, you can now drag and drop ‘activities’ to build an automation workflow. In the following screenshot, the workflow consists of five undefined activities.
- Once you’re done building the automation workflow (more on this in a separate section), click Save.
And that’s all! We have successfully created a new automation in Automation Studio.
Understanding Schedule And File Drop
Schedule and File Drop are two different kinds of triggers available in Automation Studio.
If you want to run your campaign at specific intervals, you can choose Schedule. For instance, in the case of a welcome campaign, you can schedule your first welcome email to be sent at appointed intervals after signup.
File Drop, on the other hand, triggers the automation in the event of a file having been uploaded to an appointed folder in Marketing Cloud’s enhanced FTP (File Transfer Protocol).
Example: your CRM system generates a daily sales report. You set up a new File Drop automation. So every time a sales report is uploaded to a folder in Marketing Clouds’ enhanced FTP, the automation is triggered. This automation now processes the fresh data, updates dashboards, or triggers campaigns.
The benefits are obvious. It eliminates any manual intervention, streamlines campaign workflows, and enables faster responses to incoming new data.
How to choose between Schedule or File Send as your ‘starting source?’ Well, it depends on your immediate needs. If you’re building a pre-planned campaign, such as welcome series or weekly/monthly newsletters, go for Schedule. But if you want to create triggers based on updated sales data, choose File Send.
Interestingly, you can also combine both triggers. For example, you schedule an abandoned cart campaign to run every Saturday night. Within this trigger, you can set up a secondary File Drop trigger; this automation will access the file containing real-time cart abandonment data.
Now suppose there is a waiting period after the scheduled run, allowing for a new potential cart abandonment. The File Drop trigger is active now, and it will fire as soon as a file containing updated data (latest cart abandonments) is uploaded to the concerned folder in the FTP location.
The automation then processes the updated data, and triggers a cart abandonment email just for those newly abandoned carts. Learn how to configure a new File Drop automation.

How Do You Build an Automation Workflow?
We’ve already introduced you to the drag-and-drop interface where you will build your automaton workflow. Now, take a look at the following activities once again.
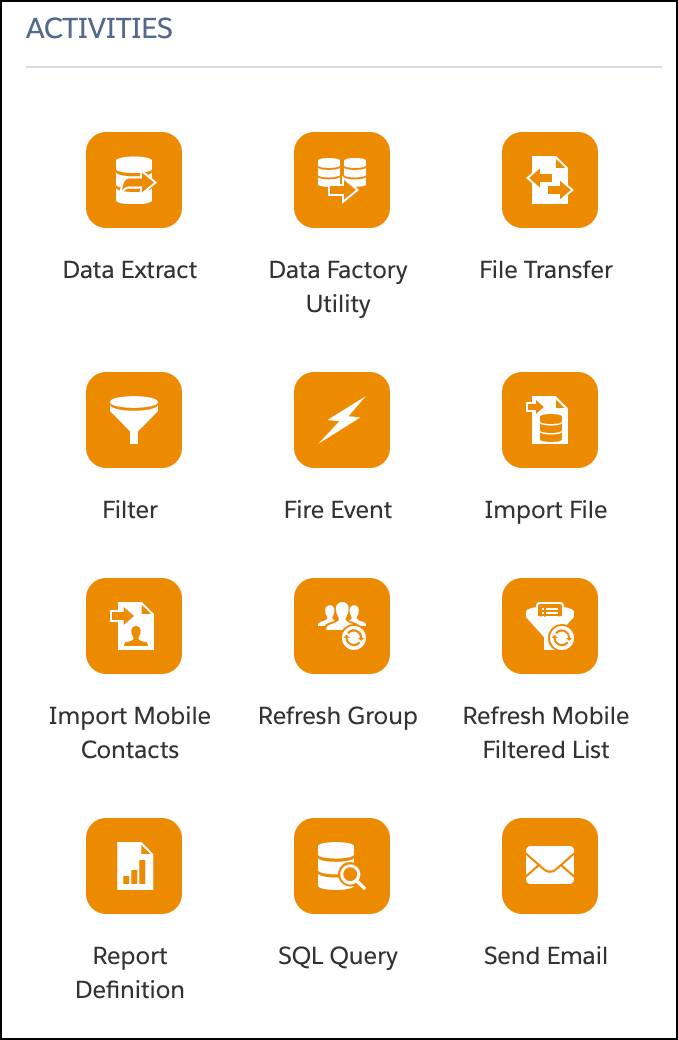
We will configure these activities to build our workflow. Feel free to go through the principle automation activities in Automation Studio. In the meanwhile, let’s view automation in action.
Suppose you want to process product survey data. Your goal is to trigger a Thank You email after every customer submits their responses via a form that saves the data to a CSV file.
You know the first step? That’s right! We create a new automation in SFMC automation studio. Next, we need to build the automation workflow in the drag-and-drop interface. Accordingly, we can define the following activities, and drop-and-drag each one onto the workflow sequence:
- File Transfer: We drag the File Transfer activity onto the interface. Then, we configure this activity to transfer the survey response file to a secure folder within Marketing Cloud.
- Import File: Next, we drag the Import File activity onto the emerging sequence. Once configured, it will now import data from the archived file, and store the data within a designated Data Extension in Marketing Cloud. Your survey responses are now stored within this Data Extension.
- Wait Activity: We want the automation to wait for 12 hours after the CSV file is imported. Why? Because this ensures that the email is sent at the right time and the system has ample time to process new/updated data. So we will add a Wait activity next. The automation is now paused.
- Send Email: We complete the sequence by adding the Send Email activity. We configure it to trigger a Thank You email to the participants who took the product survey i.e. whose data was just imported.
Here is how the current automation workflow looks.

Is that all? Well, for a high-level overview of Salesforce Automation Studio, this guide can be your reliable go-to from time to time. We have provided the entire framework of Automation Studio.
But hold on! It’s one thing to know, even to know well, and quite another to execute. Since you’re familiar with the basics of Automation Studio now, including the terminology, processes, logic, etc., you may want to go through Marketing Cloud’s own exhaustive Automation Studio implementation guide.
Or, Better Still…
Get in touch with the Salesforce partners i.e. Email Uplers! Our Salesforce Marketing Cloud automation specialists will help you implement results-driven marketing campaigns for your brand.
By now, we have served 800+ SFMC customers across more than 60 countries. Talk about consistent upskilling, risk assessments, mid-campaign contingencies, fine-tuned executions, nonstop monitoring, timely stakeholder reporting — that’s what we’ve been doing for over a decade now.
So connect with us and let us know your requirements.
But before that, make sure to read the implementation guide shared above, so whatever decision you make, it’s an informed one.
Susmit Panda
Latest posts by Susmit Panda (see all)
How Custom Email Templates Can Set Your Brand Apart
10 Tips to Review And Maintain Salesforce Data Hygiene