
Email personalization is sacrosanct. No bible of email marketing is complete without personalization. 90% of marketers swear that personalization adds majorly to ROI.
The leading ESPs in the market today are kitted out with advanced personalization features. Most ESPs offer AI-grafted personalization, which is next-gen.
But if you can’t afford ESP-level personalization just yet, you can still offer personalized experiences to your email demographic via mail merge in Outlook. It is completely free, and it’s the perfect option if you own a relatively small list of subscribers. Often, marketers first collect addresses with an email finder tool and only then set up the mail merge workflow.
You’ll just need two more Microsoft apps, Word and Excel, that’s all. We’ll get to the workflow in a bit. First things first, what exactly is mail merge in Outlook?
- What is mail merge in Outlook?
- Who should use mail merge, and when?
- Mail merge in Outlook with attachments: The steps
What is mail merge in Outlook?
Mail merge in Outlook is a functionality used for sending personalized emails to your audience. “Merge” refers to the synthesis of a template document (from Word) and a data source (from Excel.) The template document is the email body. The data source consists of the information on each recipient on your email list.
For example, you compose a welcome email on Word. Now you want to send it to 50 subscribers. Outlook “merges” the content of your welcome email from Word and the recipient data from Excel to create the email proper, ready to send to your contacts.
Another scenario: You want to send gift packages to a select group of customers who won a recent contest as part of your campaign. You can use mail merge in Outlook to create mailing labels, shipping/address labels with custom data, print them, and stick them onto the boxes.
Who should use mail merge, and when?
Typically, companies with a relatively small number of subscribers use Outlook for sending personalized emails.
But bigger brands may also use the mail merge feature as part of certain targeted campaigns to reach a smaller segment of high-value customers. One could also imagine complex internal communications taking place via mail merge in Outlook. It can be part of a brand’s email toolkit, where Outlook complements other ESPs. Make no mistake, 64% of Outlook customers are based in the United States.
There are a few limitations you need to consider when using Outlook for mail merge:
- If you are a Microsoft 365 subscriber, You are allowed to send emails to no more than 5,000 recipients each day, and each email can be sent to at most 500 recipients.
- If you are NOT a subscriber, the sending limits will be determined on the basis of account reputation, sending patterns, spam complaint rates, etc.
So much for Outlook-imposed sending limits. Here’s Microsoft 365’s sending limits:
- You can send emails to 10,000 recipients per day.
- You can only send 30 emails per minute.
If you own a small list, Outlook’s mail merge should be your go-to. Now let’s learn how to implement mail merge in Outlook with attachments.
Read more: The Ultimate Guide to Microsoft Outlook Templates
Mail merge in Outlook with attachments: The steps
1. Configure your data and email in Excel and Word
Set up your Outlook instance for sending personalized emails:
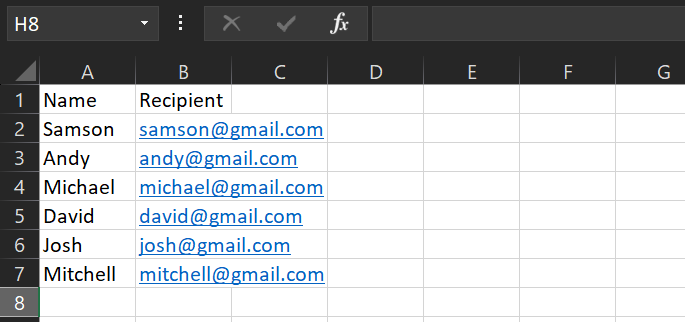
- Go to Excel and configure your data on a new Excel spreadsheet, as shown in the following screenshot.
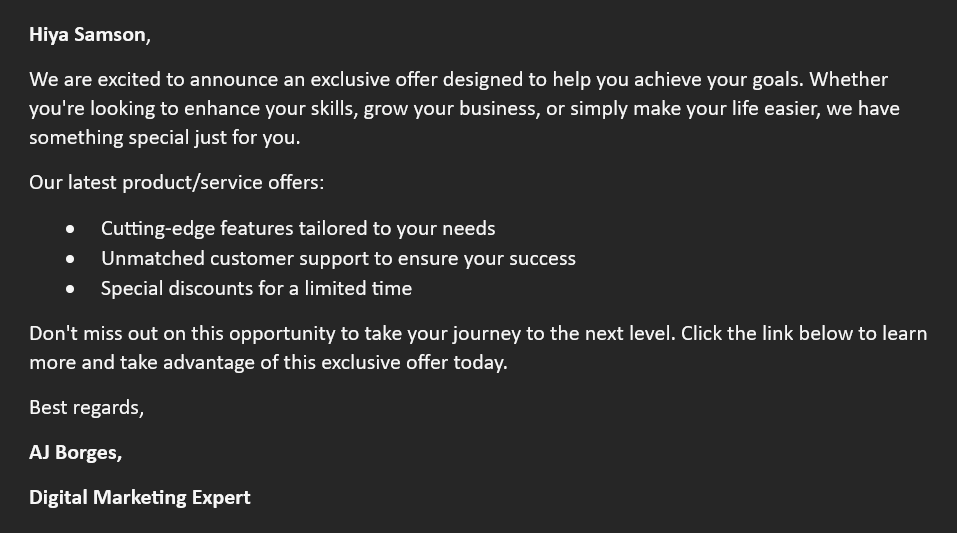
- Save this spreadsheet. Now, open a new Word document, and start drafting your email body as shown below.
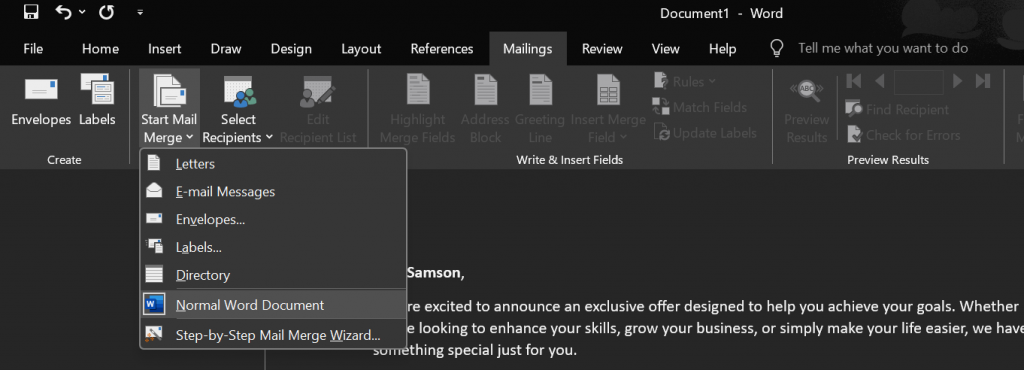
- Next, navigate to Mailings and click Start Mail Merge. Select Normal Word Document.
- Then go to Select Recipients. Select Existing List.
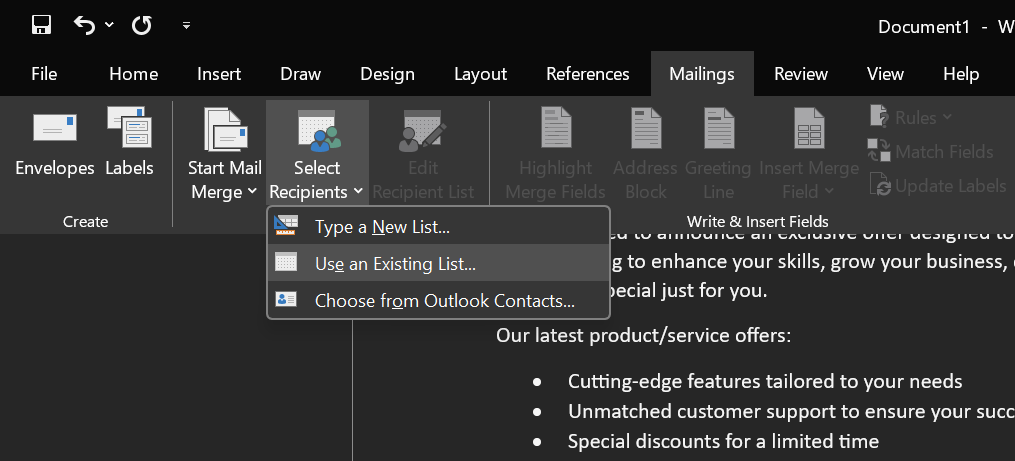
- Now select the Excel spreadsheet you saved a few steps back. Click OK.
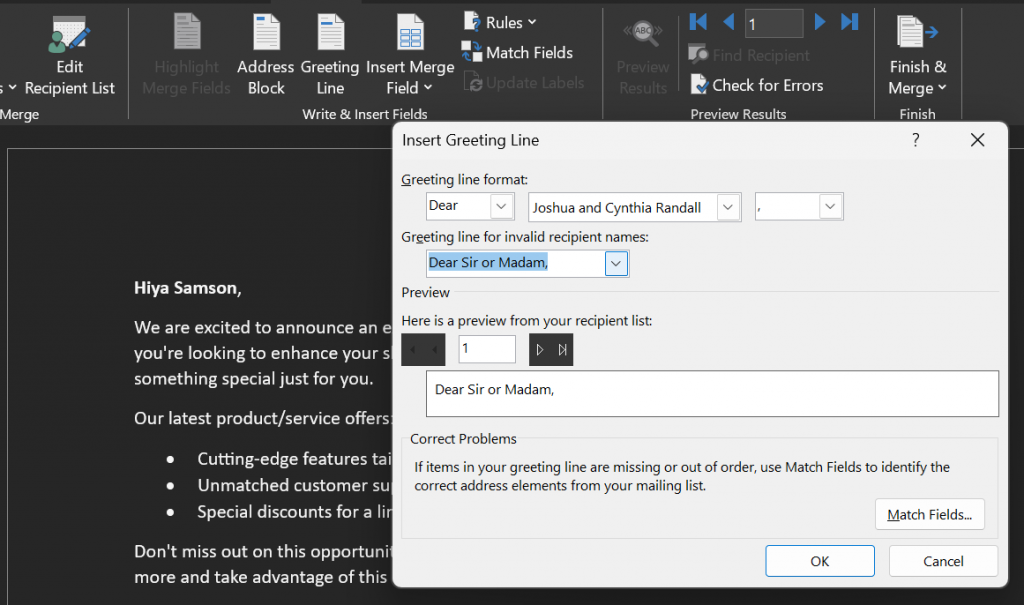
- You should see new tabs on the ribbon, such as Address Block, Greeting Line, and Insert Merge Field. Select the first line of your email body, and then select Greeting Line, as shown here. Fill the necessary fields, and click OK.
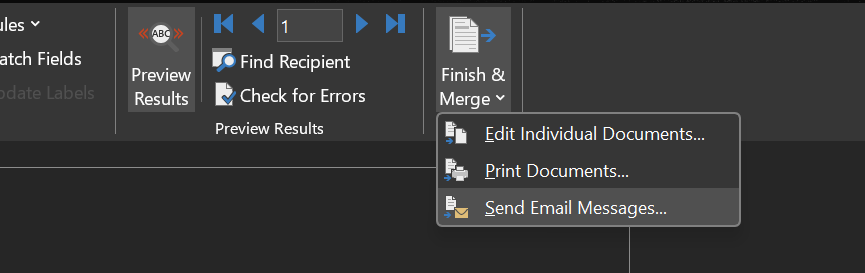
- If you need, you can preview the new email by clicking Preview Results. Once you’re satisfied with it, navigate to Finish & Merge. Click it, and choose Send Email Messages from the dropdown. Just like in the following image.
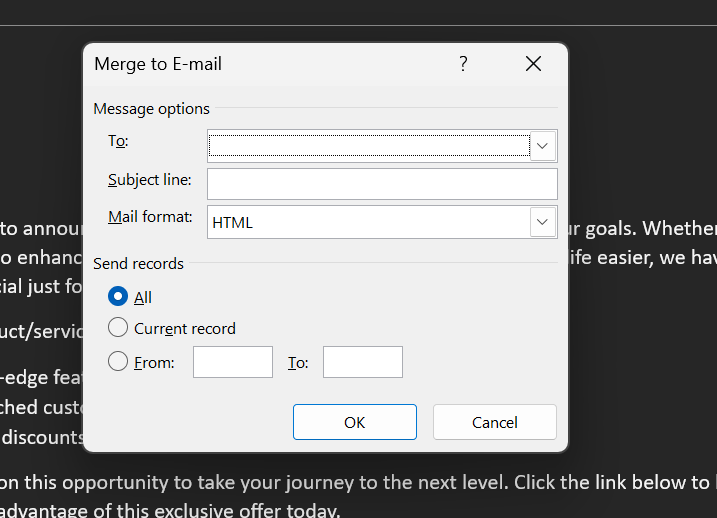
- The Merge to E-mail popup will appear, asking you to configure the email data. Add the subject line. You can choose any of the three options, All, Current Record, or a range. For the purpose of our article, we’ll select All. Click OK.
Outlook will now send your email to all the configured recipients in the Excel spreadsheet.
Now you’ll learn how to implement mail merge in Outlook with attachments.
2. Download the MERGE TOOLS ADD-IN.zip.
Download the .zip file here. Why? Because the mail merge feature in Outlook cannot attach files to emails by default. Therefore, you need to use third-party add-ins which extend the mail merge functionalities in Outlook.
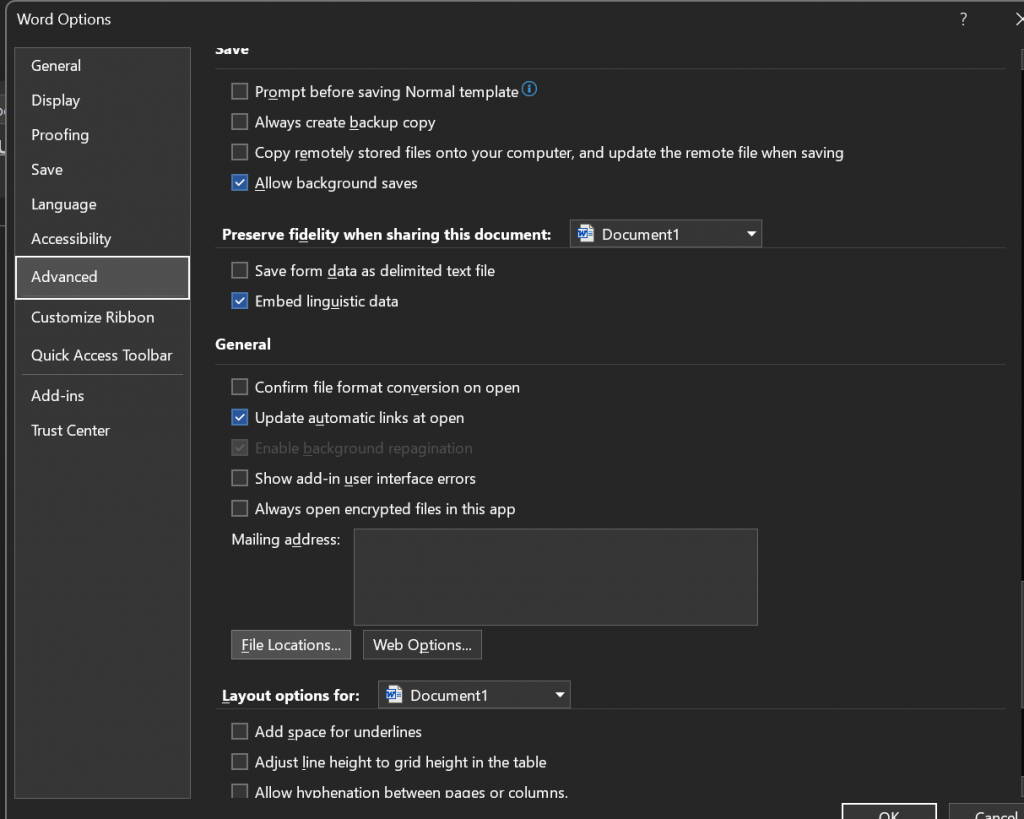
Once you download the .zip file, pull out the content. Open a Word document. Navigate to File, and click Options as shown in the following grab.

3. Go to File Locations
Navigate to Advanced. Select General, and click File Locations.
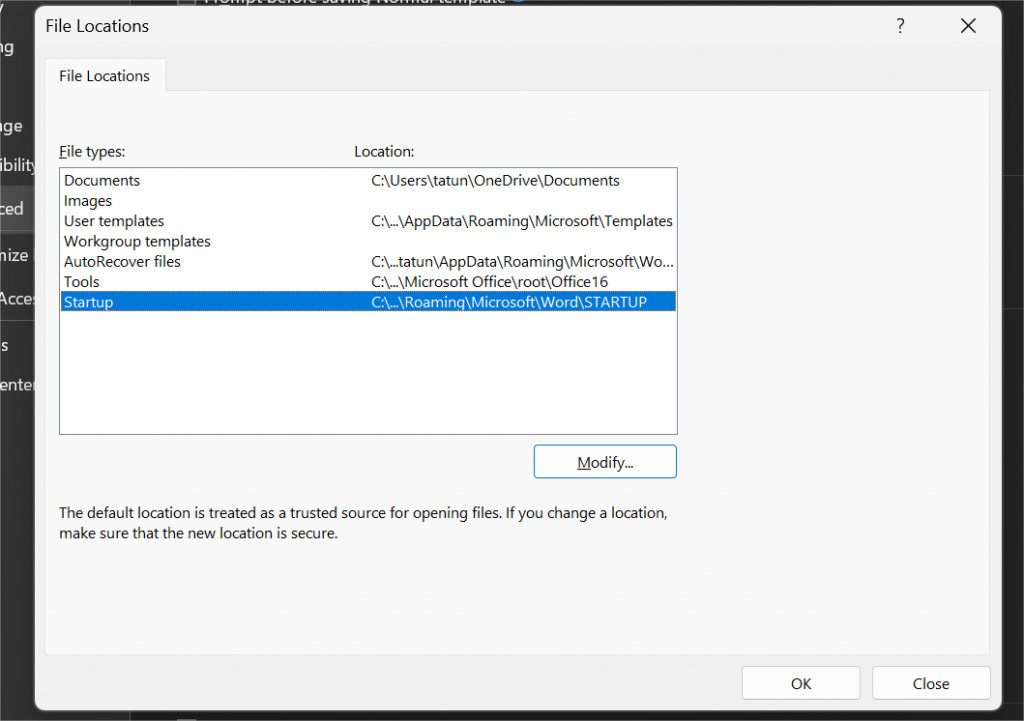
4. Select ‘Startup’
In the File Locations dialog box, select Startup, and then click Modify. (Startup is where Word stores add-ins. As soon as you open a new Word document, these add-ins are automatically made available.)
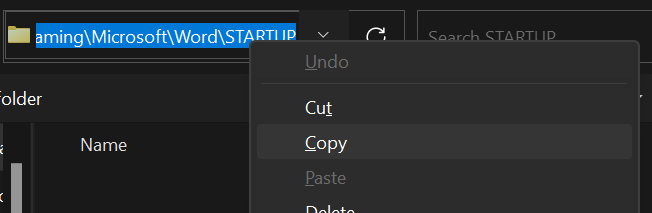
5. Copy the folder address
Clicking Modify will open the File Explorer from where you need to copy the address of the folder where the downloaded .zip file is located.
Now open File Explorer once again, and go to the folder where the .zip file is located. Select the file named MergeTools-2022.
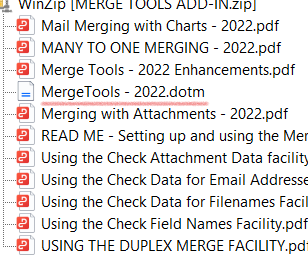
Having saved the file in the Startup folder, you’ve successfully configured the Merge Tools add-in into Word. Now you are ready to add attachments.
6. Create ‘Attachments’ column in Excel
You can name this column whatever you want. Remember, we’re talking about the original Excel spreadsheet here. The new column will be third, alongside the columns for recipient name and email address.

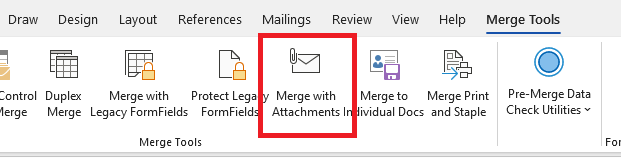
7. Select Merge with Attachments in Word
Open the original Word document where you drafted the email body. Navigate to Merge Tools, and select Merge with Attachments as shown in the image below.
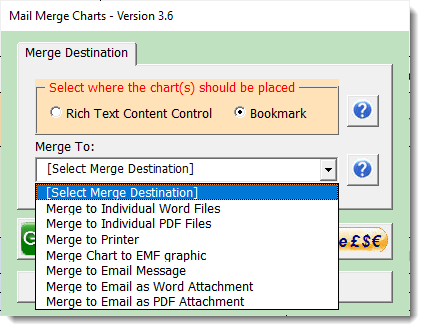
8. Select ‘Attachments’
On clicking Merge with Attachments, the dropdown will show the Attachments option. Select the option and click Add. Next, go to the Merge Destination dropdown and select Merge to Email Message as shown in the following screenshot.
You should next see the Merge to E-mail popup once again, but this time with additional fields for CC and BCC. Fill the remaining fields, choose All, and click OK.
Voila! You have successfully configured Outlook to send your personalized emails with attachments.
Read more: Outlook Email Rendering Issues and Hacks to Save the Day
Take Advantage of Five-star ESP Support!
At Email Uplers, we handle everything from email template integration to ESP migration. Our team of experts is trained in over 50 ESPs, ensuring seamless transitions and optimal performance. As official partners with Salesforce, Mailchimp, Klaviyo, and Braze, we bring specialized expertise to every project. Get in touch with us today to take your email marketing strategy up a notch.
Susmit Panda
Latest posts by Susmit Panda (see all)
Cold Email AI Tools: 4 Handy AI Cold Email Writers
Step-by-step Process to Launch Your First Email Campaign with Salesforce Marketing Cloud