
If you are a part of the email community (no matter your designation), at one point or the other, you’d have definitely picked up a conversation about Mailchimp with your colleagues- that’s just how ubiquitous it is in this field. Mailchimp is an extremely feature-rich platform, and at first glance, it might overwhelm the uninitiated. But, once you habituate yourself with its ins and outs, you can drive your email campaigns to astounding heights of success.
In this blog, we aim to introduce you to a host of tips and tricks that will allow you to make the most of this incredibly powerful platform. Whether you are an industry expert or a complete beginner, you are sure to find something handy here!
Keep Your Email Lists Clean
How you maintain your email list goes a long way towards determining the success of your email marketing campaigns. It lets you identify and weed out inactive and uninterested customers, thereby improving your deliverability and engagement. Remember, Mailchimp’s rates are directly proportional to the number of contacts on your list. Hence, you wouldn’t want to bloat it unnecessarily. To get the most out of Mailchimp, ensure that each and every subscriber on your list has been added with their explicit consent and is kept constantly engaged with relevant content.
Mailchimp allows you to create separate lists; however, keep in mind that no two lists are connected. That means if you have a certain contact present in multiple lists, every instance of it will be counted separately and added to the overall subscriber count (so, if the same contact appears in 5 lists, your subscriber count will be 5 and not 1). This is why you have to be extremely mindful while curating your Mailchimp lists.
Additionally, try to keep these tips in mind before creating a list on Mailchimp:
- While adding existing and old customers to your mailing list, check how frequently they have interacted with you over the last few months. If a contact’s activity feels too irregular, we suggest you think long and hard before adding them.
- It is better to first add those names to the list who have voluntarily expressed an interest in being there. Remember, this does not include people who have filled out your “Contact Us” form for queries or follow your brand on social media platforms.
- Prior to uploading your mailing list, you’d ideally want to confirm that all the email addresses on it are still active. To do this, consider running your list past an email verification service. Subsequently, this will diminish the probability of your emails registering high bounce rates.
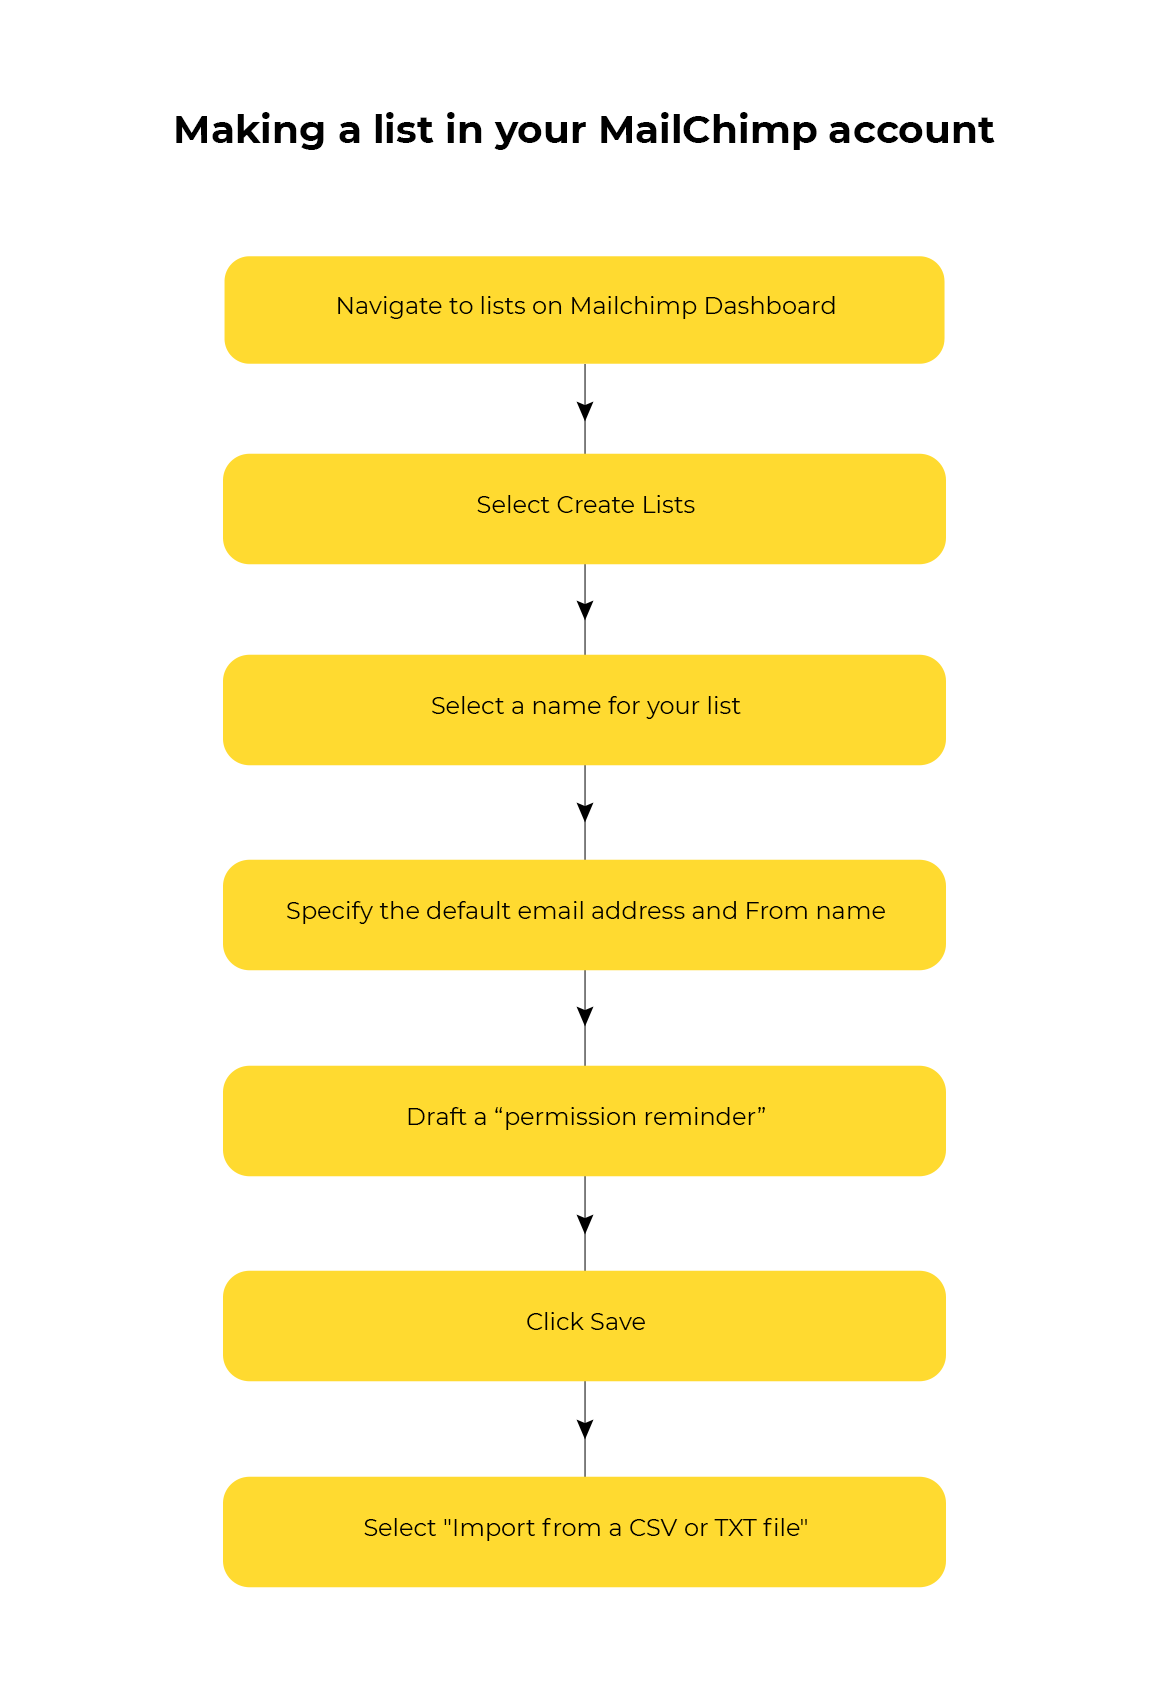
Once you’ve curated your mailing list, compile them in a CSV file before uploading it to Mailchimp. Given below are the steps you need to follow to make a list in your Mailchimp account:
- On the Mailchimp dashboard, navigate to Lists. Click it and select the Create Lists button in the upper-righthand corner.
- The List details page will appear on your screen. Here, you need to select a name for your list and specify the default email address and From name. Additionally, you also have to draft a brief “permission reminder,” which will inform your recipients how and why they are getting emails from you.
- Once you are done, click Save.
- To wrap up the process, select the “Import” option and then choose “Import from a CSV or TXT file.”
While making a CSV file isn’t the only way to import your contacts into Mailchimp, it is arguably the most convenient route.
Amass More Subscribers Using Signup Forms
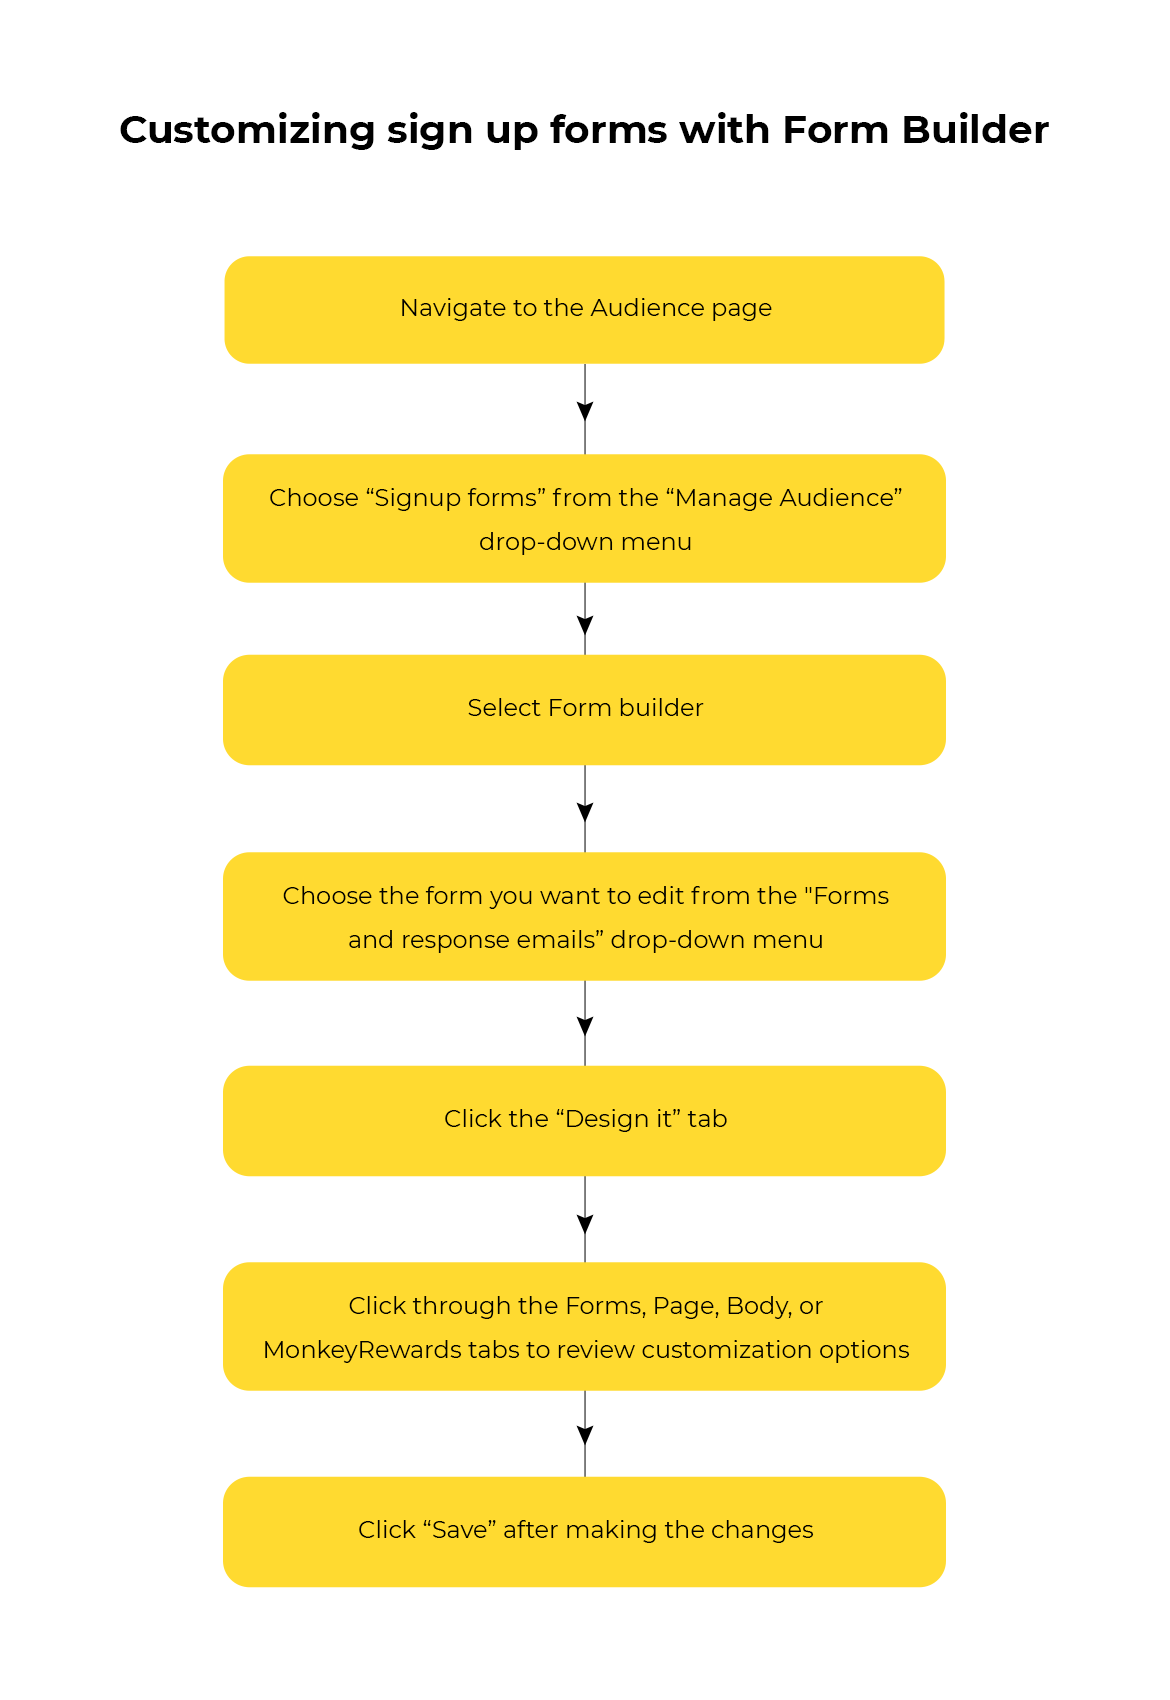
For every list that you build on Mailchimp, it automatically generates a signup form corresponding to it. Subsequently, you can utilize it to bring in more subscribers. The best part about these forms is that you can customize them as per your requirements with the help of the Form Builder module. Below, we illustrate the steps for the same.
- Navigate to the Audience page.
- At the top right, you will see a “Manage Audience” drop-down menu. Click it and then select “Signup forms” from the options that appear.
- Next, select Form builder.
- Click the drop-down menu that reads “Forms and response emails.” From the multiple options that appear, choose the form you wish to edit.
- Now, click the “Design it” tab.
- If you want to review the customization options, click through the Forms, Page, Body, or MonkeyRewards tabs. Here, you can make any changes to your signup form’s colors, styles, and fields. The changes are saved automatically by Mailchimp.
- Once you are satisfied with the design, click “Save.” Close the window once finished.
This form can be put up on your website, shared across your social media channels, and on other platforms you deem fit.
Build Pixel Perfect Templates With The Drag And Drop Editor
To design a stunning custom email template, you need to have either of the following:
- Impeccable coding skills
- Enough budget to source out the task to an expert
“What if I don’t have both?”- if that’s the question that just crossed your mind, don’t worry. Mailchimp’s drag and drop editor can come to your rescue.
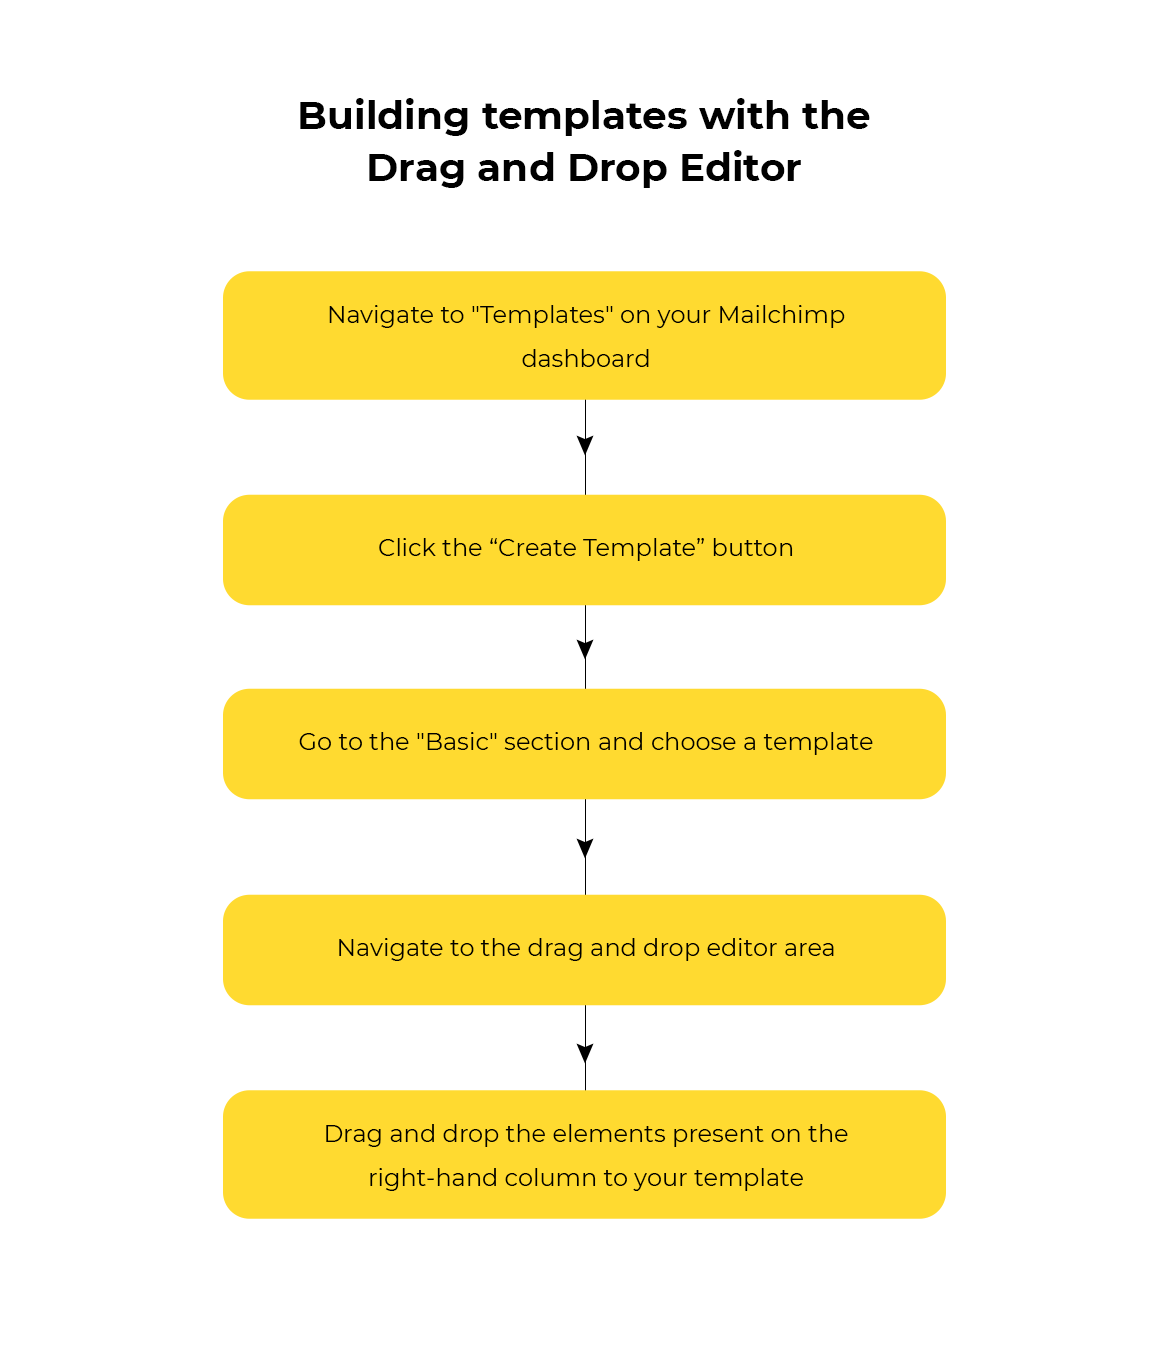
While it does have its own limitations and might not be able to do full justice to your imagination, it will certainly power you to put together a more-than-decent email template. To build customized Mailchimp templates, follow the steps listed below:
- Navigate to “Templates” on your Mailchimp dashboard. In the top right corner, you should be able to see a “Create Template” button. Click it.
- This will land you on the expanded Templates page. Here, you can browse through the gallery of predesigned templates and select one.
- Alternatively, you can build your own template too. Go to the “Basic” section and choose a template. Then, navigate to the drag and drop editor area.
- On the right-hand column, you will see a host of different elements. To add them to your template, all you have to do is a simple drag and drop maneuver.
- Tinker around with the elements until you have a template you’re satisfied with.
Yes, that’s all. That’s how easy it is to build Mailchimp email templates from scratch!
Make Use of the Preview and Test Tool
Given that mobile clients account for nearly 41.6% of email opens, it is imperative for your email design to be mobile-friendly. Mailchimp email marketing tool features include the Preview and Test Tool, which allows you to check whether your emails are mobile-optimized before sending out your campaigns. Hence, before sending out your campaigns, you can make use of Mailchimp’s Preview and Test Tool to ensure that your emails are displayed properly on mobile devices.
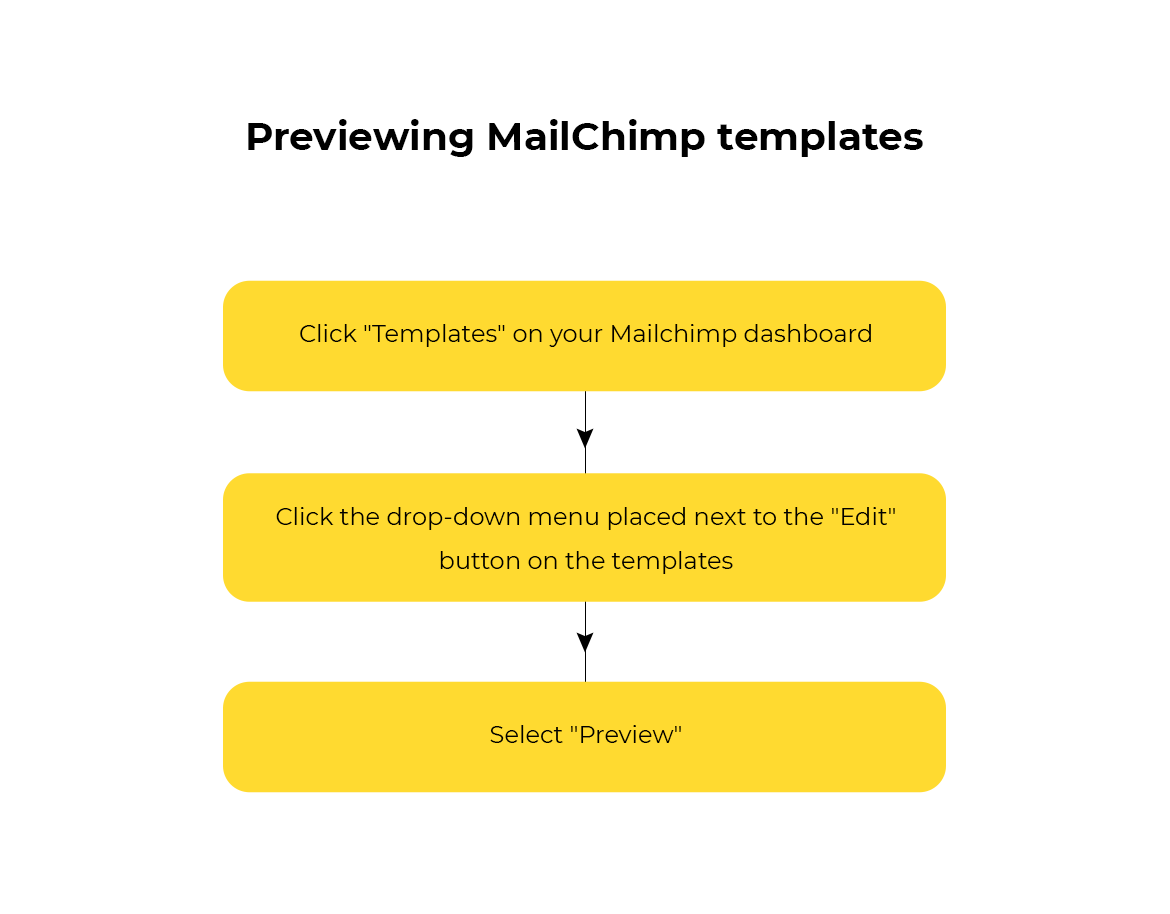
To preview Mailchimp templates, you need to:
- Click “Templates” on your Mailchimp dashboard.
- Click the drop-down menu placed adjacent to the “Edit” button on the templates.
- From the options that appear, choose “Preview.” You will be able to see how your email will appear in your recipient’s inbox.
Mailchimp’s Preview and Test tool lets you enhance the readability of your campaigns, amplifying your engagement, and ultimately conversions, in the process.

Ace Your Timing With Send Time Optimization Feature
Emails with the wittiest copies and most alluring visuals will still fail to gain traction if they haven’t been sent at the right time to your target audience. The most challenging aspect about email timing is that it is extremely subjective- no matter how many articles and studies you read about it, you will never get it right unless you test out different days and times with your own audience. Thanks to Mailchimp’s Send Time Optimization feature, that task becomes a lot easier. Make the most of this feature that takes into account your subscribers’ clicking history activity to determine the time slots when they are most likely to engage with your communications.
Stay Ahead of the Curve With Automation Workflows
Mailchimp allows you to define several different automation workflows, letting your business send you the right message at the right time to your customers. These include sending welcome emails as soon as they sign up, transactional emails upon completing a purchase, targeted product recommendation emails based on their past purchases, and the like. With automation, you are not only able to amp up the relevance of your messages but also save a lot of your precious time.
Wrapping It Up
Once you learn your way around Mailchimp, you will soon realize that this platform is a gift that keeps on giving. We hope the tips discussed above help you utilize this immensely powerful tool to the fullest and place your campaigns head and shoulders above the rest.
Rohan Kar
Latest posts by Rohan Kar (see all)
Expert Interview Series: Part 5
8 signs that indicate you need to hire a dedicated HTML email developer