Cinemagraph is a unique tableau with meticulously added cinematic effects. It is truly a revolution among revolutions. Hope you have read about the popularity and potential of cinemagraphs in email in our previous post. Uplers take you a step ahead now with insights into how to create a cinemagraph.
Let’s start!
Creating a Cinemagraph – The Prerequisites
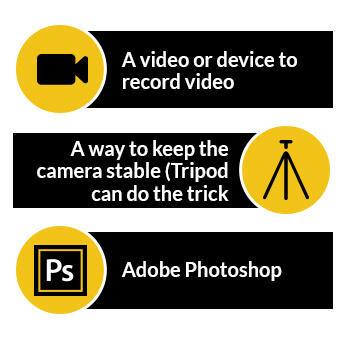
Now, how will you proceed to prepare the cinemagraph?
1. Look for a great idea
- An idea is the first step to creating a cinemagraph. Look around for an idea and craft a plan.
- Choose your subject and the action that you want to capture in the video.
- Figure out the parts that should move and the parts that should remain still.
Make sure you keep minimum movement in the cinemagraph and maintain its finesse.
An idea gives way to another idea. Here are some that can inspire you for more.
- Steam coming out of a mouthwatering dish: Food Industry
- Convey birthday wishes through a delicious cake with a candle flame in action: Retail/Ecommerce Industry.
- A particular scene from a show for promotion: Telecommunications Industry
- Shimmering on an accessory: Fashion Industry
2. Record the video
Once you have zeroed down on an idea, go ahead and record the video. So, how do you record a good video?
- The primary requirement for recording a good video is having sufficient light. If you shoot out in the open, you’ll easily get good lighting.
- Keep the recording stable with the help of a tripod. While you are recording the video, your subject should have the least possible movement.
- You should record your video for 10 to 15 seconds to ensure that you can have a working space in the video with steady movements in the subject.
3. Import and clip
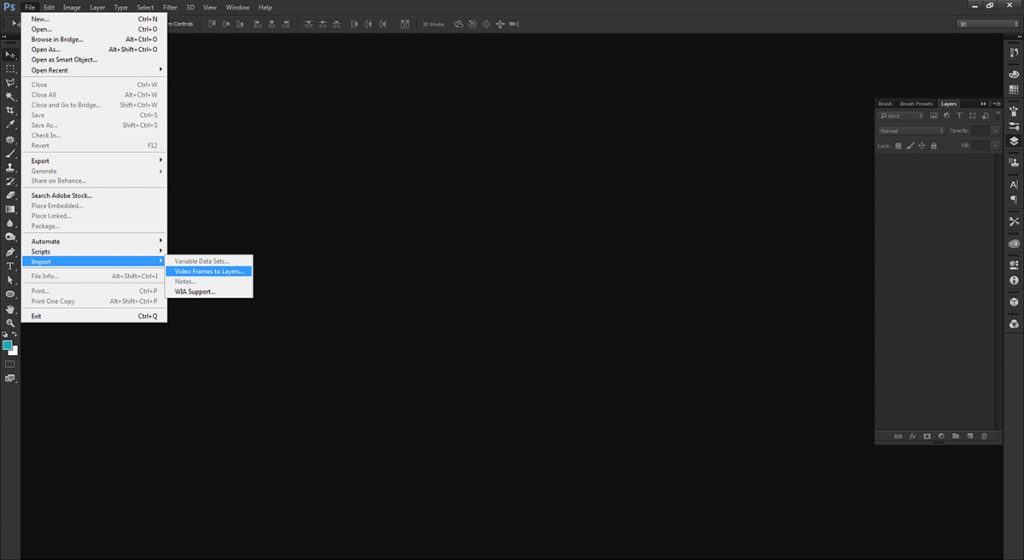
Import the video to Photoshop by choosing “Video Frames to Layers” in the “Import” option of “File” menu. Make sure you import only the necessary part of the video.
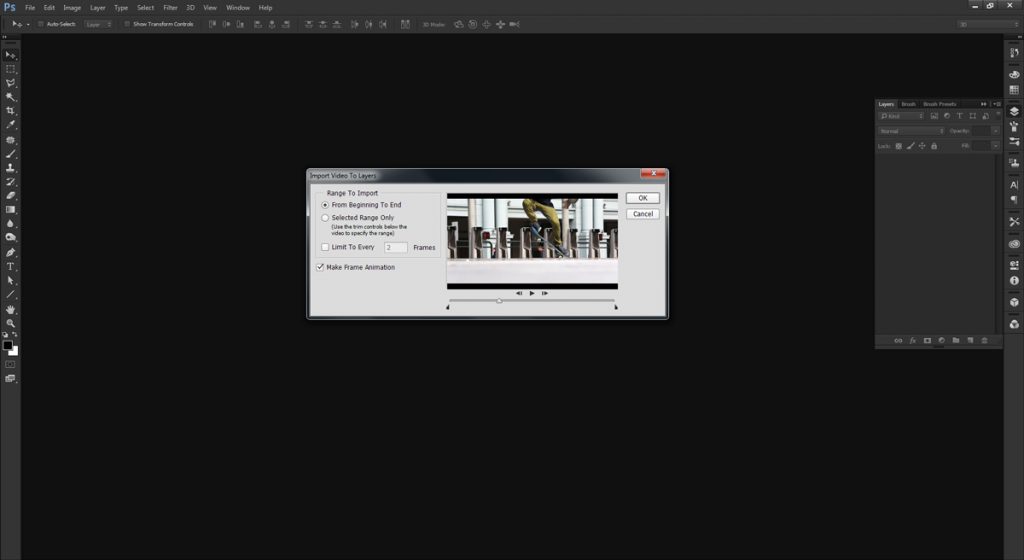
You will see a dialog box that lets you clip the video.
This is an important step because it allows you to cut down the number of video frames to work on. It will give you an option to limit the video frames too, but it is advisable that you do not limit the frame rate if you want enough frames to work on.
You should be able to see the Timeline when you choose “Timeline” in the “Window” menu. However, make sure that you do not mix it up with the Video Timeline of Photoshop.
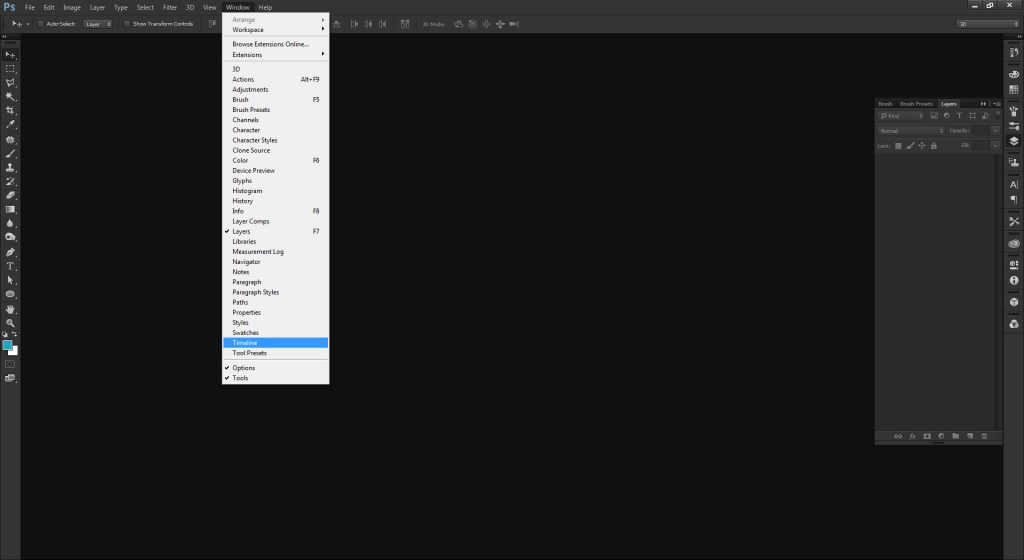
After the video is imported, all the imported frames in your Timeline will be visible to you at the bottom of the Photoshop window.
Go to the Timeline and select the speed at which you want your video to play. Make the right choice according to the kind of cinemagraph you wish to create. It should neither be too slow nor too fast.
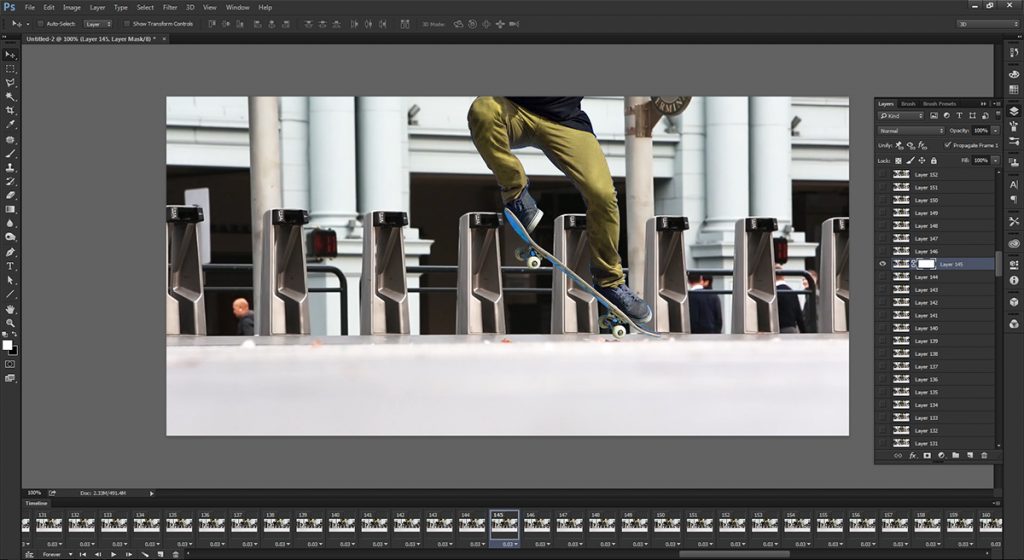
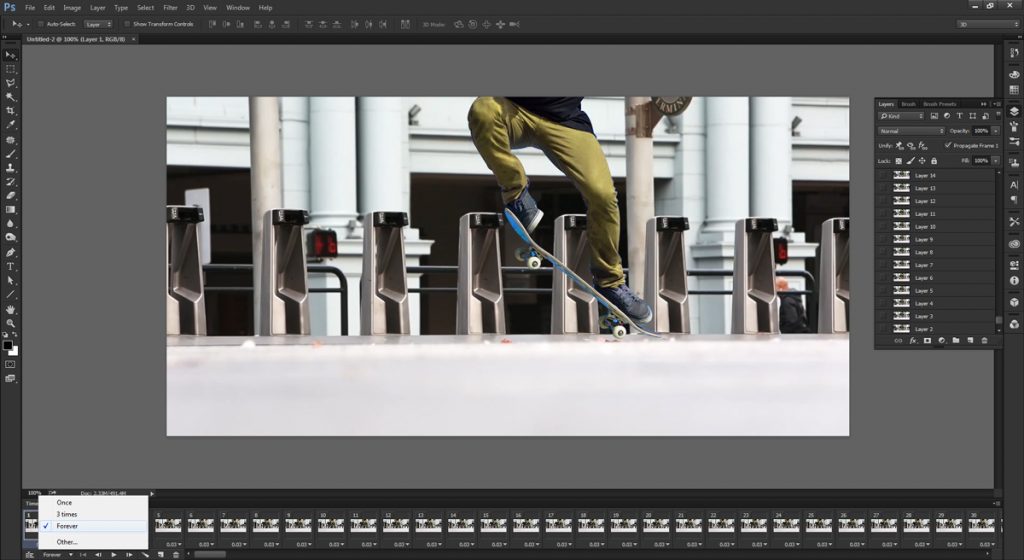
To create an infinite loop, set the Timeline to repeat “Forever”.
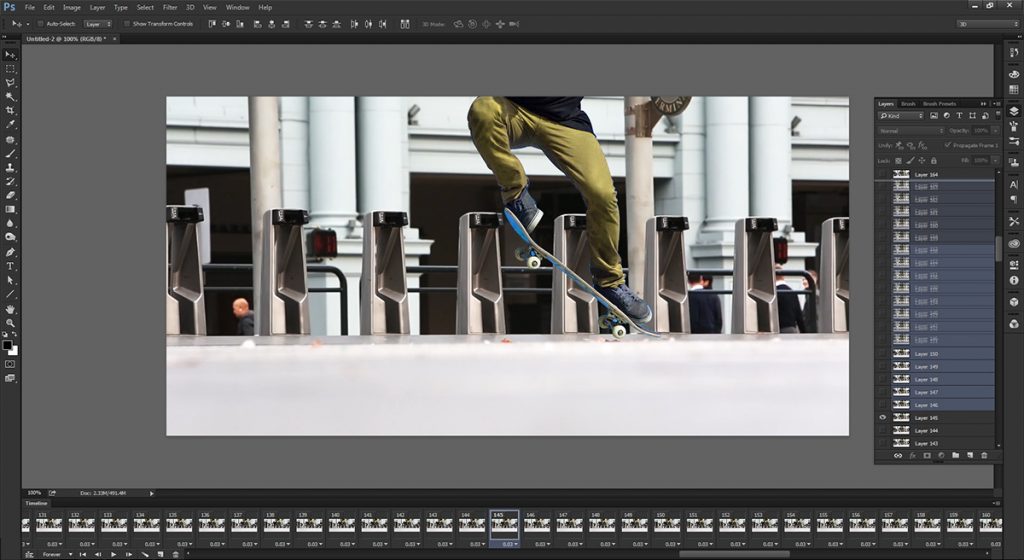
The next step is to play the video in Photoshop and delete the frames other than the ones you wish to show.
4. Create a mask
Assuming that you have a video just the way you wanted it to be, let’s proceed to creating a cinemagraph.
You will need a layer to mask the layers on each frame and cover up all the areas except the one where you need movement.
Choose the first frame in your Timeline, and in the Layers panel, duplicate the layer that you can see in the frame. Bring it up above all the remaining layers ensuring that it’s visible. This is known as “layer mask”. You can rename it the way you want.
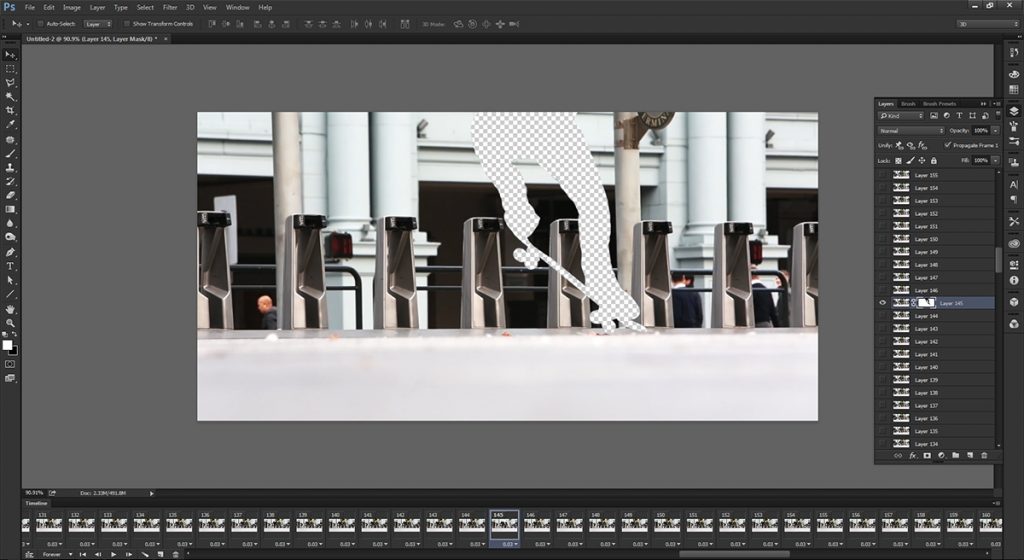
At this point of time, your video will not show any movement as the “mask” has covered it. This implies that you have frozen your video. To create a cinemagraph, all you need to do is unfreeze the area.
5. Edit the mask
Go to the layer panel and select the mask layer. At the bottom of the panel, you will be able to see “Add Layer Mask” icon.
Just select the new white mask layer, and not the image layer.
Start to paint the areas where you wish to see movement. Use Brush tool rather than the Eraser tool. Contrary to using Eraser, you can easily edit masks if you have masked a wrong area by mistake.
6. Determine whether you want to reverse
After you are done with masking, you should decide whether you want to reverse the cinemagraph.
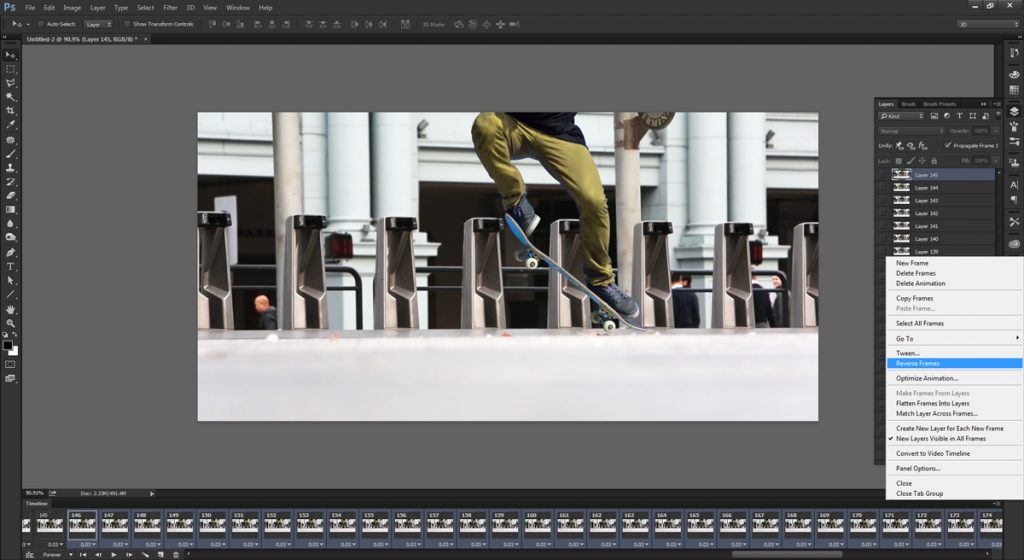
If you decide to reverse the cinemagraph, you can select the frames in your Timeline and then reverse them after duplicating the frames.
7. Export the cinemagraph
Go to “File” menu and choose the “Save for web” option to export the final cinemagraph. There are several options in the dialog box out of which the most important one is to save your file in GIF format. Before saving, resize the image so that it performs well on your website or blog from the “Image Size” option. In case you are unable to resize the image to an optimum level, you can even do so with the help of online GIF resizing tools.
You can preview the GIF in the dialog box and click “SAVE” only after you feel content with your creation.
BINGO! You can flaunt off your original cinemagraph now!
How to add the cinemagraph in email?
After you are ready with the cinemagraph, follow the steps given below to include it in your email.
- Upload the cinemagraph to the server that usually stores all your images.
- Copy the full URL of that file.
- Use the “img src” HTML code to insert the source code of HTML as below.
<img src=“/wp-content/uploads/yourfile.gif”>
- The last step is to make sure that your cinemagraph works well in the email by testing the email campaign.
- Keep in mind that Outlook and Lotus email clients display the first frame of the animation as fallback. You can include a “View in Browser” link in the email so that those subscribers don’t miss out on seeing your awesome cinemagraph.
Except Outlook and Lotus, all the email clients support cinemagraphs in email.
Are you looking to try out interactive emails and integrate cinemagraphs in them? Contact us.





Kevin George
Latest posts by Kevin George (see all)
3 Important Features All ESPs Must Have
Surprise your Subscribers with Collapsible Carousel in Emails