
The importance of segmentation and personalization is not lost on marketers. However, implementation varies from one ESP to another. This is where companies and brands usually hit a roadblock.
It’s understandable. Naturally, no two ESPs are alike in their proprietary offerings, data integration methods, and implementation logic. Terminology is arguably one of the biggest hindrances. Add to that the problem of regular platform updates. It’s hard to keep up, unless you’re fully invested.
But you don’t have the time to read through every ESP documentation. As a result, if you’re failing to implement proven marketing strategies (e.g. segmentation and marketing), it’s naturally depressing.
Now, we’ve been expanding our portfolio over the years, and today we have experts proficient in more than 50 ESPs, Marketo being one of them. In this geek guide, we will take you through the ins and outs of Marketo segmentation and personalization. Don’t worry, it’s not exactly rocket science.
Marketo Segmentation: Defining Segment Rules
You must define segment rules before you can do segmentation in Marketo. The purpose of defining segment rules is to categorize your contacts into “different mutually exclusive groups.” This means that contacts can exist in only one group at a time so that there’s no overlapping. Here’s how to do it in Marketo:
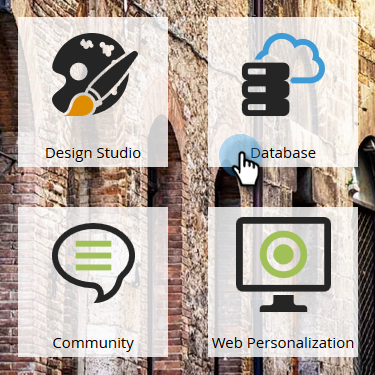
- Log in to your Marketo account and go to Database.
- Click Segmentation in the dropdown, and choose a Segment.
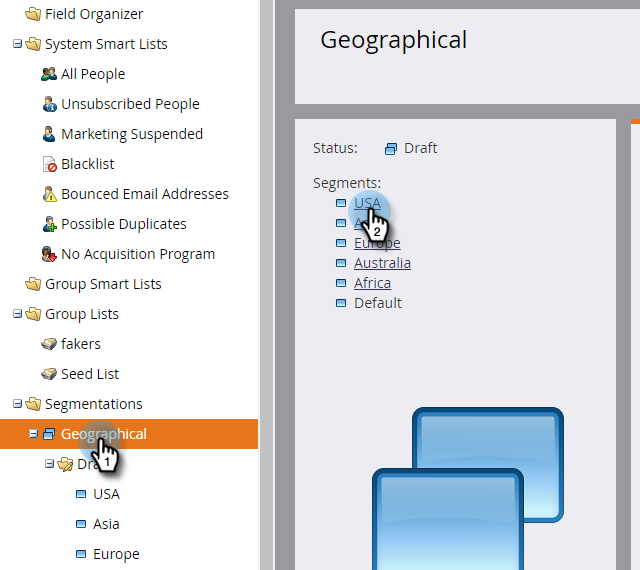
- Click Smart Lists to add filters.
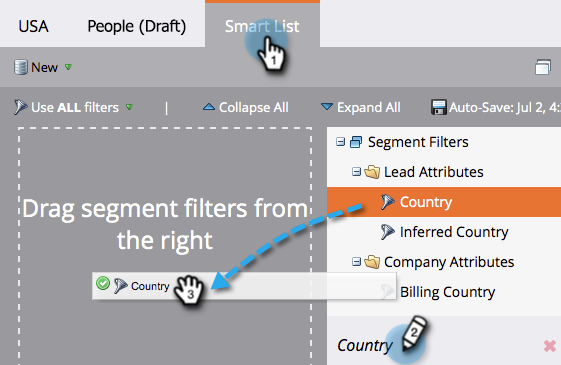
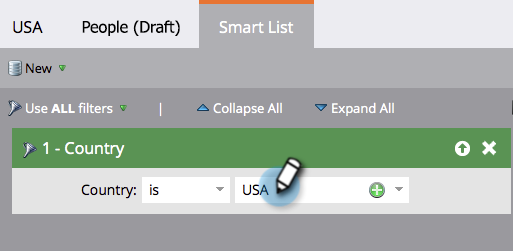
- Fill in the filters with the right values.
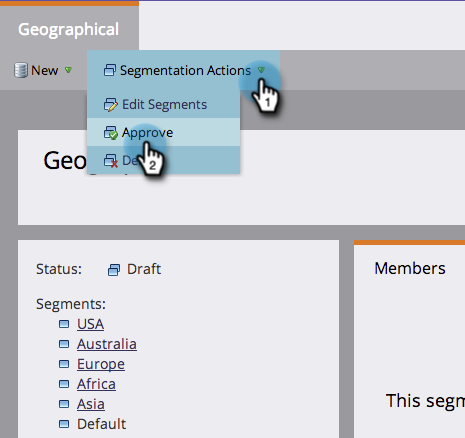
- Click the People (Draft) tab to view contacts that you think are eligible for this segment.
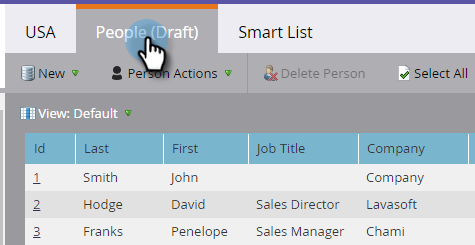
- Select the Segmentation Actions dropdown, and click Approve.
Marketo Segmentation: Implementation
We have successfully defined the segment rules. Now it’s time to implement segmentation in Marketo for real. Follow these simple steps:
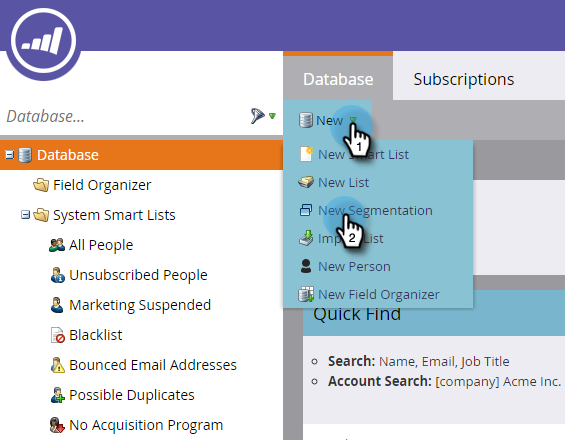
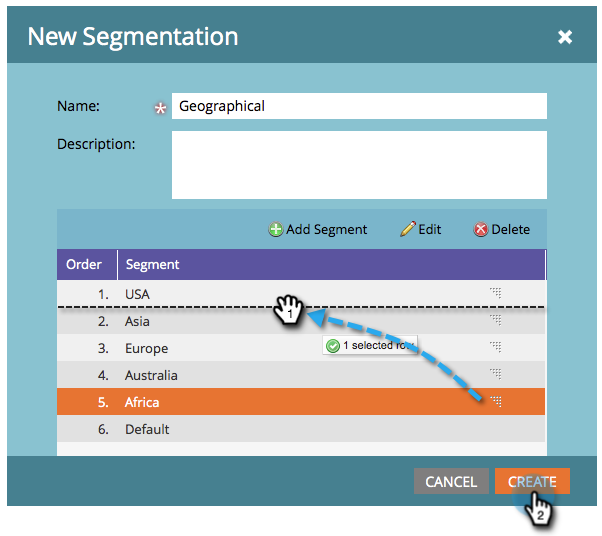
- Go to Database. Click New. From the dropdown, select New Segmentation as shown below.
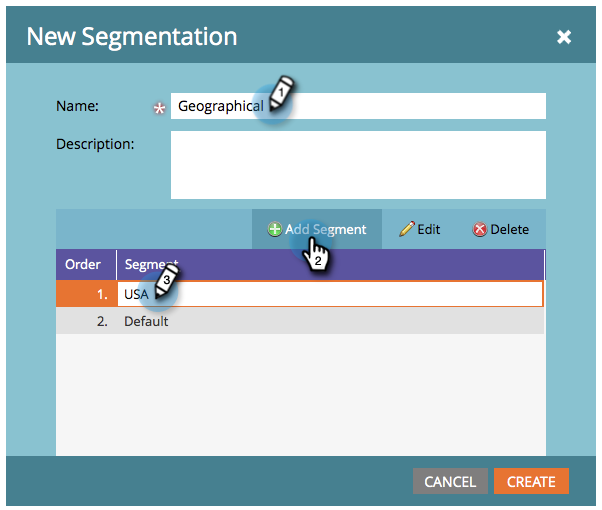
- Enter a Name. Click Add Segment. Then click Create. You can add up to 100 segments.
- You can now drag and drop the segments to establish their priority. That done, click Create.

Marketo Email Personalization: Understanding Tokens, Dynamic Content, And Velocity Scripting
Email personalization in Marketo depends mainly on tokens, dynamic content, and velocity scripting. Let’s start with tokens.
Tokens
Tokens are simply placeholder variables. Marketo offers a host of tokens, such as Person tokens, company tokens, campaign tokens, system tokens, trigger tokens, custom tokens, etc.
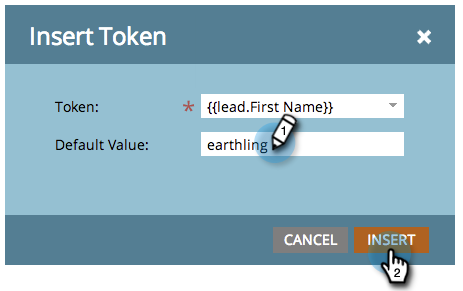
Every token you use should have a default value. In other words, if you use a First Name token, its default value will be the relevant contact’s name. In this way, you can personalize a single email, so that every contact in a segment will receive the same email addressed to them individually.
In the following example, the default value is “earthling.”
Dynamic Content
But tokens alone are not the answer. Without dynamic content, personalization is useless. In Marketo, you can add dynamic content blocks to your email. Learn how to implement dynamic content in Marketo in the following steps:
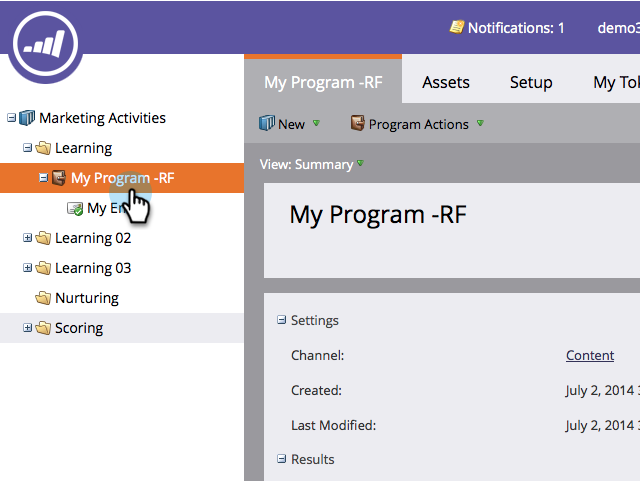
- Log in to your Marketo account, and go to Marketing Activities, as shown in the following image.
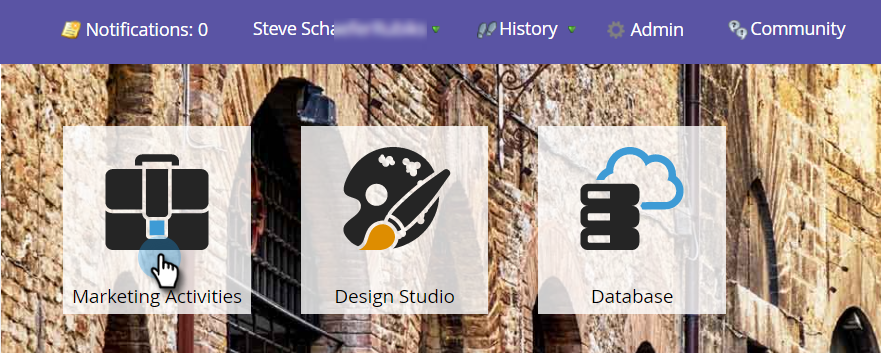
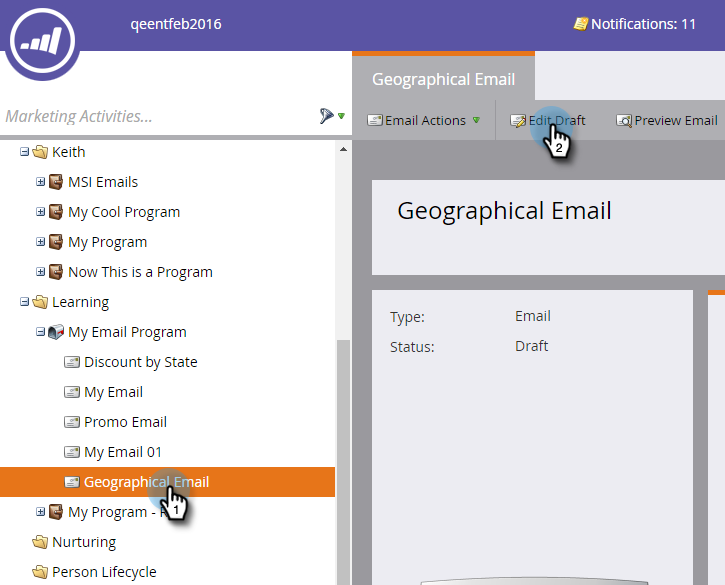
- Choose the email where you want to use dynamic content. Select Edit Draft.
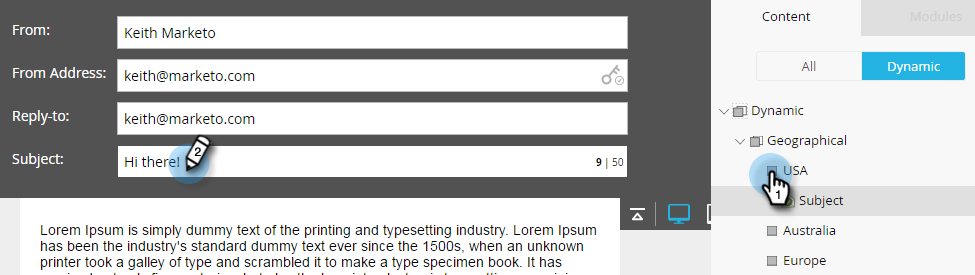
- Suppose we want to make the subject line dynamic. Click inside the field, and choose the Make Dynamic option.
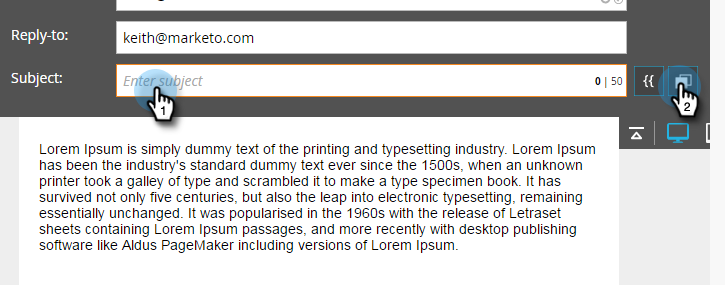
- Now you need to apply segmentation. In this example, segmentation is by geography. Once done, click Save.

- Now it’s just a matter of applying Dynamic Content. So click your segments, add the subject line, and then repeat for each segment.
Now seems a good time to introduce another quintessential Marketo feature called snippets. Snippets are not strictly necessary for Marketo email personalization. But snippets come in handy when you want to personalize reusable elements in your email.
For instance, you can create an email signature snippet that will change dynamically based on the recipient’s location. You create a snippet once, then reuse it in multiple places. This means you can also update a snippet centrally. Update it once, and it will be updated across your digital marketing assets.
“Tokens” and “snippets” might sound synonymous, but they’re two completely different things in Marketo. While tokens are placeholders, snippets are reusable blocks of HTML content that may include tokens, images, text, etc. So a token acts as a data reference, and a snippet is a content entity.
Velocity Scripting
Last but not least, for advanced personalization, Marketo offers Velocity scripting. This is mainly development-oriented. It allows the developer to write code snippets (different from snippets previously discussed) that can manipulate data and generate content dynamically within an email.
For instance, if you need to send out an email solely targeted at active subscribers, not contacts or potential subscribers, your assigned developer can write a Velocity script within an email to check the “hasActiveSubscription” field. If the field is “true,” then the script will show the content; else, it will hide it.
Take another example. Say, you want to personalize product recommendations. The Velocity script will now check the “lastPurchasedProduct” field. If it is “true,” the script will access the subscriber’s purchase history and recommend complementary products; else, no recommendations.
If your development team needs help, they can go through Marketo’s Email Scripting documentation. Meanwhile, here’s how to implement Velocity scripting in Marketo:
- Go to Marketing Activities in the Marketo dashboard. Then select a program as shown below.

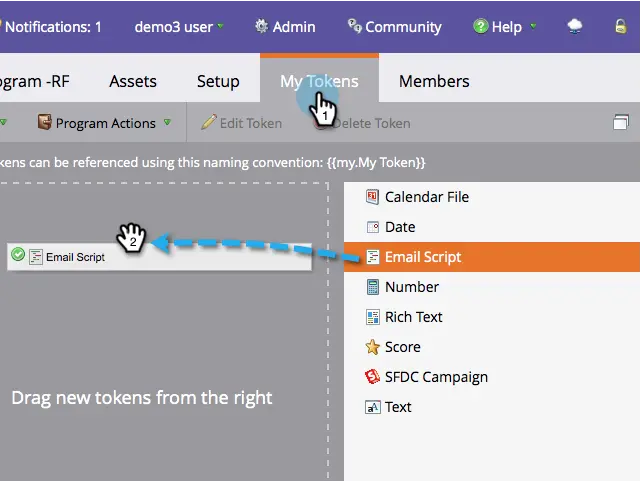
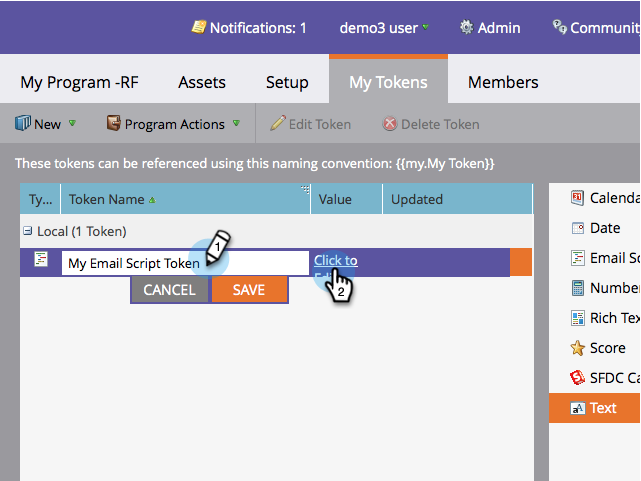
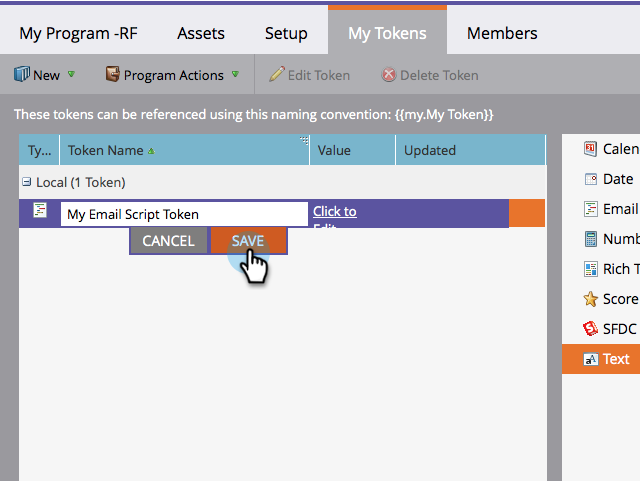
- Go to My Tokens, and drag in an Email Token.
- Give a name to your token, then click to edit its content.
- You should see the following dropdown on the right. Drag in your token in the way shown here.
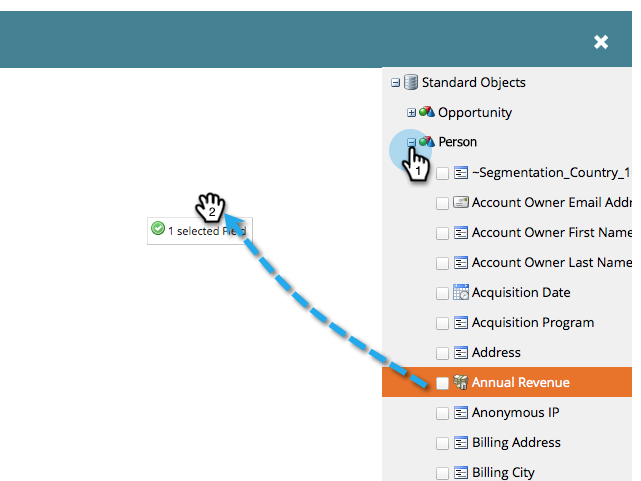
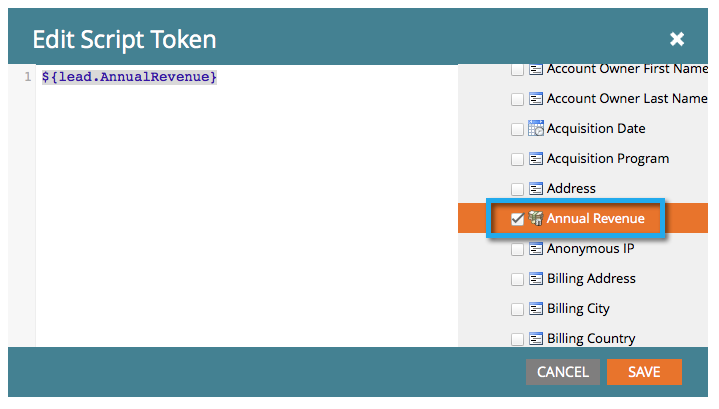
- Now the token is active within the script editor.
- Next, you write the code in Velocity. Once you complete the script, click Save.
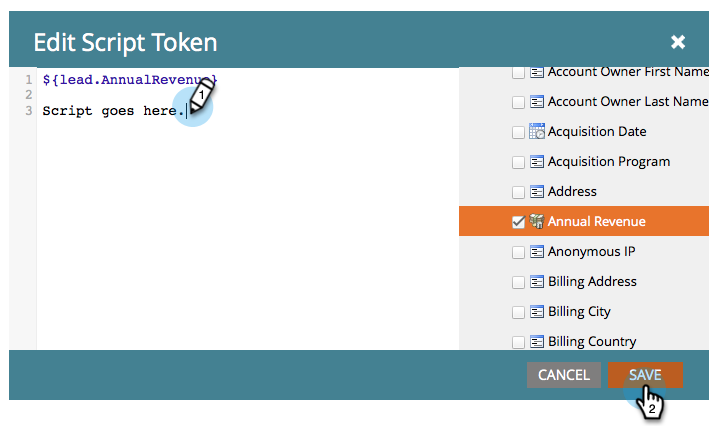
- Click Save again. And you’re good to go!
Closing The Loop: What Next?
Mastering an ESP can be time-consuming. Being good at it is only half the battle; if you want to see results, you should be able to rely on your intuition. Documentation can help, but there are many things a marketer needs to intuit mid-campaign, which are not necessarily found in documentation. It’s a matter of experience.
Not to mention the usual roadblocks such as understanding all features and functionalities of an ESP, campaign complexity, integration challenges, and data management practices.
But you can always outsource your email marketing needs to our ESP-locked experts. Feel free to get in touch with our full-time Marketo-certified team of seasoned, bankable professionals.
Trust us, you’ll save a lot of cognitive as well as financial drain by launching your next Marketo campaign with us.
Susmit Panda
Latest posts by Susmit Panda (see all)
How to Implement Cart Abandonment Journey in SFMC?
Revisiting The Email Marketing Checklists: 9 Fail-Safe Measures to Put in Place