
Eye-popping and engaging email templates form the lifeline of an email marketing campaign, that’s no secret. However, designing one isn’t all that easy. Conceptualizing your email isn’t the same as actualizing it, of course, and the latter leaves many businesses at their wits’ end. Email development is a complex affair, requiring you to have a strong grip over coding and other technical domains to give justice to your vision. And having a seasoned developer on deck, while ideal, isn’t always a feasible option. So, what can one do in such a scenario? Well, our suggestion would be to take the help of an email builder or editor- a tool that lets you create pixel-perfect templates from scratch without any technical know-how. And if the tool in question is the Pardot Lightning email builder, you’ll find your life becoming a whole lot easier.
Any email marketer who has used Salesforce will strongly vouch for the fact that the software is incredibly user-centric. It strives to make even the most complicated of tasks as less intimidating as possible for its users, enabling them to fulfill every single one of its objectives being its mission statement. The Pardot Lightning email builder is nothing but yet another step in that direction. It aims to level the playing field, empowering businesses of all shapes and hues to craft stunning email campaigns in a hassle-free manner, with the help of ready-to-use modules. Today, we are going to take you on a comprehensive tour of this wonderful tool with the view of familiarizing you with its every little nuance and helping you build wonderful Pardot responsive email templates in the process. Ready to set sail? Let’s go!
Pardot Lightning Email Builder Features
Pardot’s Lightning email builder is exciting in every sense of the word. But, don’t take our word for it. Take a look at the features it packs and decide for yourself.
Drag And Drop Blocks
The Lightning email builder contains a variety of reusable blocks called components that can be arranged with a simple drag and drop maneuver to build exciting email marketing newsletter templates. In this way, the tool lets everyone, irrespective of their level of experience and expertise, to realize the email designs gestating in their minds, all with a few clicks! Present as a sidebar menu in the builder’s interface, the components section comprises rich text, images, buttons (sparing you from hard-coding your buttons; you can also modify the button style as desired by playing around with different parameters such as font, color, padding, width, and border radius ), and basically everything that one might required to build a template. To summon a block onto the canvas (which is the designing space in the builder), you simply have to drag it from the menu and drop it there. If you’re unhappy with any particular action during the design process, you can simply undo it, something that was not possible in the classic Pardot email builder. What’s more, you also get the scope to create custom Lightning components or download partner-developed ones from AppExchange.
Images With Salesforce CMS
Now, there’s no longer a need to rely on external file hosting. The Lightning builder allows you to store and fetch images from Salesforce CMS itself, making things incredibly convenient. Additionally, you get the option of adding alt text and hyperlinks. To ensure your emails are accessible, try and write descriptive alt texts. The more clarity your alt text provides, the better the user experience will be for your readers.
Columns And Rows
Pardot’s Lightning email builder does away with the need for coding HTML tables to structure your emails. Here, you can specify the number of columns a block needs to have using a pop-up menu (under the components section). Keep in mind that you can define a maximum of 4 columns.
Mobile Previews
The Lightning builder enables you to toggle between different sized devices and obtain instant email previews for the same. This means that you are free from carrying out email rendering tests, which, as anyone in the email community would tell you, can be pretty time consuming.
Responsive Templates
With more than 50% of people using their cell phones to access emails, it has become imperative for brands to dish out responsive email campaigns for their audience. Salesforce understands this and thus the Pardot email template builder has several mobile-friendly out-of-the-box templates.
Personalization Handlebars Merge Language (HML)
Earlier, one had to make use of “variable tags” which used Pardot’s legacy merge language to effect personalization. Now, the same has to be done through HML.This new merge language is also used in Salesforce Lightning templates such as Service Cloud, Sales Cloud, Experience Cloud, and the like. Launch the merge picker to view available fields by sender, by object, or by organization fields. Additionally, you can merge data outside accounts field, prospects data, and custom object data.
Resend List Emails
The Lightning Email builder makes it possible for you to send and resend email content swiftly, all without needing you to clone the email list while resending. This makes it easier to test sends to different prospect segments.

Creating An Email Template In Pardot Lightning Email Builder
Now that we are familiar with the Lightning email builder features, let us look at the steps we need to carry out to create a template.
1. Log in to your Pardot account and go to the tab titled “Email Content”. From the drop-down menu that appears, click New.

2. A dialog box will appear on your screen, asking you to name your Email content, select a template, and enter a description. Only the “Name” field in this box is mandatory.
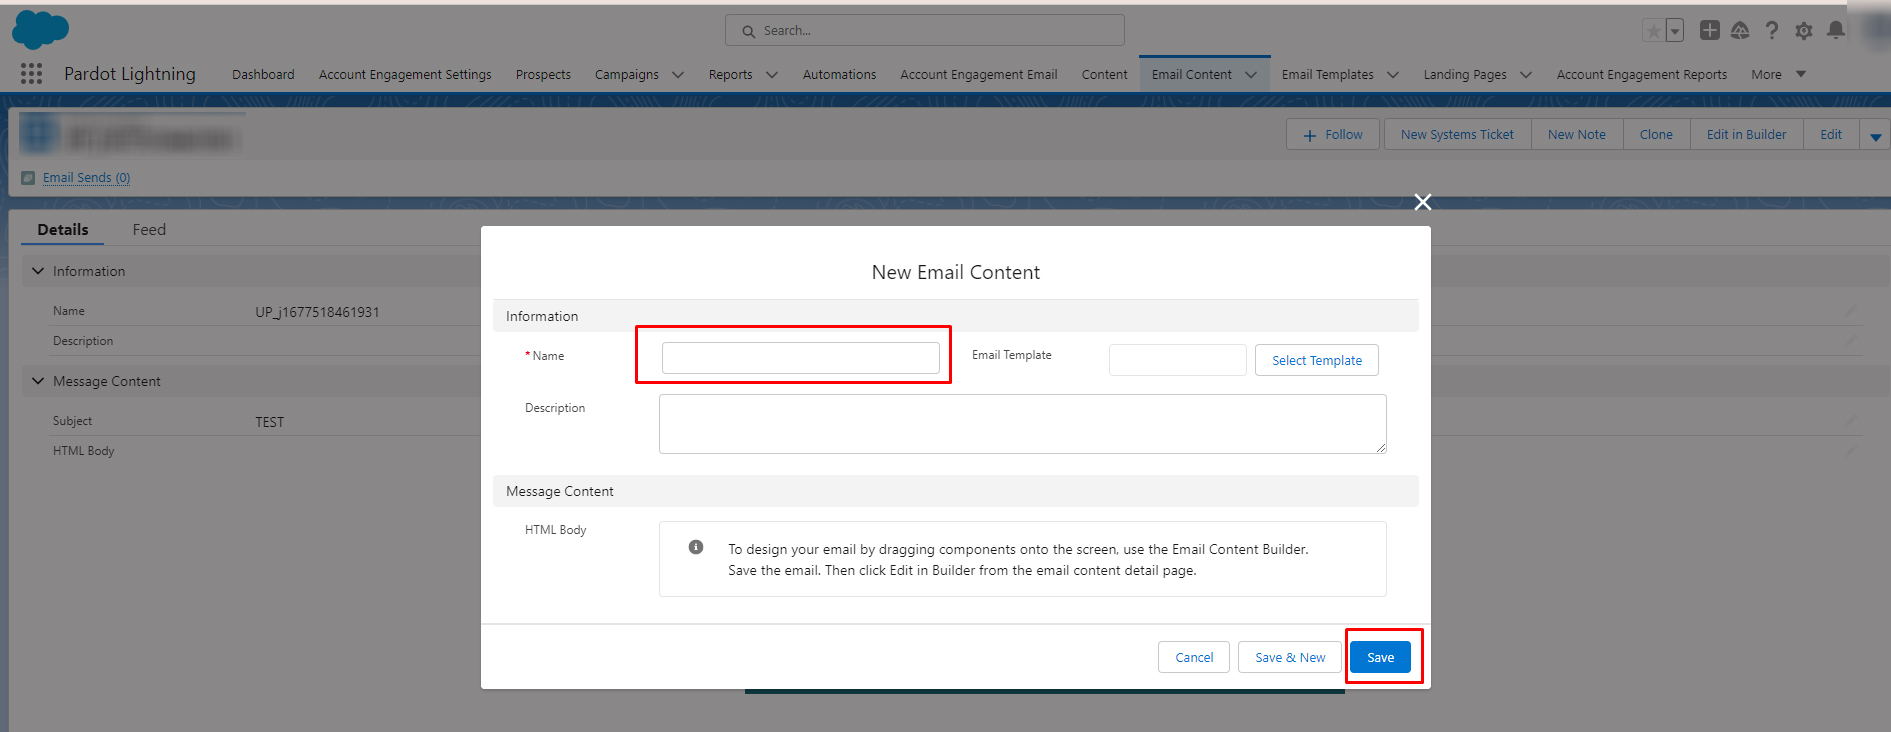
Lightning builder allows you to keep the same name for Email Content and Email Templates as other content or templates. This provision was not available in the classic builder. However, to steer clear of confusion, it is advisable to not do so and instead assign unique names. Once you’ve filled out the dialog box, click Save.
3. Click “Edit in Builder” on the top right hand side of the window.
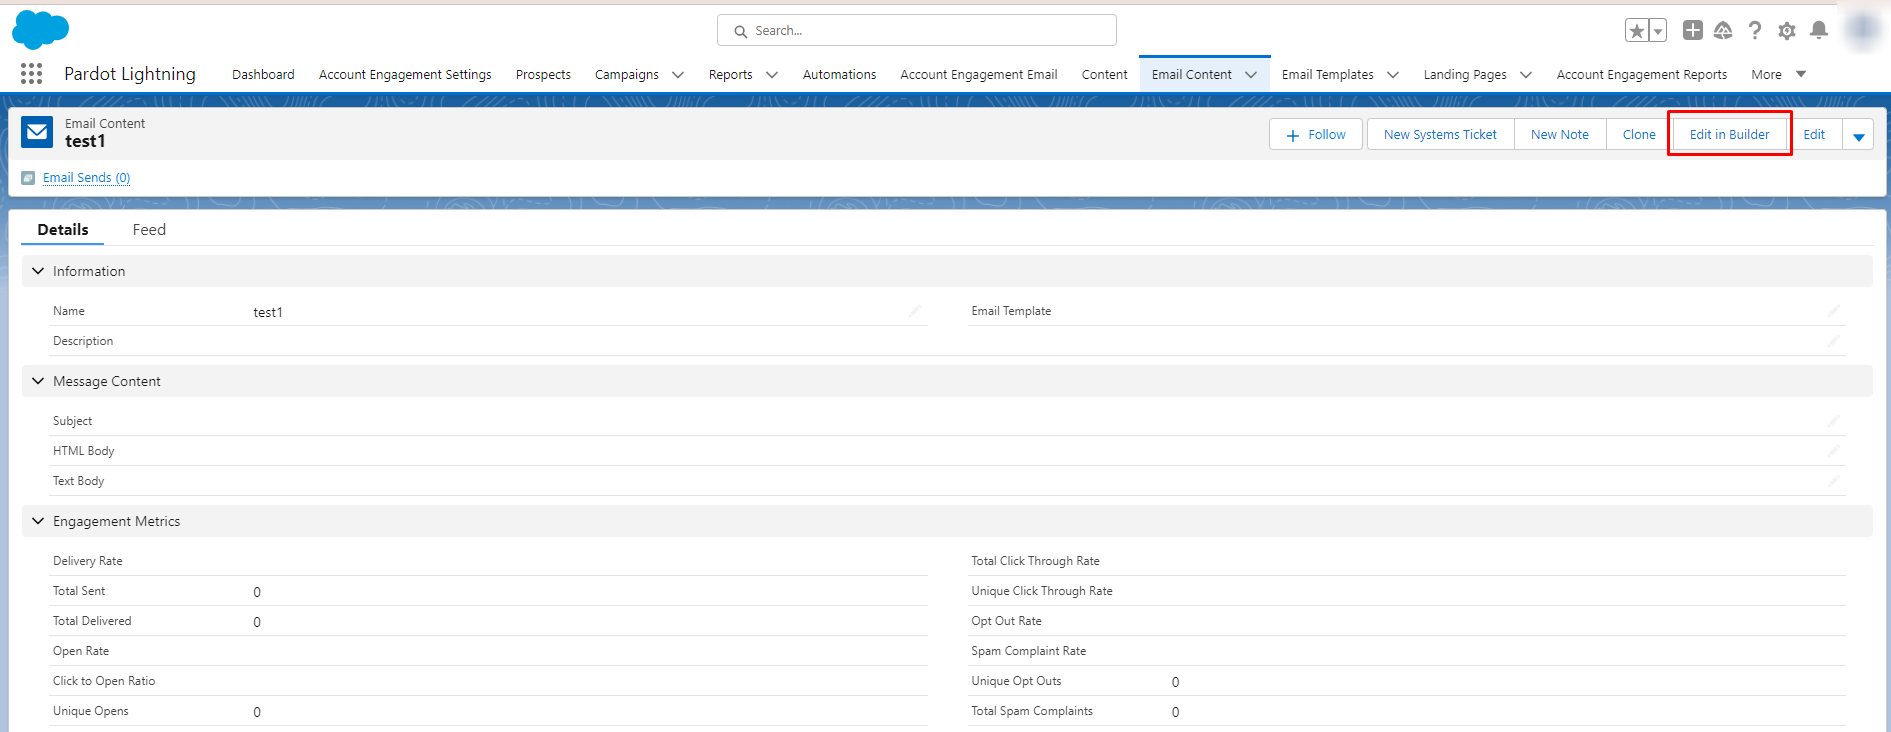
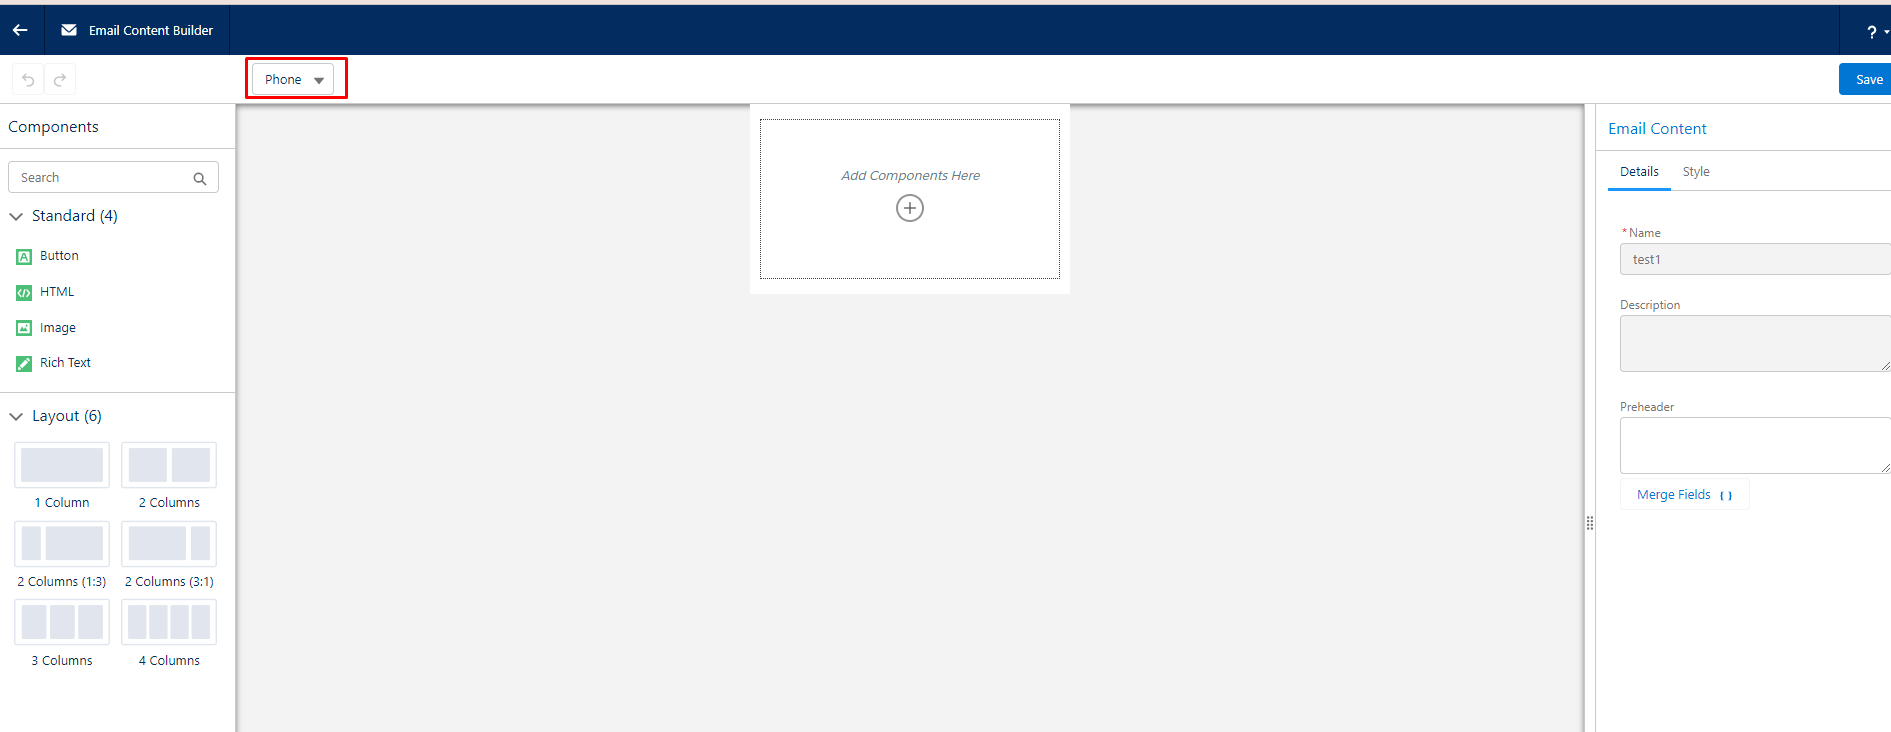
4. This will take you to the email builder area.
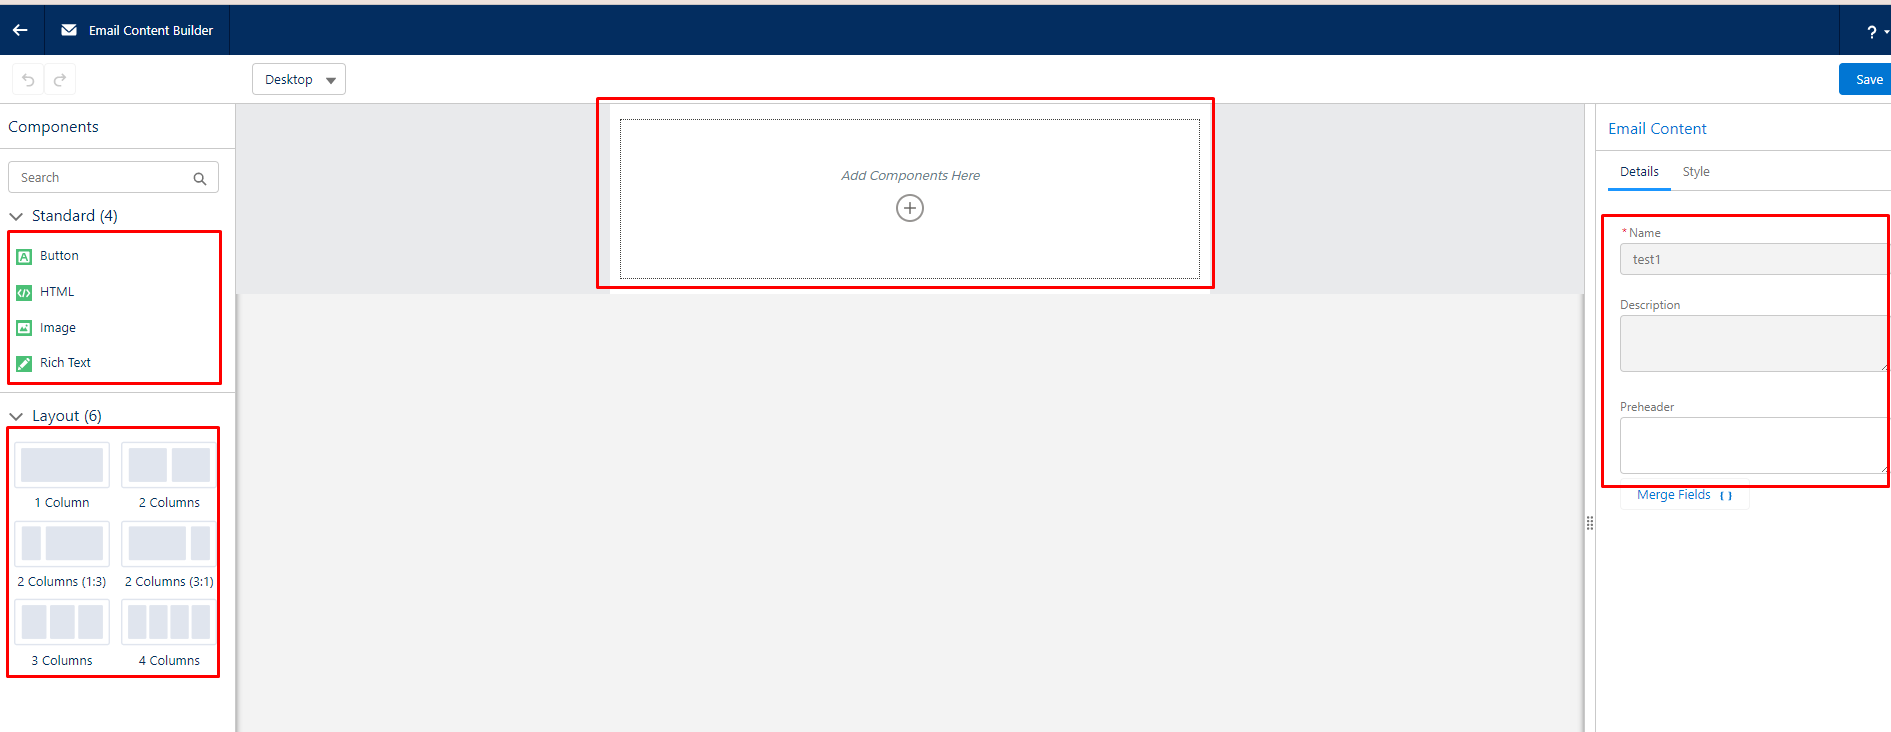
Here, you’ll have a bevy of block and styling options at your disposal to design your template. As mentioned earlier, to pick and subsequently position any item, all you have to do is drag and drop. Under the “Style” tab (on the right), you can configure the style settings of any element you add. One thing that is common to Lightning as well as classic builder is that both give you the choice of either entering the content directly into the editor or switching to the source code (opted by those who prefer to edit the HTML)
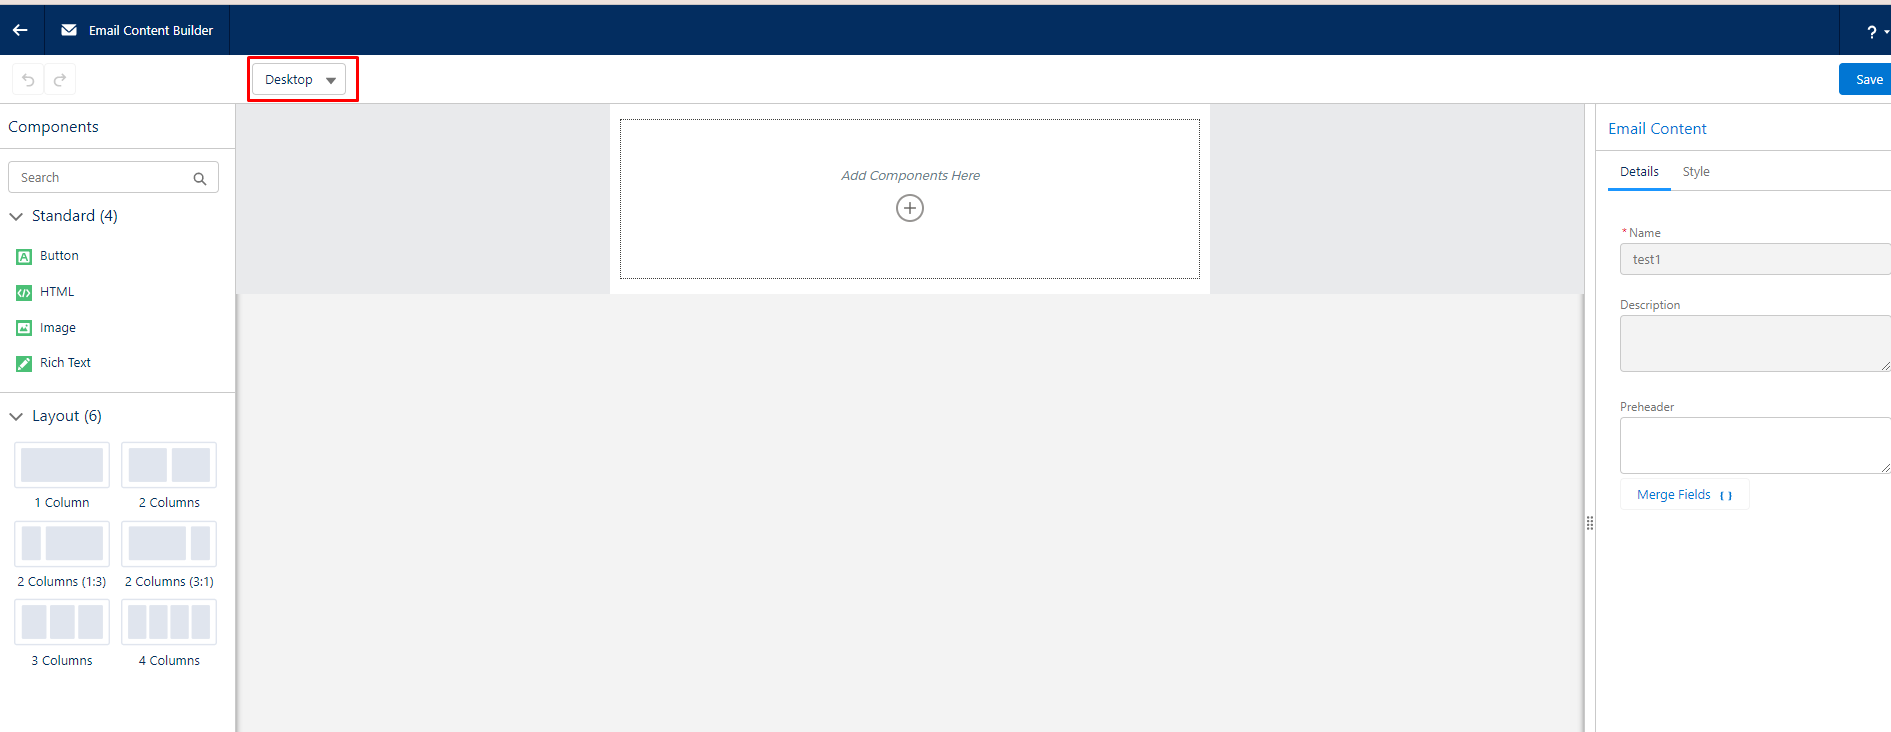
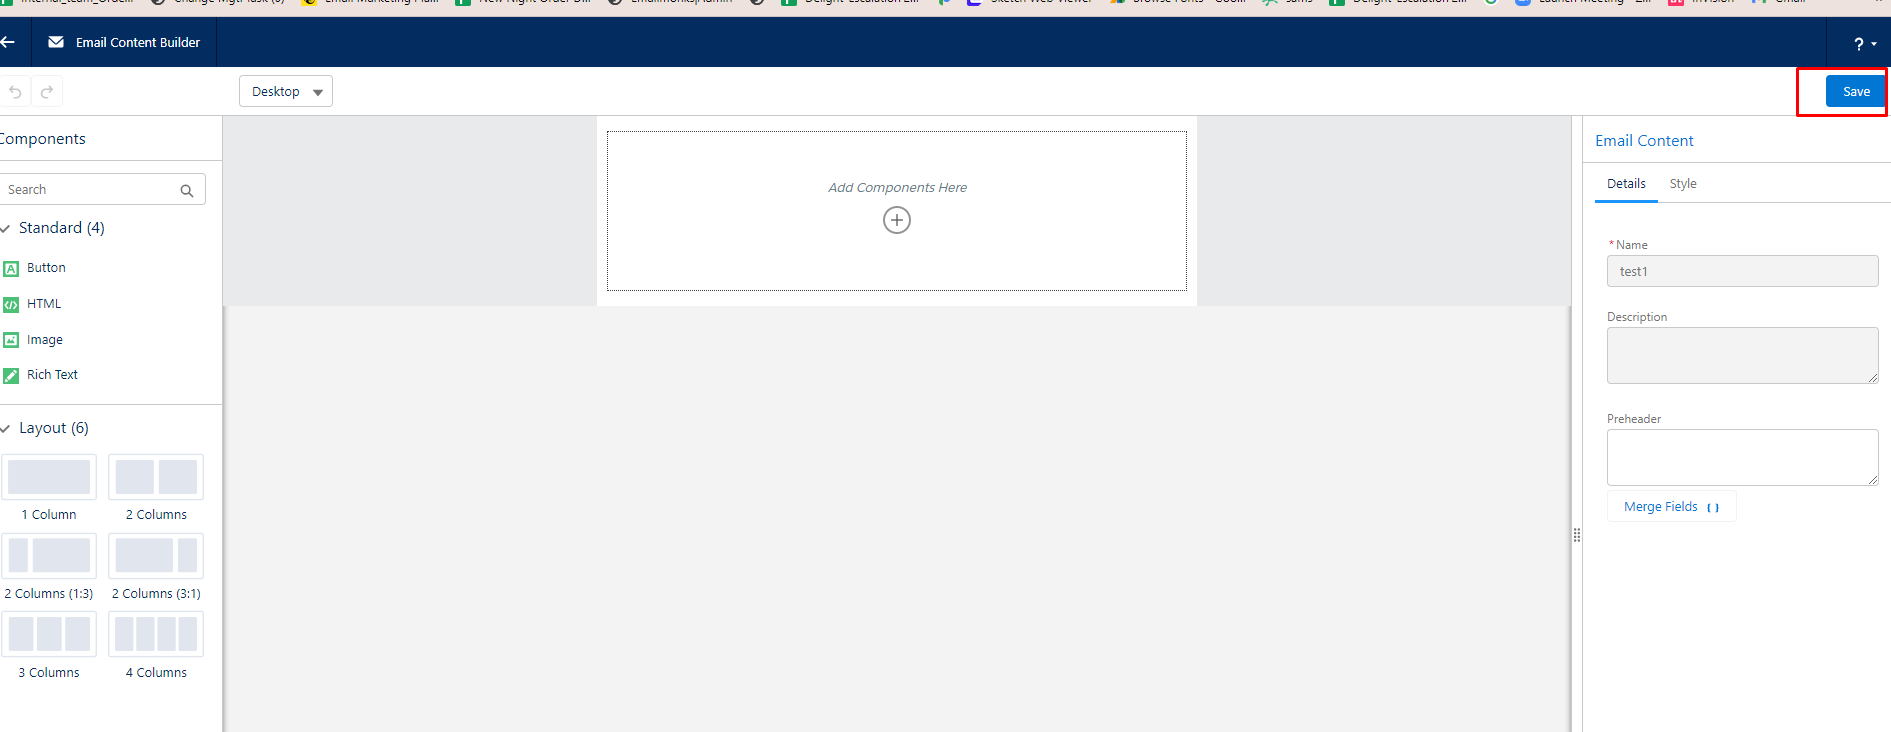
5. Once you’re happy with the design, proceed with previewing the email. As covered earlier in this blog, Lightning Builder lets you switch between email previews across different devices.
6. After going through the previews, if everything seems to be in place, click the Save button to wrap up the process.
A Few Limitations
Although the Pardot drag and drop email builder makes it extremely convenient for you to design emails, the templates that are borne out of it are devoid of HTML CSS coding. This gives rise to certain restrictions you must contend with.
- Not all sections of your email will match up to your blueprint.
- The final render-result of your email might look a little different than your original design. You might also notice some misalignments and extra-padding / spaces between the two sections of your email.
- The Mobile view will be set as per the Desktop view automatically by Pardot. You do not have any controls over the Mobile view settings. Any change you make in the Desktop view will reflect in the mobile version and vice versa.
- There might be some uncontrollable or unresolvable rendering-errors post-delivery.
- You’ll have to stay limited to the default fonts offered by Pardot lightning Inbuilt Editor and not use any custom fonts.
- While you can use background images, you’ll have to go to the source code if you wish to change it. You will not be able to change the background image directly through the editor.
- The 2 column sections will scale automatically as per the design. You cannot change the scaling as per the requirements.
- You won’t be able to create a dark mode version of your email.
Wrapping It Up
The Pardot Lightning Email Builder is feature-rich and might take some time to get used to. But, once you get the hang of it, you’ll be churning out visually appealing and responsive templates in no time. We hope this guide is able to give you a surer grip over Pardot’s Lightning email builder.
Rohan Kar
Rohan Kar works as a Content Writer at Email Uplers, An engineering graduate, he was quick to realize that his calling lied in other pastures. When not writing, he can be found participating in elaborate movie marathons or aggressive book circle discussions.
Anand Gohel
Anand is the Email Development Team Lead at Uplers and has an extensive experience of 8 years in email development. He loves to explore the depths of ESPs, tools, and the latest technologies. A die-hard Marvel movies fan, he also loves to groove to beautiful music tracks.
How Automation Can Give a Leg Up to Your Lead Nurturing Game
Make Your Emails Mobile-friendly And Call The Shots With These Best Practices!